
Shattering Concoction Pathfinder POE2 Build
A very strong Setup for the Pathfinder Ascendency that uses an exclusive array of Concoction Skills to Shatter your Enemies!Shattering Concoction
Pathfinder Build
Updated for Path of Exile 2 Early Access
The Best Crafty Guides by Odealo
| Guide notes |
| February 5, 2025 - Created for Early Access |
| Build Overview | |||
| Tags: [ATTACK] [ELEMENTAL] [LIFE] [UNARMED] | |||
|
Budget: Defenses: |
|
Boss DPS: AoE: |
|
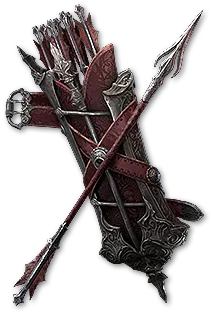
The Pathfinder Ascendency grants you access to the unique series of Skills, the Concoctions. There are 5 types of Concoctions, each of a different type and specialization. It is an Unarmed Attack that throws a Projectile that explodes upon hitting the ground. Each use consumes 3 Charges from your Mana, rendering it unusable if you run out of Charges. As with all other Unarmed Skills, it provides its own source of Damage, but can still benefit from modifiers on your Weapons. The two most popular types are Cold and Chaos. In this Guide, we will focus on the Shattering Concoction, but you can easily apply most of the information included here with some tweaks to create a chaos-themed Poisonous Concoction Build just as well.
The Shattering Concoction offers the highest base Critical Strike Chance of 11%, which will be your main way of scaling your Damage. It also has 100% more Freeze Buildup, which makes it extremely effective at inflicting that Ailment even on the most dangerous Bosses. On top of that, it also inflicts Cold Exposure, which lowers the Enemy's Cold Resistance.
The Concoction Skills are extremely dependent on the Skill Level, which can be affected by your Character Level, as well as Projectile Level modifiers on your Gear. Each level improves both the added flat Damage and base Damage scaling, making it extremely important. The best way to obtain huge amounts of that modifier is to use the Widowhail Bow and a few Rare Jewels to boost the Effects granted by your Quiver. Pair it with a Rare Quiver that provides two additional Gem Levels, which in this Setup means at least 8 additional levels for your Concoction. With a higher budget, you can reach even 10 additional levels, but this level of investment is hardly needed to conquer everything the game has to offer.
To elevate your Clear Speed and preserve Flask Charges on leftover monsters you will use a combination of Herald of Ice and Herald of Thunder. Unlike the Concoction, you will need sources of flat Damage on your Quiver and Rings to make them effective, as the Widowhail's unique properties are not useful here.
For defense, the best choice is to use a hybrid mix of maximum Life, Evasion, and Energy Shield. Thanks to the Eternal Youth Keystone and Pathfinder's Enduring Elixirs Notable you will be able to recover your Energy Shield on demand with a Life Flask. The Grim Feast and Ghost Dance are also excellent ways of recovery during mapping.
You can also check our other Path of Exile 2 builds right over here Odealo's Crafty Guides - Full List
1. Gameplay
The gameplay is very simple, you will primarily use your Shattering Concoction for most scenarios. Against Bosses, you should use Eye of Winter to apply Critical Weakness, which grants you 10% Base Critical Strike Chance, and Curse them with Temporal Chains to make effects like Freeze or Critical Weakness last longer.
|
|
|
|

2. Build's PROS & CONS
| PROS |
|
| CONS |
|
3. Leveling tips
You will need to finish your first Ascendency Trial to unlock the Concoction Skill, but even then it is quite weak without proper scaling. As a Ranger, you will have access to many useful Notables that can boost your Elemental Attacks in the early game, which prompts you to level up with a usual Bow setup. We recommend sticking to the Lightning Arrow and Lightning Rods setup until you reach Maps, as transitioning to Shattering Concoction requires hefty investments into Critical Strikes, which is not feasible without good Quiver and many Passive Points at your disposal.
| [DPS] Lightning Arrow setup | |
 |
Lightning Arrow - shoots an Arrow infused with Lightning that creates Chaining Beams. |
 |
Martial Tempo - improves your Attack Speed considerably. |
 |
Primal Armament - enhances the Elemental Damage you deal. |
 |
Inspiration - lowers the Mana Costs. |
| [DPS] Lightning Rod setup | |
 |
Lightning Rod - the Rods created by this Skill pulse with AoE Damage any time a Lightning Beam chooses it as its target. |
 |
Magnified Effect - enlarges the Radius of pulses, allowing them to Hit the same target more reliably. |
 |
Scattershot - adds additional Projectiles, allowing you to create more Rods with fewer Attacks. |
 |
Lightning Infusion - grants you Extra Lightning Damage but lowers other Damage types. |
| [DPS] Orb of Storms setup | |
 |
Orb of Storms - use it to activate your Lightning rods faster. |
 |
Chain - grants additional Chains to trigger more Rods. |
 |
Overabundance - allows you to summon one additional Orb, but make them disappear faster. |
 |
Persistence - makes your Orbs last a bit longer. |
4. Final Skill Tree, Ascendancy Points, and Pantheon
Final Skill Tree:
 |
|
Click on the image to open the Passive Tree preview in a new window, or use the full browser version: Passive Tree or use the Path of Building (PoB) tool. |
Ascendancy points:
Preferably in this order:
- Shattering Concoction
- Traveler's Wisdom
- Connected Chemistry
- Enduring Elixirs
5. Final Gems links
| [DPS] Shattering Concoction setup | |
 |
Shattering Concoction - your main Skill unlocked by Ascendency. The AoE created by multiple Projectiles can overlap. For the maximum DPS, you should stay close to Enemy. |
|
Scattershot - lowers your Damage and Attack Speed, but adds two Projectiles, effectively doubling your total Damage. |
|
Martial Tempo - simply increases your Attack Speed. |
 |
Ice Bite - grants you 35% Extra Cold Damage for all your Attacks when you Freeze an Enemy. It will be active all the time. |
 |
Cold Infusion - provides even more Extra Cold Damage. |
 |
Close Combat - improves your Damage in close range. |
| [UTILITY] Eye of Winter setup | |
 |
Eye of Winter - fires multiple shards that apply Critical Weakness on Hit. It grants you an additional 10% Base Critical Strike Chance at full potential. |
 |
Unleash - you will fire two additional Eyes of Winter when casting this Skill infrequently. |
|
Inspiration - due to massive amounts of Projectile Level modifiers, this Skill will consume large amounts of Mana. You can lower it with this Support. |
 |
Arcane Tempo - increases your Cast Speed with this Skill. |
| [UTILITY] Temporal Chains setup | |
 |
Temporal Chains - with Cold Exposure and Penetration you won't need an offensive Curse. You can instead use the Temporal Chains to make them frozen for longer. |
 |
Focused Curse - the Curse activates faster. |
 |
Heightened Curse - increases the effect of your Curse. |
 |
Encumbrance - magnifies the effect of Slows. |
| [UTILITY] Herald of Ice setup | |
 |
Herald of Ice - upon killing a Frozen Enemy it will detonate with an AoE Attack that deals Cold Damage. It greatly boosts your Clear Speed. |
|
Magnified Effect - increases the AoE of explosions. |
|
Lightning Infusion - the Herald cannot Freeze or Shock, but it can inflict Shock if you supplement it with extra Lightning Damage. |
 |
Conduction - makes it easier to apply Shock. |
|
Primal Armament - increases your Elemental Damage with Attacks. |
| [UTILITY] Herald of Thunder setup | |
 |
Herald of Thunder - upon killing a Shocked Enemy it will make your next 5 Attacks trigger a Lightning Bolt in a small radius. It can be triggered by the Herald of Ice. |
 |
Innervate - killing a Shocked Enemy grants you Extra Lightning Damage to all your Attacks for 3 seconds. |
 |
Glaciation - increases your odds of Freezing Enemy. |
 |
Longshot - increases the Damage against distant targets. |
 |
Lightning Mastery - raises the Skill Level of your Herald, causing it to deal more Damage. |
| [UTILITY] Grim Feast setup | |
 |
Grim Feast - thanks to this Buff you can recover and overflow your Energy Shield during Mapping. |
| [UTILITY] Wind Dancer setup | |
 |
Wind Dancer - a Buff that improves your Evasion Rating and triggers a Burst of Wind that deals Damage around you upon being Hit. |
 |
Blind - with this Support it applies Blind on Hit. |
 |
Maim - use it to apply Maim to slow Enemies down even more. |
| [UTILITY] Ghost Dance setup | |
 |
Ghost Dance - being Hit restores your Energy Shield based on the amount of Evasion you have. |
 |
Fast Forward - causes Shrouds to generate faster. |
| [UTILITY] Alchemist's Boon setup | |
 |
Alchemist's Boon - passively restores Flask Charges over time. You can use it against Bosses instead of Herald Skills, as they won't trigger without killing Enemies anyway. |
 |
Precision - increases your Accuracy Rating. |
|
|
6. Gear Setup
The Unique Bow and good Rare Quiver with bonuses to your Projectile Skill Levels are crucial for this Build to work properly. You will also need plenty of flat Damage to make your Heralds self-sufficient, even though those modifiers are barely affecting your Concoction Skill. The Attack Speed is also important, although you shouldn't boost it too much, as you will run out of Flask Charges faster. All your other Gear pieces should be focused on capping your Resistance and Attribute Requirements and providing as much maximum Life, Energy Shield, and Evasion as possible.
|
Stat priorities on items:
|
 (Weapon) Widowhail - the Concoctions Skills are Unarmed Attacks that still benefit from global modifiers on your Weapon. Thanks to the Corruption this Bow can provide up to 300% increased bonuses for your Quiver, but you can start with the regular version too. (Weapon) Widowhail - the Concoctions Skills are Unarmed Attacks that still benefit from global modifiers on your Weapon. Thanks to the Corruption this Bow can provide up to 300% increased bonuses for your Quiver, but you can start with the regular version too. |
|
| (150–250)% increased bonuses gained from Equipped Quiver | |
 (Quiver) Rare Quiver - it is the most important piece of Equipment for this Build. It should grant 2 Projectile Skill levels and a lot of Critical Strike Chance and Damage Bonus. It can also provide additional Damage for Attacks or Dexterity, but it shouldn't be prioritized. (Quiver) Rare Quiver - it is the most important piece of Equipment for this Build. It should grant 2 Projectile Skill levels and a lot of Critical Strike Chance and Damage Bonus. It can also provide additional Damage for Attacks or Dexterity, but it shouldn't be prioritized. |
|
| Min. requirements: +2 to Level of all Projectile Skills 20% increased Critical Hit Chance for Attacks (Implicit) 30% increased Critical Hit Chance for Attacks (Suffix) Optional affixes: % increased Critical Damage Bonus for Attack Damage Adds # Damage to Attacks Dexterity |
|
 (Amulet) Rare Amulet - additional levels for Projectile Skills are possible here, but it is a luxury upgrade. You should get defensive bonuses that provide maximum Life, increase your maximum Energy Shield, grant Spirit, and possibly provide some Resistance. (Amulet) Rare Amulet - additional levels for Projectile Skills are possible here, but it is a luxury upgrade. You should get defensive bonuses that provide maximum Life, increase your maximum Energy Shield, grant Spirit, and possibly provide some Resistance. |
|
| Min. requirements: +100 to maximum Life 40% increased maximum Energy Shield +30 to Spirit Optional affixes: Elemental or Chaos Resistance Attributes +# to Level of all Projectile Skills |
|
 (Ring) Rare Ring - look for lots of maximum Life, Resistance, and a decent amount of flat Damage for Attacks to make your Heralds more effective. (Ring) Rare Ring - look for lots of maximum Life, Resistance, and a decent amount of flat Damage for Attacks to make your Heralds more effective. |
|
| Min. requirements: +100 to maximum Life +50% total Resistance Optional affixes: Adds # Cold or Lightning Damage to Attacks +# to Evasion Rating |
|
 (Belt) Rare Belt - use the Belt to greatly improve your Flask Charge sustain, which is required to use Concoction Skills smoothly. It should also provide the usual defensive modifiers. (Belt) Rare Belt - use the Belt to greatly improve your Flask Charge sustain, which is required to use Concoction Skills smoothly. It should also provide the usual defensive modifiers. |
|
| Min. requirements: +130 to maximum Life +50% total Elemental Resistance Optional affixes: % increased Flask Charges gained Flasks gain 0.17 charges per Second % reduced Flask Charges used |
|
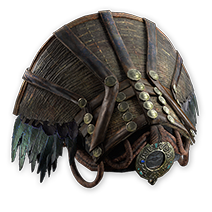 (Helmet) Rare Helmet - use a Helmet with lots of maximum Life, Energy Shield, and Resistance. It can also provide some Critical Strike Chance, but it could make it very expensive. (Helmet) Rare Helmet - use a Helmet with lots of maximum Life, Energy Shield, and Resistance. It can also provide some Critical Strike Chance, but it could make it very expensive. |
|
| Min. requirements: +140 to maximum Life +150 Energy Shield +50% total Elemental Resistance Optional affixes: Attributes Critical Strike Chance |
|
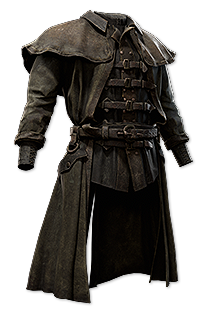 (Body Armour) Rare Armour - your Body Armour provides the biggest bulk of Energy Shield and Evasion for this Build. It can also provide some Spirit if you can't get enough of it on your Amulet. (Body Armour) Rare Armour - your Body Armour provides the biggest bulk of Energy Shield and Evasion for this Build. It can also provide some Spirit if you can't get enough of it on your Amulet. |
|
| Min. requirements: +800 to Evasion Rating +250 to Energy Shield +150 to maximum Life Optional affixes: #% total Elemental Resistance +# to Spirit |
|
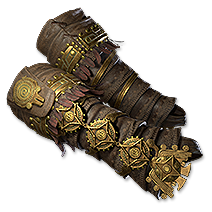 (Gloves) Rare Gloves - on top of the usual defense modifiers, the Gloves can also provide a decent amount of Attack Speed and flat Damage for Heralds. (Gloves) Rare Gloves - on top of the usual defense modifiers, the Gloves can also provide a decent amount of Attack Speed and flat Damage for Heralds. |
|
| Min. requirements: +100 to maximum Life +80 to Energy Shield Optional affixes: #% total Elemental Resistance |
|
 (Boots) Rare Boots - always use Boots with at least a 30% Movement Speed bonus. Other than that look for maximum Life, Resistance, and some Energy Shield with Evasion. (Boots) Rare Boots - always use Boots with at least a 30% Movement Speed bonus. Other than that look for maximum Life, Resistance, and some Energy Shield with Evasion. |
|
| Min. requirements: 30% Movement Speed +100 to maximum Life +80 Energy Shield +30% total Elemental Resistance Optional affixes: Attributes % reduced Freeze Duration on you |
|
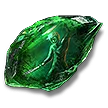
 (Jewel) Rare Emerald Jewel - a total of 50% Quiver Effect means 1 additional Projectile Skill Level. It is also the most expensive modifier on a Jewel, so match it to your roll on the Bow to make sure the investment is worth it. (Jewel) Rare Emerald Jewel - a total of 50% Quiver Effect means 1 additional Projectile Skill Level. It is also the most expensive modifier on a Jewel, so match it to your roll on the Bow to make sure the investment is worth it. |
|
| Recommended modifiers: % increased bonuses gained from Equipped Quiver #% increased Critical Damage Bonus for Attack Damage #% increased Elemental Damage % increased Attack Damage % increased Projectile Damage % increased Critical Hit Chance for Attacks % increased Mana Flask Charges gained |
|
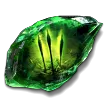
 (Jewel) Rare Sapphire Jewel - on the Sapphire Jewels you can find a similar amount of Damage, but they can also boost your Energy Shield. You will need to find a balance for your offense and defense using various types of Jewels. (Jewel) Rare Sapphire Jewel - on the Sapphire Jewels you can find a similar amount of Damage, but they can also boost your Energy Shield. You will need to find a balance for your offense and defense using various types of Jewels. |
|
| Recommended modifiers: % increased maximum Energy Shield % increased Critical Damage Bonus Recover 2% of Life on Kill % increased Elemental Damage % increased Cold Damage % increased Critical Hit Chance % increased Area of Effect |
|
|
If you have any other build requests please leave that in the comments below. We are always open to suggestions and constructive feedback.
Pictures used in this article are the intellectual property of Grinding Gear Games.