 Buy/Sell
 Log in

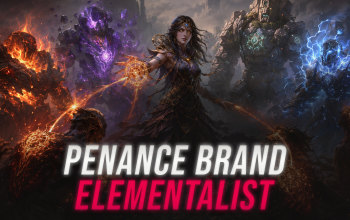
Penance Brand Elementalist Build
A powerful Herald-based Elementalist that clears entire screens with Herald of the Hive and destroys Bosses with Penance Brand IgnitePenance Brand
Elementalist Build
Updated for Patch 3.29
The Best Crafty Guides by Odealo
| Guide notes | |||
| July 23, 2026 -Updated for patch 3.29 |
|||
| Build overview | |||
| Tags: [BRAND] [IGNITE] [LIFE] | |||
|
Budget: Defenses: |
|
Boss DPS: AoE: |
|



Penance Brand is a very special Spell that creates a Brand which attaches to enemies and builds up Energy over time before unleashing a massive explosion at 20 Energy. This makes it an excellent Skill for Ignite, as a single large Hit can create an extremely powerful Ignite that continues to burn enemies after the initial explosion. The Elementalist is the perfect Ascendancy for this role thanks to Shaper of Flames, allowing all Damage Types to Ignite, while Mastermind of Discord and Bringer of Ruin provide powerful scaling. This guide focuses on Elementalist because it combines exceptional Ignite scaling with some of the best screen-wide Clear available, through Herald of the Hive.
The build scales Penance Brand's enormous Damage Effectiveness through Gem Levels, Elemental Damage, Fire Damage, and Damage over Time Multipliers, while taking advantage of Physical and Lightning Damage being able to Ignite through Shaper of Flames. Obliteration is particularly powerful for mapping, as its Profane Bloom-like explosions add another layer of screen-wide Clear to the build. Lost Unity further enhances this playstyle by enabling Herald of the Hive, while Foulborn The Coming Calamity provides a powerful Herald-based scaling engine.
Defensively, the build combines the natural Elemental Resistances and defensive tools available to an Elementalist with a strong ranged playstyle, allowing you to stay away from dangerous enemies while your Brands do the work. The main defensive priorities are Maximum Life or Energy Shield, capped Resistances, and reliable mitigation against incoming Hits. The build's biggest weakness is that Penance Brand requires a short delay before reaching maximum Energy and delivering its massive explosion, meaning positioning and timing are important against fast or highly mobile enemies. Once the core Unique Items are assembled, however, Penance Brand Ignite offers an exceptionally satisfying playstyle, combining enormous Ignite Damage with explosive, almost screen-wide Clear.
1. Gameplay
Use Herald of the Hive from Lost Unity as your main Clear Skill, stacking multiple Heralds to massively amplify its Damage and trigger chain reactions that wipe out entire packs. Keep moving between groups with Shield Charge and let the Herald explosions handle the Clear while you focus on positioning and maintaining your buffs. Against Bosses, use Penance Brand as your dedicated Single-Target Skill, allowing it to build Energy before delivering a massive Hit that applies a powerful Ignite. Keep your Golems and other buffs active, apply your Curse, and use Penance Brand whenever you need to deal with tougher enemies. Once the core Herald setup is online, the build becomes extremely fast and smooth for mapping, with Penance Brand reserved primarily for Bosses and high-Health targets.
|
|
|
|


2. Build's PROS & CONS
| PROS |
|
| CONS |
|
3. Leveling tips
The smoothest way to level this character is to use a conventional Elementalist setup such as Freezing Pulse, which received a significant buff in 3.29, or Kinetic Bolt and Kinetic Fusillade for a fast and effective campaign progression. All of these options allow you to level comfortably while collecting the Gems, gear, and Passive Tree nodes needed for the final build. You can transition into Penance Brand once you have the necessary Skill Gems and supporting gear, but the complete build comes together later when you can equip the core Unique Items and start scaling your Heralds.
If you manage to acquire Lost Unity and the other required pieces early, you can transition into the final Herald of the Hive setup during the campaign. However, the build becomes significantly smoother once you have access to multiple Heralds and the supporting Golem scaling, so sticking with your preferred leveling Skill until the core mechanics are online is recommended.
Bandits:
Help Alira early and then swap to Kill all Bandits to earn 1 additional Passive Point.
4. Final Skill Tree, Ascendancy Points, and Pantheon
Final Skill Tree:
100 Points Final Skill Tree (doesn't include Clusters)
119 Points Path of Building (PoB) link
Ascendancy points:
Preferably in that order:
- Shaper of Flames
- Liege of the Primordial
- Mastermind of Discord
- Bringer of Ruin
Pantheon:
Major God: Soul of Brine King: You cannot be Stunned if you've been Stunned or Blocked a Stunning hit in the past 2 seconds.
Minor God: Soul of Abberath: 60% less Duration of Ignite on You, Unaffected by Burning Grounds
5. Final Gems links
| [DPS] Penance Brand helmet setup | |
 |
Penance Brand - main Single-Target Skill, used primarily against Bosses and tougher enemies. It builds Energy on its attached target before unleashing a powerful explosion, applying a massive Ignite that deals the majority of your Damage over time. |
 |
Swift Affliction - provides a strong More Damage over Time multiplier for your Ignite at the cost of reducing its Duration. The shorter Ignite Duration is largely irrelevant against Bosses, where the increased Damage is more valuable. |
 |
Cruelty - provides a More Damage multiplier to your Hits and Ailments based on the Damage of the initial Hit. Penance Brand's large Hit allows it to generate a strong Cruelty effect, significantly improving the Damage of your Ignite. |
 |
Inspiration - reduces the Mana Cost of your Penance Brand and provides increased Elemental Damage through Inspiration Charges. It makes the Skill more comfortable to cast while also providing a reliable Damage increase. |
| [UTILITY] Herald body armour setup | |
 |
Herald of Ash - provides additional Fire Damage and causes overkill Damage to burn nearby enemies. It is one of the Heralds that forms the core of our Herald of the Hive setup, contributing to both our overall Damage and Clear. |
 |
Herald of Ice - adds Cold Damage to your Skills and creates explosions when you shatter enemies. These explosions help spread your Clear and work together with the rest of your Herald setup to create powerful chain reactions. |
 |
Herald of Purity - grants additional Physical Damage and summons Sentinels of Purity when you kill enemies or hit Rare and Unique enemies. Its Herald effect contributes to our overall Damage while the Sentinels provide additional utility. |
 |
Herald of Thunder - adds Lightning Damage and creates powerful Lightning strikes after killing shocked enemies. It provides another source of Herald Damage and helps maintain the chain reactions that make the build's Clear so effective. |
 |
Herald of Agony - provides additional Physical Damage and grants Virulence when you Poison enemies, summoning a powerful Agony Crawler at high Virulence. |
 |
Tempest Shield - provides Spell Block and grants immunity to Shock, making it an excellent defensive addition to the build. |
| [UTILITY] Golems setup | |
 |
Summon Stone Golem of Safeguarding - defensive Golem that provides additional survivability and helps protect you from incoming Damage. It is used for its defensive utility. |
 |
Summon Flame Golem - grants increased Damage and AoE. Its buff improves both our Ignite Damage and Herald of the Hive. |
 |
Summon Lightning Golem - provides increased Cast Speed and Attack Speed, making Penance Brand and Shield Charge smoother to use. |
 |
Summon Chaos Golem - grants increased Damage over Time Multiplier and Chaos Resistance, making it an excellent offensive and defensive choice for this build. |
| [UTILITY] Movement and Curse setup | |
 |
Shield Charge - main Movement Skill, allowing you to quickly move between packs and reposition during Boss encounters. |
 |
Faster Attacks - significantly increases the Attack Speed of Shield Charge, making it faster and smoother to use for travelling through Maps. |
 |
Flammability - main Curse, reducing the Fire Resistance of cursed enemies and significantly increasing the Damage they take from your Ignite. |
 |
Flame Surge - provides additional Fire Damage against enemies affected by your Ignite. Use it against Bosses and tougher enemies to supplement your Penance Brand Ignite with extra Damage. |
| [UTILITY] CWDT setup | |
 |
Cast when Damage Taken - automatically triggers Molten Shell when you take enough Damage, allowing you to activate your defensive tools without interrupting your gameplay. |
 |
Molten Shell - provides a strong defensive barrier that absorbs a portion of incoming Damage. It benefits from your Armour and offers reliable protection against large Hits, making it a valuable defensive layer for the build. |
 |
Pyroclast Mine of Sabotage - applies Fire Exposure to enemies. Throw it and don't detonate. It can be used against Bosses and tougher enemies to supplement your main Damage setup. |
|
|
5. Gear Setup
The gearing is built around several key Unique Items that form the core of the build's Herald of the Hive setup. Lost Unity provides the Herald of the Hive Skill that powers our Clear, while Foulborn The Coming Calamity allows us to stack multiple Heralds and scale their combined Damage. Obliteration adds powerful explosions that further improve our already excellent Clear Speed, while Polaric Devastation provides additional Elemental scaling and Ignite synergy. The remaining Rare Items should primarily provide Maximum Life, Resistances, and other defensive stats, while also helping you meet your Attribute requirements. For the Penance Brand setup, prioritise Gem Levels and Damage over Time scaling to maximise your Single-Target Damage. The build also heavily benefits from scaling Golems, making Golem-related modifiers and Cluster Jewels important parts of the Endgame setup.
|
Stat priorities on items:
|
 (Helmet) Archdemon Rare Helmet - offensive Helmet that significantly boosts the Damage of your Penance Brand. Use Essence of Horror for 30% more Elemental Damage and ideally Elder Exalt Orb for Burning Damage Support (Helmet) Archdemon Rare Helmet - offensive Helmet that significantly boosts the Damage of your Penance Brand. Use Essence of Horror for 30% more Elemental Damage and ideally Elder Exalt Orb for Burning Damage Support |
|
| Min. requirements: Socketed Gems Deal 30% more Elemental Damage +100 to maximum Life 50% total Elemental and Chaos Resistance Optional affixes: Socketed Gems are supported by level 20 Burning Damage +# to level of socketed AoE Gems |
|
 (Body Armour) Foulborn The Coming Calamity - core of the build, providing additional Gem Levels and massively increasing the Effect of your Herald Buffs. The increased Stun Avoidance from each active Herald also gives you a strong defensive layer, making this item essential for scaling both the offensive and defensive aspects of the build. (Body Armour) Foulborn The Coming Calamity - core of the build, providing additional Gem Levels and massively increasing the Effect of your Herald Buffs. The increased Stun Avoidance from each active Herald also gives you a strong defensive layer, making this item essential for scaling both the offensive and defensive aspects of the build. |
|
| +2 to Level of Socketed Herald Gems (80—100)% increased Energy Shield 35% chance to avoid being Stunned for each Herald Buff affecting you (80—100)% increased Effect of Herald Buffs on you |
|
 (Weapon) Obliteration - best map clear weapon that provides additional explosions to your clear. (Weapon) Obliteration - best map clear weapon that provides additional explosions to your clear. |
|
| Gain (30—40)% of Physical Damage as Extra Chaos Damage Enemies you Kill have a 20% chance to Explode, dealing a quarter of their maximum Life as Chaos Damage |
|
 (Weapon) Grace of the Goddess - best single target and endgame weapon for this build. If you can get Oriath's End flask then you can use it both for clear and Single Target. (Weapon) Grace of the Goddess - best single target and endgame weapon for this build. If you can get Oriath's End flask then you can use it both for clear and Single Target. |
|
| (300—350)% increased Physical Damage Gain (10—50)% of Physical Damage as Extra Fire Damage Gain (10—50)% of Physical Damage as Extra Cold Damage Gain (10—50)% of Physical Damage as Extra Lightning Damage +1 to maximum number of Sacred Wisps +1 to number of Sacred Wisps Summoned |
|
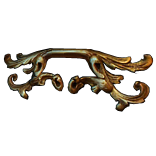 (Shield) Rare Shield - provides a large amount of Life, Resistances, and Block Chance while also granting an additional Gem Level to your Lightning Skills. Spell Block is an excellent upgrade, while Attributes can help solve any gearing requirements. (Shield) Rare Shield - provides a large amount of Life, Resistances, and Block Chance while also granting an additional Gem Level to your Lightning Skills. Spell Block is an excellent upgrade, while Attributes can help solve any gearing requirements. |
|
| Min. requirements: +100 to maximum Life 70% total Elemental and Chaos Resistance +1 to level of all Lightning Spell skill Gem 40% increased chance to Block Optional affixes: #% chance to Block Spell Damage +# to Dexterity or Strength |
|
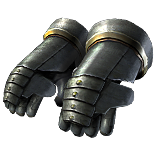 (Gloves) Rare Gloves - defensive Rare item that provides Life and Resistances while also giving your Ignites a powerful Clear mechanic. The Ignite Proliferation causes Ignites you inflict to spread to nearby enemies, greatly improving the Clear Speed of the build. (Gloves) Rare Gloves - defensive Rare item that provides Life and Resistances while also giving your Ignites a powerful Clear mechanic. The Ignite Proliferation causes Ignites you inflict to spread to nearby enemies, greatly improving the Clear Speed of the build. |
|
| Min. requirements: +100 to maximum Life 70% total Elemental and Chaos Resistance Ignites you inflict spread to other enemis within 1.2 metres Optional affixes: +# to Dexterity or Strength |
|
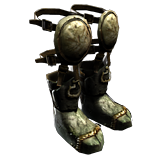 (Boots) Rare Boots - your Boots must provide Movement Speed. Other than that they should have standard Life and Resistances modifiers. Ideally Ignite you inflict deal Damage faster modifier. (Boots) Rare Boots - your Boots must provide Movement Speed. Other than that they should have standard Life and Resistances modifiers. Ideally Ignite you inflict deal Damage faster modifier. |
|
| Min. requirements: +100 to maximum Life 70% total Elemental and Chaos Resistance +30% increased Movement Speed Optional affixes: Ignite you inflict deal Damage #% faster |
|
 (Belt) Stygian Vise - A flexible belt that provides a large amount of Life and Resistances while also giving you access to an Abyssal Socket for an additional Jewel. Use it to fill any defensive gaps in your gear and meet your Attribute requirements. (Belt) Stygian Vise - A flexible belt that provides a large amount of Life and Resistances while also giving you access to an Abyssal Socket for an additional Jewel. Use it to fill any defensive gaps in your gear and meet your Attribute requirements. |
|
| Min. requirements: +100 to maximum Life 70% total Elemental and Chaos Resistance Optional affixes: +# to Attributes +# to Armour |
|
 (Amulet) Rare Amulet - provides valuable Gem Levels for Penance Brand while significantly increasing your Ignite Damage through Damage over Time Multiplier. Maximum Life is essential, while additional Gem Levels and Chaos Resistance are excellent upgrades for further Damage and survivability. (Amulet) Rare Amulet - provides valuable Gem Levels for Penance Brand while significantly increasing your Ignite Damage through Damage over Time Multiplier. Maximum Life is essential, while additional Gem Levels and Chaos Resistance are excellent upgrades for further Damage and survivability. |
|
| Min. requirements: +80 to maximum Life +1 to level of all Lightning/Physical skill Gems +20% to Damage over Time Multiplier Optional affixes: +1 to level of all Lightning/Physical skill Gems Chaos Resistance |
|
| Recommended Anointments: Testudo |
|
 (Left Ring) Polaric Devastation - when equipped in the Left Ring slot, it covers enemies in Ash when you Ignite them, causing them to take increased Fire Damage and reducing their Movement Speed. (Left Ring) Polaric Devastation - when equipped in the Left Ring slot, it covers enemies in Ash when you Ignite them, causing them to take increased Fire Damage and reducing their Movement Speed. |
|
| (15—25)% increased Global Critical Strike Chance +(20—40)% to Fire Resistance +(20—40)% to Cold Resistance (10—20)% increased Duration of Ailments on Enemies Left Ring slot: Cover Enemies in Ash for 5 seconds when you Ignite them Right Ring slot: Cover Enemies in Frost for 5 seconds when you Freeze them |
|
 (Ring) Lost Unity - the core Ring of the build, granting access to Level 30 Herald of the Hive, which forms the foundation of our Clear. Combined with our multiple Herald setup, it creates powerful chain reactions that allow us to clear entire packs with ease. (Ring) Lost Unity - the core Ring of the build, granting access to Level 30 Herald of the Hive, which forms the foundation of our Clear. Combined with our multiple Herald setup, it creates powerful chain reactions that allow us to clear entire packs with ease. |
|
| Grants Level 30 Herald of the Hive Skill +(10—20)% to all Elemental Resistances +(23—37)% to Chaos Resistance |
|
 (Jewel) Rare Jewels - just look for Fire Damage over Time Multiplier mods, Block and increased Life (Jewel) Rare Jewels - just look for Fire Damage over Time Multiplier mods, Block and increased Life |
|
| Recommended affixes: Fire Damage over Time Multiplier Damage over Time Multiplier % increased maximum Life % chance to Block Attack Damage while holding a Shield % chance to Block Spell Damage while holding a Shield |
|
 (Cluster Jewel) Large Cluster Jewel - get a 8 passives Minion Damage clusters, each of them with 3 Passive Skills which one of them is Primordial Bond. It massively boosts your Golems. We only care about this Passive Skill. (Cluster Jewel) Large Cluster Jewel - get a 8 passives Minion Damage clusters, each of them with 3 Passive Skills which one of them is Primordial Bond. It massively boosts your Golems. We only care about this Passive Skill. |
|
| Recommended affixes: 1 Added Passive Skill is Primordial Bond |
|
 (Cluster Jewel) Medium Cluster Jewel - get an increased Damage while affected by a Herald Cluster Jewel, and look for Empowered Envoy and Endbringer passive skills. (Cluster Jewel) Medium Cluster Jewel - get an increased Damage while affected by a Herald Cluster Jewel, and look for Empowered Envoy and Endbringer passive skills. |
|
| Recommended affixes: Empowered Envoy Endbringer |
|
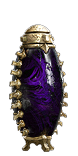 (Flask) Cinderswallow Urn - a ton of damage through Malediction and also from increasing damage dealt on ignited enemies. (Flask) Cinderswallow Urn - a ton of damage through Malediction and also from increasing damage dealt on ignited enemies. |
|
| Recharges 5 Charges when you Consume an Ignited corpse +(10—20) to Maximum Charges (175—200)% increased Charges per use Enemies Ignited by you during Effect take (7—10)% increased Damage Recover (1—3)% of Life when you Kill an Enemy during Effect Enemies Ignited by you during Effect have Malediction |
|
 (Flask) Oriath's End - excellent for map clear, and enables Grace of the Goddess as mapping weapon (Flask) Oriath's End - excellent for map clear, and enables Grace of the Goddess as mapping weapon |
|
| (20—40)% increased Charge Recovery Enemies you Kill during Effect have a (20—30)% chance to Explode, dealing a tenth of their maximum Life as Damage of a Random Element |
|
|
Other suggested Flasks and Tinctures:
|
|
    |
|
|
If you have any other build requests, please leave that in the comments below.
Pictures used in this article are the intellectual property of Grinding Gear Games.
