Buy/Sell
 Log in

Path of Exile 2 Abyss Guide
A complete Guide and overview for the Abyss mechanics in Path of Exile 2, including potential rewards and recommended tactics!Path of Exile 2
Abyss Guide
Last Update: 31/10/2026
⏎ Return to the main article about PoE2 end-game mechanics
Introduction
Abyss is one of the most important Endgame mechanics in Path of Exile 2. It is the only source of Desecration materials, which are used in both Early and End-game Crafting. It also drops plenty of natural Crafting materials, Items, and Experience, making it one of the most popular Endgame activities.
As always, there is more than just 1 method of approaching these mechanics. Tablets allow for high customization suited for your character's power and goals. While Abyss might seem fairly easy at first glance, there are some important nuances you can't miss if you want to maximise your profits. Let's dive right in!
Abyss Questline and Pinnacle Bosses
You should always prioritise completing the Abyssal Questline before you start considering farming the Abyss seriously. However, you don't need the full Atlas Tree. Only the first few points are important; some are optional, while a certain Notable is even considered detrimental (automatic Desecration on Tier 5 Equipment drops).
- Upon opening your Atlas, you will notice massive green cracks across the map. Head to the center of them, located to the north of Citadel. Doing so will unlock The Well of Souls, which is the main hub of Abyss and the only place you can complete the Desecration.
- Your task is to complete long cracks. Each of them ends with a guaranteed special Abyssal Depth: Lightless Void and Dark Domain. There you will fight Minibosses.
- The last Miniboss you kill will drop Kulemak's Invitation. Travel back to the Well of Souls, where a new option appears. Jump down the Well to challenge the final Boss.
- The Kulemak fight consists of repeatedly slaying and empowering the Vessel. The empowerment you pick will affect the Unique Ring modifiers that drop afterwards, but it is not really important. Upon successfully defeating the Kulemak, you will be rewarded with 6 Abyss Atlas Passive Points.
Abyss Rewards
The reward structure of Abyss is fairly simple. You will get various Bones that can be used to Desecrate specific types of Equipment, and Omens that affect their outcomes. Desecration is a mechanic that adds or replaces one Modifier on your Gear and allows you to pick one of the 3 options, including special Modifiers that are not obtainable anywhere else.
As you might guess, only the rarest drops are worth any money. The Omen of Abyssal Echoes is a decent filler drop, but you are mostly interested in Omens of Light, which can cost multiple Divine Orbs. The Bones have 3 tiers:
- Gnawed: Can be used on Gear with a maximum Item Level of 64.
- Preserved: No special effects or requirements.
- Ancient: Guarantees a modifier with a minimum Modifier Level of 40, which cuts out many bad outcomes.
The Gnawed and Preserved Bones are very useful for self-crafting, but their market value is very low. The Ancient Bones are all very valuable, but you can get them only through the Kulemak Pinnacle Boss fight, or very rarely in Abyssal Depths.
| Icon | Notable Abyss Items |
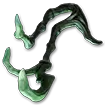 |
Kulemak's Invitation - allows you to fight the Vessel of Kulemak Boss. Guaranteed profit through Ancient Bones, with occasional valuable drops on top of that. |
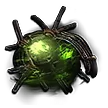 |
Omen of Light - your next Orb of Annulment will remove only the Desecrated modifier, allowing you to Desecrate it again. Great for Endgame Crafting. |
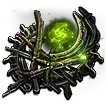 |
Omen of Abyssal Echoes - allows you to reroll Desecration options once. You can't go back to the first set of choices. Great at every level of Crafting. |
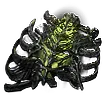 |
Gnawed/Preserved/Ancient Rib/Jawbone/Collarbone/Cranium - Desecrates Armours/Weapons/Jewellery/Jewels. The foundation of Abyssal Crafting. |
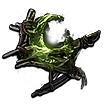 |
Omen of Putrefaction - adds 6 Desecrated modifiers to an Item, replacing all other modifiers. Great for Early Crafting. |
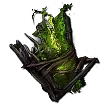 |
Omen of Sinistral/Dexteral Necromancy - your Desecration will target Prefix/Suffix. |
 |
Omen of the Liege/Blackblooded/Sovereign - your next Desecration will pick only from the special pool of modifiers. |
The "Pullout" method
The Omen of Light is not just rare, it is also restricted to a specific method. You can't get it just from any monster. You have to find a special Amanamu's Void modifier on a Rare Abyssal monster, and kill it outside its safe smoke zone. The smoke makes monsters immune to Damage from outside sources, but provides no protection if you are standing in the smoke as well.
By pulling or kiting the monster away from its smoke, you enable the Omen of Light drop. It is still not guaranteed, so not every monster killed this way will drop it, but the chance is fairly high. Be mindful of monsters that spawn just beneath your feet, or can teleport to you. They can create the smoke again just at the wrong moment and deprive you of the valuable loot.
Abyssal Depths
This rule does not apply to Abyssal Depths. There, any monster of any faction, or even Chests, can drop Omen of Light. You can also meet the miniboss Liches that drop Kulemak's Invitation, or get Ancient Bones. For this reason, you should always complete the Abyssal Depths if you see one. Remember that only the final Pit on your Map can lead to Abyssal Depths.
Overrun by Abyssal
The Atlas Notable or Unforeseen Consequences Unique Tablet can cause your Map to be Overrun by Abyssal, which simply means there are tons of Pits and Abyss Rare monsters for you to fight, replacing native inhabitants of that Map.
Recommended strategies
Currently, the best method is to hunt for Abyssal Depths. Your chances of getting Omen of Light are significantly higher than on regular Maps. Keep in mind, your Waystone modifiers will also apply to the Depths, so you can't neglect the usual Monster Rarity or Effectiveness scaling for best results.
Adding extra Tablets to your Map adds extra Pits, but only the final one can lead to Abyss. They also grant a 25% chance for Abyssal and Lichborn modifiers for monsters in Depths, which boost the rewards of affected monsters.
This results in a very good situation where both low-investment and high-investment strategies are good and have their niches. You can use just a single Tablet and run through many Maps quickly, or use more Tablets to have a very high chance of encountering Depths, but you will have to clear out multiple Pits first.
| List of recommended Tablet modifiers (Depth hunting) | |
|---|---|
| Priority | Modifier |
| High | (20-30)% increased chance for Abyssal monsters in Map to have Abyssal Modifiers |
| High | Monsters have (10-15)% increased Effectiveness |
| High | Map has (15-20)% increased Monster Rarity |
| High | Map has (1-2) additional random Modifiers |
| High | (20-30)% increased chance for Desecrated Currency from Abysses in Map |
| Medium | (2-3) additional Rare Monsters are spawned from Abysses in Map |
| Medium | Abysses in Map spawn (20-30)% increased Monsters |
| Low | Abyssal Monsters have (8-12)% increased Effectiveness for each closed Pit, up to 100% |
| Low | Map contains 1 additional Abysses |
| Low | Map has (20-40)% chance to contain four additional Abysses |
| Low | Abysses in Map have (10-20)% increased chance to lead to an Abyssal Depths |
Another method focuses on killing monsters on the surface. You will be maximizing the amount of Pits and monsters they release. The Unique Tablet or naturally existing Abyssal Overrun is heavily recommended. This method yields fewer Omens of Light, but more natural drops. Currently, it is less efficient than farming Depths, but it's still very good, and you might find the gameplay loop more fun, which is the most important aspect of any long-term farming method.
| List of recommended Tablet modifiers (Overrun) | |
|---|---|
| Priority | Modifier |
| Mandatory | Unforeseen Consequences Additional Rare Monsters are spawned from Abysses in Map Map contains (14-18) additional Abysses Map is overrun by the Abyssal |
| High | (20-30)% increased chance for Abyssal monsters in Map to have Abyssal Modifiers |
| High | Abyssal Monsters have (8-12)% increased Effectiveness for each closed Pit, up to 100% |
| High | Monsters have (10-15)% increased Effectiveness |
| High | Map has (15-20)% increased Monster Rarity |
| High | Map has (1-2) additional random Modifiers |
| High | Abysses in Map spawn (20-30)% increased Monsters |
| High | (20-30)% increased chance for Desecrated Currency from Abysses in Map |
| High | (2-3) additional Rare Monsters are spawned from Abysses in Map |
| High | Abyssal Monsters have (8-12)% increased Effectiveness for each closed Pit, up to 100% |
| Medium | Map contains 1 additional Abysses |
| Medium | Map has (20-40)% chance to contain four additional Abysses |
| Medium | Abysses in Map have (10-20)% increased chance to lead to an Abyssal Depths |
As you can see, the Tablet Modifiers for both methods are nearly identical, since in both variants you will be focusing on monster drops. The difference lies in whether you will be fighting hordes of monsters underground or overground.
Low investment Abyss alternatives
If you are just starting out, you should use Irradiated Tablets to add random mechanics to your Maps, with a hidden boost to their native Tablet drop chance, which you can sell to other players for good money, or craft yourself if you have already defeated the Arbiter of Divinity and unlocked the 4th Tablet modifier on the Atlas Tree.
At lower investment levels, only Abyssal Depth hunting is worth it. The Overrun Maps require compounding Rarity stacking to yield proper results, which requires strong characters and high initial investments.
Abyss Atlas Tree
The Atlas Passive Tree greatly improves your rewards. It grants additional Rerolls, improves your Tribute gains by spawning more monsters, and increases your chances for valuable Unique Items. You should complete the intro Questline and farm up remaining Points before committing to this farm.
Important choice Notables:
- Vile Treasures: Omens - the obvious choice for money-making purposes.
- Balance of Power: Amanamu.- You want this for the Amanamu's Void modifier on Rare monsters, as explained in the "Pullout" section.
- Lord of the Pit: 20% chance for Additional Pit/10% Effectiveness per closed Pit - depends on your chosen tactic. Additional Pits is more useful while chasing Depths, while Effectiveness greatly ramps up on Overrun Maps.
If you have any other Guide requests, please leave them in the comments below. We are always open to suggestions and constructive feedback.
Pictures used in this article are the intellectual property of Grinding Gear Games.