Oil Barrage Martial Artist POE 2 Build
A Marital Artist build that stays in the Wyvern form and uses all of its most powerful Power-Charge-consuming SkillsOil Barrage
Martial Artist Build
Updated for Path of Exile 2 Early Access
The Best Crafty Guides by Odealo
| Guide notes |
| July 1, 2026 - Created for Early Access. |
| Build Overview | |||
| Tags: [SHAPESHIFT] [CRIT] [RANGED] [ELEMENTAL] [ENERGY SHIELD] | |||
|
Budget: Defenses: |
|
Boss DPS: AoE: |
|
The build revolves around Oil Barrage, which is one of the strongest skills in the game if properly managed. First, empower it with Power Charges to fire a sequence of Lightning Projectiles. Normally, it's a steady stream, but with Nova Projectile Support, you fire them in a circle. These Projectiles explode on impact, and a single enemy can be hit with multiple of these explosions from a single skill use, enabling a "shotgun" effect. We must improve the Barrage with Fork and Salvo to fire many more Projectiles with a single skill use, thus increasing the chance of one enemy being hit multiple times. Power Charges are generated by eating bells (that's the Devour plus Hollow Focus combo), and Ailith's Chimes with Culmination and Living Lightning on any skill that Hits. Martial Artist's Martial Master passive enables this technique. This setup works best when you don't even have to use a Skill to Hit, so we've linked them with Blasphemy and Repulsion Curse for it to affect nearby enemies, which we then Hit with any Skill, but other methods will work just fine. Salvo on Oil Barrage prevents us from spamming it all the time, so it's reserved for stronger opponents or bigger crowds, while the default Rend seems like a much better device for less demanding situations. Rend also consumes a Power Charge to improve its AoE, but we have more than enough of these.
We've selected Marital Artist for the aforementioned Martial Master passive, which enables the Power-Charge-generating tech, and that requires Martial Adept - a passive for faster Combo generation and shortening the delay of Energy Shield Recharge. ES should start Recharging with almost no delay at all, so we can make it our primary defensive layer. Chaos Inoculation would be now a great addition, but Atziri's Communion is worth considering too: this Support Gem lets you Reserve Life instead of Spirit, and such a setup creates just the right environment for Pain Attunement (from a Legacy of Crown of Thorns Rune) to be always active. Hollow Focus is another passive we've already talked about, it's the one that created Bells, and while not obligatory, it helps immensely during boss fights and clearing alike because of how well it pairs up with Devour and its Support Gems. The last passive can be spent on Way of the Stonefist because it's simply the best. It transforms your Gloves into something else.
You can also check our other Path of Exile 2 builds right over here Odealo's Crafty Guides - Full List
1. Gameplay
Move around the map with Pounce and damage enemies with Rend or Oil Barrage. If you see an enemy ripe for Culling or a Bell, Devour it to gain Power Charges and get extra Damage that will last for 5 seconds. Against bosses, be sure to Pounce on them to apply Sniper's Mark, use the Ferocious Roar to gain Rage, eat a Bell, and only then, within a point-blank range, start spamming Oil Barrage. The skills that you don't have to think about are Blasphemous Repulsion, Herald of Thunder, Wind Dancer, Ghost Dance, Charge Regulation, and Spirit Vessel Companion.
|
|

2. Build's PROS & CONS
| PROS |
|
| CONS |
|
3. Leveling tips
The build will not work until you do the second ascendancy, but even then, we do not recommend jumping into it right away. You need to start smaller. We do, however, recommend starting with Falling Thunder, but the Charges for it will be clumsily generated with Wyvern's Devour or Killing Palm. To kill the Act 1 boss, prime him for Stun with a Skill that will build up Stun quicker (use Support Gems like Brink and Stun) and use Wing Blast to get Power Charges. In Act 2, you'll unlock much better sources of Power Charges like Lingering Illusion or Siphoning Strike. Cold Damage improved with Frost Bomb to inflict Exposure. For unique items, we recommend Grip of Winter Gloves and Pillar of the Caged God Staff, if you have Rings with added flat damage and other items with Attributes.
| various skills | |
 |
Devour - Generates Power Charges by culling enemies or eating their corpses. |
 |
Herald of Thunder - Extra Damage and improved clear speed on builds with Lightning Damage. |
 |
Wing Blast - Use it against enemies that are Primed for Stun (are nearly Stunned) to get Power Charges. |
 |
Frost Bomb - Cold Damage with Cold Exposure. |
| [DPS] Rend setup | |
 |
Rend - A Wyvern Skill that can consume a Power Charge to gain extra damage. Can be replaced with any other Quarterstaff Attack |
 |
Rage |
 |
Brink |
| [DPS] Oil Barrage setup | |
 |
Oil Barrage |
 |
Salvo |
 |
Fork |
4. Final Skill Tree, Ascendancy Points, and Pantheon
Final Skill Tree:
 |
|
Click on the image to open the Passive Tree preview in a new window Or import the build into PoB: |
Ascendancy points:
Preferably in this order:
- Martial Adept
- Martial Master
- Way of Stonefists
- Hollow Focus Technique
5. Final Gems links
| [DPS] Rend setup | |
|
Rend - A default Attack of the Wyvern form. You can use it to kill weak enemies and not waste Salvo on Oil Barrage. It consumes Power Charge to have a much greater AoE and to grant you a Buff for extra Lightning damage. |
|
Rage |
 |
Prolonged Duration |
 |
Heightened Charges |
 |
Rapid Attacks |
 |
Perpetual Charge |
| [DPS] Oil Barrage setup | |
|
Oil Barrage - The primary source of damage. It applies Exposure, can shotgun, and Fork off the ground, making it excellent against bosses. You may need a Pinpoint Critical to reach the 100% Crit Chance. |
|
Salvo |
 |
Nova Projectiles |
 |
Ricochet |
|
Fork |
 |
Elemental Armament |
| [UTILITY] Pounce setup | |
 |
Pounce - A skill to apply Mark with by transforming you into a Wolf form and leaping forward. You can also use it to move faster. |
 |
Cooldown Recovery |
|
Rapid Attacks |
 |
Sniper's Mark - The next Critical Hit against the marked enemy deals bonus Critical Damage and grants Frenzy Charge for Charge Regulation. |
 |
Mark for Death |
 |
Mark of Siphoning |
| [UTILITY] Blasphemy setup | |
 |
Blasphemy - Transform linked Curse into an Aura, which constantly affects nearby enemies. It is the most efficient way to generate Power Charges, but you can use other Skills instead if you don't want to Reserve Spirit. |
 |
Repulsion - Enemies Cursed with it deal Area Damage on Hit. This will generate Power Charges via Ailith's Chimes, Culmination, and Living Lightning combo more or less passively. |
 |
Ailith's Chimes |
 |
Culmination |
 |
Living Lightning |
 |
Charge Profusion |
| [UTILITY] Devour setup | |
|
Devour - Generates Power Charges by eating corpses or Culling low-life enemies and Hollow Focus Bells. It's good in boss arenas where it's harder to start with Charges ready. Use it every 8, or better yet, every 5 seconds, to gain extra damage from its Support Gems. |
|
Charge Profusion |
 |
Blazing Critical |
 |
Thrill of the Kill |
 |
Empowered Sparks |
 |
Hit and Run |
| [UTILITY] Hollow Focus setup | |
 |
Hollow Focus - Ascendancy Skill that Conjures Bells, which you can hit and destroy to deal minuscule AoE damage. Hits against them are always Critical and Culling, and they're Primed for Stun, so they're good with the Devour setup. |
 |
Magnified Area |
|
Cooldown Recovery |
 |
Armour Break |
 |
Enduring Impact |
 |
Blind |
| [UTILITY] Ferocious Roar setup | |
 |
Ferocious Roar - A Roar that grants Rage, which grants Damage. Helbrym's Hide will get you some Guard and Rage. |
 |
Echoing Cry |
 |
Raging Cry |
 |
Helbrym's Hide |
| [UTILITY] Herald of Thunder setup | |
|
Herald of Thunder - It slightly improves clear speed with its Lightning Bolts manifesting on killing a Shocked enemy. It may not be needed if you're short on Spirit. |
 |
Elemental Focus |
|
Elemental Armament |
 |
Longshot |
|
Magnified Area |
 |
Lightning Mastery |
| [UTILITY] Wind Dancer setup | |
 |
Wind Dancer - Builds up Stages that grant more and more Evasion. When Hit, you lose stages and Hit nearby enemies with a gust of wind. |
 |
Maim |
|
Magnified Area |
|
Blind |
|
Rage |
| [UTILITY] Ghost Dance setup | |
 |
Ghost Dance - Regenerates Energy Shield when hit based on your Evasion, but consumes stored Ghost Shrouds it builds up over time. You may not need this additional ES recovery tool with Martial Adept being so strong. |
|
Cooldown Recovery |
 |
Her Declaration |
| [UTILITY] Charge Regulation setup | |
 |
Charge Regulation - Consumes Charges every now and then. Power Charges grant Crit Chance; Endurance Charges grant more Defences; Frenzy Charges grant Skill Speed. |
| [UTILITY] Spirit Vessel setup | |
 |
Spirit Vessel - A Skill from the Forgotten Warden chest, which gives you a Companion off-charge. It will use socketed Skill and tank some of the damage. |
 |
Romira's Requital |
 |
Meat Shield |
 |
Tangmazu's Thurible |
|
|
6. Gear Setup
It's a mixed Evasion-ES build where, at some point, you will want to allocate Chaos Inoculation or Reserve most of your Life with Atziri's Communion. On your rare items, you'll go for these two defensive stats plus Deflection Rating. The damage you're dealing is of the Physical Attack type with Lightning derived from it and added on top, so on your Weapon, Rings, and Gloves, seek any damage, as it doesn't matter as long as you have a lot of it. Enemies will receive mostly Elemental Damage. If you don't have Atziri's Communion, you'll need around 200 Spirit in total, which is hard to get, so that may force you to give up the more Spirit-demanding Skills, or get a Rare Body Armour with Spirit. For a Unique Item, consider Forgotten Warden. You're looking for Gem levels for Projectile Skills and Critical Hit mods.
|
Stat priorities on items:
|
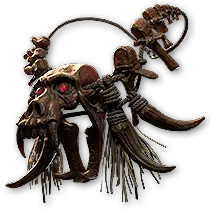
 (Helmet) Rare Helmet - On a Helmet, try to get lots of Energy Shield or Es mixed with Evasion. It can roll Crit Chance and Resistances. Socket Legacy of Crown of Thorns for Pain Attunement or Stag Idol for Forks. (Helmet) Rare Helmet - On a Helmet, try to get lots of Energy Shield or Es mixed with Evasion. It can roll Crit Chance and Resistances. Socket Legacy of Crown of Thorns for Pain Attunement or Stag Idol for Forks. |
|
| Min. requirements: 300 Energy Shield +40% total Elemental Resistance Optional affixes: increased Critical Hit Chance Intelligence Evasion |
|
 (Weapon) Rare Talisman - On a Talisman, get Added damage of various elemental types (or simply high Physical Damage) with increased Elemental Damage for Prefixes, with Gem Levels, Attack Speed, and Crit modifiers for Suffixes. Spiny Talisman has the highest Crit Chance. (Weapon) Rare Talisman - On a Talisman, get Added damage of various elemental types (or simply high Physical Damage) with increased Elemental Damage for Prefixes, with Gem Levels, Attack Speed, and Crit modifiers for Suffixes. Spiny Talisman has the highest Crit Chance. |
|
| Min. requirements: +4 to Level of all Attack Skills Added Elemental Damage increased Elemental Damage with Attacks Critical Hit Chance Optional affixes: Critical Damage Bonus increased Critical Hit Chance increased Attack Speed Gain #% of Damage as Extra Cold Damage (Essence Prefix) |
|
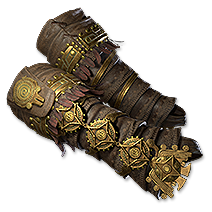 (Gloves) Rare Gloves - Your Gloves will be transformed with Way of the Stonefist. You're looking for the added damage, which gives damage as extra Elemental Damage on Prefixes, or Evasion and ES. On Suffixes, you need increased Attack Speed for Onslaught on Hit, Desecrated Arcane Surge on Crit for Power Charge on Crit. and Resistances, or Critical Damage Bonus, which gives Crit Chance. (Gloves) Rare Gloves - Your Gloves will be transformed with Way of the Stonefist. You're looking for the added damage, which gives damage as extra Elemental Damage on Prefixes, or Evasion and ES. On Suffixes, you need increased Attack Speed for Onslaught on Hit, Desecrated Arcane Surge on Crit for Power Charge on Crit. and Resistances, or Critical Damage Bonus, which gives Crit Chance. |
|
| Min. requirements: Adds # Elemental Damage to Attacks increased Critical Damage Bonus for Attack Damage Optional affixes: Elemental Resistances increased Evasion and Maximum Energy Shield chance to Gain Arcane Surge when you deal a Critical Hit (Desecrated Suffix) increased Attack Speed |
|
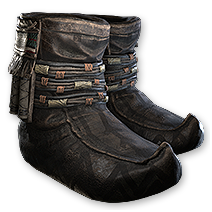 (Boots) Rare Boots - Movement Speed on Boots with Evasion or Energy Shield, Resistances, and Attributes if they're needed. You can socket Tecrod's Gaze here for Movement Speed on Low Life. (Boots) Rare Boots - Movement Speed on Boots with Evasion or Energy Shield, Resistances, and Attributes if they're needed. You can socket Tecrod's Gaze here for Movement Speed on Low Life. |
|
| Min. requirements: +80% total Elemental Resistances 30% increased Movement Speed Optional affixes: Attributes Evasion and Energy Shield Skills have #% chance to not remove Charges but still count as consuming them (Uhtred's Sidereus Suffix) |
|
 (Amulet) Rare Amulet - On an Amulet, you can look for Evasion, Energy Shield, Critical Hit Chance, Critical Damage Bonus, Gem levels for Projectile Skills, and Spirit, which is probably the most important of them all. (Amulet) Rare Amulet - On an Amulet, you can look for Evasion, Energy Shield, Critical Hit Chance, Critical Damage Bonus, Gem levels for Projectile Skills, and Spirit, which is probably the most important of them all. |
|
| Min. requirements: +3 to Level of all Projectile Skills +50 Spirit Optional affixes: Elemental Resistance increased Critical Hit Chance for Attacks increased Critical Damage Bonus Maximum Energy Shield increased Maximum Energy Shield increased Evasion Anointment: Thaumaturgic Generator Anticipation |
|
 (Ring) Rare Ring - On Rings seek added Elemental or Physical Damage with Elemental Resistances or Attributes. Nothing else is required. (Ring) Rare Ring - On Rings seek added Elemental or Physical Damage with Elemental Resistances or Attributes. Nothing else is required. |
|
| Min. requirements: Elemental Resistances Adds # Elemental or Physical Damage to Attacks Optional affixes: Attributes Mana on Kill |
|
 (Belt) Rare Belt - On a Rare Belt, there's only Strength and Resistances that are worth your attention. Ingenuity is a better choice if you don't need these. (Belt) Rare Belt - On a Rare Belt, there's only Strength and Resistances that are worth your attention. Ingenuity is a better choice if you don't need these. |
|
| Min. requirements: +80% total Elemental Resistances Strength Optional affixes: Flask or Charm modifiers |
|
 (Body Armour) Forgotten Warden - Has high defensive stats with Deflection Rating, and a strong Companion Skill, which we can employ to take some of our damage and use Skills just like we do. (Body Armour) Forgotten Warden - Has high defensive stats with Deflection Rating, and a strong Companion Skill, which we can employ to take some of our damage and use Skills just like we do. |
|
| Grants Skill: Level (17-20) Spirit Vessel +(70-100) to Deflection Rating per 50 missing Energy Shield (200-300)% increased Evasion and Energy Shield +(20-30) to Dexterity Companions have (30-50)% increased maximum Life (10-15)% of Damage from Deflected Hits is taken from Damageable Companion's Life before you |
|
 (Jewel) Rare Jewels - Sapphires are the best. Here, get Maximum Energy Shield, Critical Hit mods, increased Damage, and maybe Mana on Kill if you struggle with Mana sustain. (Jewel) Rare Jewels - Sapphires are the best. Here, get Maximum Energy Shield, Critical Hit mods, increased Damage, and maybe Mana on Kill if you struggle with Mana sustain. |
|
| Optional affixes: increased Energy Shield increased Critical Hit Chance increased Critical Damage Bonus Recover Mana on Kill increased Elemental/Elemental Damage |
|
 (Jewel) Heart of the Well - Heart of the Well can be a source of Mana on Kill with additional useful mods from the list, mostly damage-oriented. (Jewel) Heart of the Well - Heart of the Well can be a source of Mana on Kill with additional useful mods from the list, mostly damage-oriented. |
|
| Recommended affixes: Gain #% of Damage as Extra Lightning Damage Gain #% of Damage as Extra Fire Damage Gain #% of Damage as Extra Cold Damage #% increased Evasion Rating from Equipped Body Armour #% increased Energy Shield from Equipped Body Armour Recover #% of maximum Mana on Kill Gain 1 Rage on Melee Hit |
|
|
If you have any other build requests please leave that in the comments below. We are always open to suggestions and constructive feedback.
Pictures used in this article are the intellectual property of Grinding Gear Games.