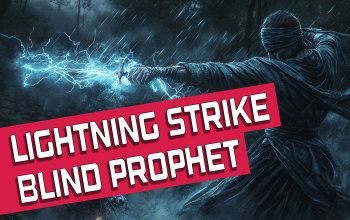
Lightning Strike Blind Prophet
A very good and reliable Setup for the Blind Prophet Ascendency, ideal to start your journey in the Legacy of Phrecia Event League!Lightning Strike
Blind Prophet
Created for Legacy of Phrecia
The Best Crafty Guides by Odealo
| Guide notes |
| February 22, 2025 -Build created |
| Build overview | |||
| Tags: [ELEMENTAL] [LIFE] [CRIT] [ATTACK] | |||
|
Budget: Defenses: |
|
Boss DPS: AoE: |
|
The Legacy of Phrecia Event League introduces 19 new Ascendency Classes. They drastically alternate how you can Build up your Character, but many of those options require careful planning around very specific Notables and gimmicks. However, the Blind Prophet Ascendency is pretty straightforward - the only Notable you can allocate after the first Labirynth massively boosts your base Critical Strike Chance. After that, you will have more freedom of choice.
The best Skill to use with this Ascendency is unsurprisingly the same Skill that is the best with all other Ascendencies - the Lightning Strike. It is a Melee Skill that releases Projectiles when you Strike an Enemy. Thanks to the Returning Projectiles granted by the Blind Prophet Ascendency with every Attack you will Hit Enemies three times - once with the Projectiles, the second time with a Melee Hit extended via Additional Strike Target modifier, and the third time with a returning Projectile, which triggers a 50% of times from both of your Hits. Thanks to the Careless Notable you will gain two additional Projectiles, which will greatly help with your Clear Speed. The Directionless Notable is mandatory for the Returning Projectile Chance, but it also makes them fire in random directions, so you should aim for as many Projectiles as possible for comfortable targeting. Against Bosses, you should stand very close to your Enemy to ensure all Hits will always Hit.
The Blind Prophet, as the name suggests, also inflicts you with a permanent Blind Debuff. It lowers your Accuracy and Evasion Rating, but it is not that impactful. You can easily overcome this Debuff by equipping a Lycosidae Shield, or later on by crafting a special modifier on your Rare Weapon. The Lightless Notable is also impactful for your gearing choices - it increases your maximum life by 5% per each Abyssal Jewel you equip. It heavily prompts you to use that type of Jewel, which is usually very good for Attacks anyway. Thanks to this setup you can achieve very impressive amounts of maximum Life, which is quite rare for Builds on that side of the Passive Tree.
You can also check all our Guides for the on-going Event right here: Best Builds for Legacy of Phrecia
1. Gameplay
It plays like any other Lightning Strike Character, but now you will have the expensive Nimis Ring effect for free, which may take some time to adjust as the Projectiles are fired in random directions. For Movement, you should use Whirling Blades and Frostblink. The Tincture massively boosts your Damage, but it will slowly burn all your Mana over time until it completely runs out.
|
|
|
|

2. Build's PROS & CONS
| PROS |
|
| CONS |
|
3. Leveling tips
The leveling process will be very easy. You can start using the Lightning Strike very early on, which will also help you with adjusting to the targeting trick with extra Strike Targets to ensure maximum DPS. You can check out our Top 10 Leveling Unique Items for more tips and ideas on how to speed up your leveling process.
Bandits:
It is best to help the Alira Bandit to get a 15% bonus to all Elemental Resistance.
Leveling Skill Trees:
44 Points Passive Tree
Pick up early maximum Life and Elemental Damage Notables. You might also need a bit of Intelligence for Gem Requirements. Leech and Claw Notables will be very helpful too.
75 Points Passive Tree
Allocate the necessary Masteries like improved Leech or Additional Strike Target. Continue investing into Elemental Damage with Attacks, but don't forget about defense in the form of maximum Life and Suppression.
4. Final Skill Tree, Ascendancy Points, and Pantheon
Final Skill Tree:
108 Points Final Skill Tree (doesn't include Unique or Cluster Jewels)
118 Points Path of Building(PoB) link
Ascendancy points:
Preferably in the order:
- Sightless
- Directionless
- Careless
- Lightless
Pantheon:
Major God: Soul of Arakaali: 10% reduced Damage taken from Damage Over Time; +40% Chaos Resistance against Damage Over Time
Minor God: Soul of Shakari: 50% less Duration of Poisons on You; You cannot be Poisoned while there are at least 3 Poisons on you
5. Final Gems links
| [DPS] Lightning Strike setup | |
 |
Lightning Strike - a Melee Strike Skill that releases Projectiles upon Hitting the Enemy, or ground, allowing you to Hit Enemies multiple times with each Attack. |
 |
Trinity Support - grants a massive Damage bonus, but requires dealing similar Damage with two different types, here it is Cold and Lightning. |
 |
Added Cold Damage Support - you might also use the Added Lightning Damage Support instead to balance your Resonance. |
 |
Multistrike Support |
 |
Inspiration Support |
 |
Elemental Damage with Attacks Support |
| [UTILITY] Auras setup | |
 |
Wrath - grants a high amount of Lightning Damage for your Attacks. It requires a lot of Intelligence. |
 |
Grace - a defensive Aura that massively improves your Evasion Rating. |
 |
Herald of Ice - killing Frozen Enemies causes a Cold Explosion. You can also use defensive Aura instead. |
 |
Enlighten Support - it is not needed but helps with sustaining your Tincture. |
 |
Precision - use a level 1 Precision to activate certain modifiers on the Watcher's Eye Jewel. You can also use the Clarity or Vitality Auras instead. |
| [UTILITY] Mark setup | |
 |
Assassin's Mark - increases your Critical Strike Chance and Damage against Marked Enemies, and generates your Power Charges. |
 |
Mark on Hit Support |
| [UTILITY] Whirling Blades setup | |
 |
Whirling Blades - it is your main Movement Speed ability. You can also use it to generate Rage or Cull enemies. |
 |
Faster Attacks Support |
 |
Rage Support |
 |
Culling Strike Support |
| [UTILITY] Guard setup | |
 |
Immortal Call - massively lowers the Damage you take for short time. Use a level 3 Gem to match the requirements of the Support Gem. |
 |
Cast when Damage Taken Support - activates linked Spells when you take enough Damage. Keep it on level 1 Trigger it as soon as possible. |
|
More Duration Support |
| [UTILITY] Mobility setup | |
 |
Frostblink - an instant teleport Skill that you can use without interrupting your other actions, but it has a short Cooldown. |
| Bonechill Support | |
 |
Unbound Ailments Support |
|
|
5. Gear Setup
The gearing process is fairly typical for an Elemental Attack Build, although you will need a source of guaranteed Hit, as getting enough Accuracy while Blinded requires too much investment. You will need a solid amount of Elemental Damage for Attacks, Critical Strike Multiplier, Attack Speed, and increases to your Damage. For defense, you should focus on high maximum Life, Evasion Rating, and Energy Shield. Of course, you will also need to cap your Elemental and Chaos Resistance, Spell Suppression, and obtain enough Attributes to use all your skills at the highest level possible.
|
Stat priorities on items:
|
 (Helmet) Rare Helmet - on this slot you can get a lot of maximum Life, Resistance, and optionally Attributes or Spell Suppression. The Eldrich Influence can be used to lower your Mana Cost of Skills and grant a bit of Physical Damage Reduction. (Helmet) Rare Helmet - on this slot you can get a lot of maximum Life, Resistance, and optionally Attributes or Spell Suppression. The Eldrich Influence can be used to lower your Mana Cost of Skills and grant a bit of Physical Damage Reduction. |
|
| Min. requirements: +100 to maximum Life +80% to Elemental and Chaos Resistance 20% Reduced Mana Cost of Attacks Optional affixes: #% of Physical Damage from Hits taken as Elemental Damage % increased Mana Reservation Efficiency of Skills Attributes |
|
 (Weapon) Rare Claw - on your Weapon look for the highest possible Elemental DPS and an open Prefix to craft the guaranteed Hit Chance which you can unlock by unveiling Weapons. The Critical Strike Chance will be overwritten by your Ascendency, but you can improve your Critical Strike Multiplier or get a chance to deal Double Damage. (Weapon) Rare Claw - on your Weapon look for the highest possible Elemental DPS and an open Prefix to craft the guaranteed Hit Chance which you can unlock by unveiling Weapons. The Critical Strike Chance will be overwritten by your Ascendency, but you can improve your Critical Strike Multiplier or get a chance to deal Double Damage. |
|
| Min. requirements: 400+ Elemental DPS Hits can't be Evaded Optional affixes: % increased Attack Speed % to Global Critical Strike Multiplier |
|
 (Offhand) Lycosidae - at first you can use this Shield to solve the Accuracy problem, but this Shield doesn't provide any defense so it should be replaced as soon as possible. (Offhand) Lycosidae - at first you can use this Shield to solve the Accuracy problem, but this Shield doesn't provide any defense so it should be replaced as soon as possible. |
|
| +(120-160) to Armour +(30-40) to maximum Life Your hits can't be Evaded +(3-5)% Chance to Block Adds 250 to 300 Cold Damage to Retaliation Skills |
|
 (Offhand) Rare Shield - it is a defensive piece, but it can grant you a bit of Attack Speed too. Primarily you should look for maximum Life, Spell Suppression Chance, extra Block Chance, and Ailment Avoidance. (Offhand) Rare Shield - it is a defensive piece, but it can grant you a bit of Attack Speed too. Primarily you should look for maximum Life, Spell Suppression Chance, extra Block Chance, and Ailment Avoidance. |
|
| Min. requirements: +100 to maximum Life +20% chance to Suppress Spell Damage Optional affixes: #% increased Chance to Block #% increased Attack Speed % chance to Avoid Elemental Ailments |
|
 (Body Armour) Rare Armour - another defensive piece, look for high maximum Evasion and Energy Shield. You should avoid any Life modifier here to enable the Life Mastery. The Eldritch Implicits can grant you Fortify, but it only works with the Melee Hit, not the Projectiles. (Body Armour) Rare Armour - another defensive piece, look for high maximum Evasion and Energy Shield. You should avoid any Life modifier here to enable the Life Mastery. The Eldritch Implicits can grant you Fortify, but it only works with the Melee Hit, not the Projectiles. |
|
| Min. requirements: 1500+ Evasion Rating 300+ Energy Shield +60% to Elemental Resistance Melee Hits have #% chance to Fortify Optional affixes: % increased effect of Non-Curse Auras from your Skills % increased Mana Reservation Efficiency of Skills Flasks gain a Charge every 3 seconds |
|
 (Amulet) Rare Amulet - look for maximum Life, Critical Strike Multiplier, increases to your Elemental Damage, and possibly as much Resistance and Attributes as you need. (Amulet) Rare Amulet - look for maximum Life, Critical Strike Multiplier, increases to your Elemental Damage, and possibly as much Resistance and Attributes as you need. |
|
| Min. requirements: +80 to maximum Life 30% to Global Critical Strike Multiplier 30% increased Elemental Damage with Attack Skills Optional affixes: % increased Effect of Non-Damaging Ailments Resistance Attribute |
|
 (Gloves) Rare Gloves - you can get a lot of Damage here. Get maximum Life, Attack Speed, and Additional Pierce. The Eldritch Implicit should provide Rage generation, Additional Strike Target, or a chance to Intimidate Enemies, depending on what you get on the Lethal Pride Jewel. (Gloves) Rare Gloves - you can get a lot of Damage here. Get maximum Life, Attack Speed, and Additional Pierce. The Eldritch Implicit should provide Rage generation, Additional Strike Target, or a chance to Intimidate Enemies, depending on what you get on the Lethal Pride Jewel. |
|
| Min. requirements: +100 to maximum Life +60% to Elemental and Chaos Resistance Optional affixes: Projectiles Pierce an additional Target #% increased Attack Speed % chance to Intimidate Enemies for 4 seconds on Hit Gain 1 Rage on Attack Hit Strike Skills target 1 additional nearby Enemy |
|
 (Belt) Rare Belt - always use a Belt with the Abyssal Jewel Socket. Get as much maximum Life, Resistance, and Elemental Damage for Attacks as you can afford. The Flask modifiers are also useful. (Belt) Rare Belt - always use a Belt with the Abyssal Jewel Socket. Get as much maximum Life, Resistance, and Elemental Damage for Attacks as you can afford. The Flask modifiers are also useful. |
|
| Min. requirements: +100 to maximum Life +60% to Elemental and Chaos Resistance 35% increased Elemental Damage with Attack Skills Optional affixes: Strength Flask modifiers |
|
 (Boots) Rare Boots - thanks to Whirling Blades you won't need Movement Speed here. focus on maximum Life, Resistance, and Ailment Avoidance. (Boots) Rare Boots - thanks to Whirling Blades you won't need Movement Speed here. focus on maximum Life, Resistance, and Ailment Avoidance. |
|
| Min. requirements: +100 to maximum Life +100 to Elemental and Chaos Resistance +30% chance to Avoid Elemental Ailments (Suffix and Eater Influence) 5% Action Speed (Exarch Influence) Optional affixes: Spell Suppression Onslaught on Kill |
|
 (Ring) Rare Ring - the possible modifiers on your Rings are very similar to the modifiers on your Amulet, which are Life, Crit Multiplier, and Elemental Damage for Attacks. You can also craft the Mana Cost Reduction here. (Ring) Rare Ring - the possible modifiers on your Rings are very similar to the modifiers on your Amulet, which are Life, Crit Multiplier, and Elemental Damage for Attacks. You can also craft the Mana Cost Reduction here. |
|
| Min. requirements: +80 to maximum Life +60 to Elemental and Chaos Resistance 30% increased Elemental Damage with Attack Skills Non-Channelling Skills have -7 to Total Mana Cost Optional affixes: % to Global Critical Strike Multiplier Resistance Attribute |
|
 (Jewel) Ancestral Vision - it is a great way to get your remaining Ailment Avoidance if you can't get it on your other Items. You can overcap your Spell Suppression a bit to get extra Avoidance too. (Jewel) Ancestral Vision - it is a great way to get your remaining Ailment Avoidance if you can't get it on your other Items. You can overcap your Spell Suppression a bit to get extra Avoidance too. |
|
| +(5-10) to Dexterity Modifiers to Chance to Suppress Spell Damage also apply to Chance to Avoid Elemental Ailments at 50% of their Value |
|
 (Jewel) Rare Abyss Jewels - on your Abyss Jewels you should look for added Elemental Damage, Critical Strike Multiplier, Attack Speed, and maximum Life. Thanks to the Lightless table each Jewel will also grant you 5% maximum Life. (Jewel) Rare Abyss Jewels - on your Abyss Jewels you should look for added Elemental Damage, Critical Strike Multiplier, Attack Speed, and maximum Life. Thanks to the Lightless table each Jewel will also grant you 5% maximum Life. |
|
| Recommended affixes: +# to maximum Life % to Global Critical Strike Multiplier Added Lightning or Cold Damage with Claw Attacks % increased Attack Speed if you've dealt a Critical Strike Recently Elemental Resistances |
|
 (Jewel) Watcher's Eye - the Precision modifier can prevent the Blind Debuff too, but it's not recommended. Instead, you should focus on Grace's defensive bonuses and other offensive modifiers from Precision. (Jewel) Watcher's Eye - the Precision modifier can prevent the Blind Debuff too, but it's not recommended. Instead, you should focus on Grace's defensive bonuses and other offensive modifiers from Precision. |
|
| (4-6)% increased maximum Energy Shield (4-6)% increased maximum Life (4-6)% increased maximum Mana <Two or Three random aura modifiers> Recommended modifiers: Cannot be Blinded while affected by Precision (40-60)% increased Attack Damage while affected by Precision +(5-8)% chance to Evade Attack Hits while affected by Grace +(12-15)% chance to Suppress Spell Damage while affected by Grace |
|
 (Jewel) Lethal Pride - try to get Intimidation Chance and Rage generation, otherwise you will need those mods on the Gloves. It can also grant you plenty of Double Damage chances. Melee Crit modifiers do not apply to Lightning Strike Projectiles. (Jewel) Lethal Pride - try to get Intimidation Chance and Rage generation, otherwise you will need those mods on the Gloves. It can also grant you plenty of Double Damage chances. Melee Crit modifiers do not apply to Lightning Strike Projectiles. |
|
| Commanded leadership over (10000-18000) warriors under (Akoya-Kaom-Rakiata) Passives in radius are Conquered by the Karui Historic |
|
 (Jewel) Large Cluster Jewel - you can use various Setups here. The Claw Notables grant you extra Projectile, while the Shield Notables grant you both defense and Damage. You will probably skip the third Notable, but its efficiency depends on your progression. (Jewel) Large Cluster Jewel - you can use various Setups here. The Claw Notables grant you extra Projectile, while the Shield Notables grant you both defense and Damage. You will probably skip the third Notable, but its efficiency depends on your progression. |
|
| Recommended affixes: 1 Added Passive Skill is Calamitous 1 Added Passive Skill is Fan of Blades 1 Added Passive Skill is Martial Prowess 1 Added Passive Skill is Advance Guard 1 Added Passive Skill is Gladiator's Fortitude 1 Added Passive Skill is Strike Leader 1 Added Passive Skill is Veteran Defender |
|
 (Tincture) Prismatic Tincture - activating the Tincture grants you a massive boost to Damage. It will slowly burn your Mana, and deactivate for a few seconds if you can't sustain it anymore. (Tincture) Prismatic Tincture - activating the Tincture grants you a massive boost to Damage. It will slowly burn your Mana, and deactivate for a few seconds if you can't sustain it anymore. |
|
| (70-100)% increased Elemental Damage with Melee Weapons Recommended affixes: 20% increased effect Melee Weapon Damage Penetrates 15% Elemental Resistances |
|
|
Other suggested Flasks:
|
|
    |
|
|
If you have any other build requests please leave that in the comments below. We are always open to suggestions and constructive feedback.
Pictures used in this article are the intellectual property of Grinding Gear Games.
