Hammer of the Gods Titan POE2 Build
A simple Attack build for the Titan; it uses Hammer of the Gods to inflict a powerful IgnitesHammer of the Gods
Ignite Titan Build
Updated for Path of Exile 2 Early Access
The Best Crafty Guides by Odealo
| Guide notes |
| February 01, 2025 - Created for Early Access. |
| Build Overview | |||
| Tags: [MELEE] [ELEMENTAL] [LIFE] [IGNITE] | |||
|
Budget: Defenses: |
|
Boss DPS: AoE: |
|
It's a rather simple build; its premise is to find the hardest-hitting Attack and use it to Ignite enemies. Hammer of the Gods is by far the strongest Attack in the game with an equally big drawback of a 24-second Cooldown. It pairs up somewhat well with the Ignite mechanics, as Ignite doesn't stack, making Hit Rate more or less useless in such builds. That being said, your Ignite will last around 10 seconds, and as the long Cooldown may seem like a serious disadvantage at first glance, this 10 seconds should still be enough to take down map bosses with one hit. You will be able to Ignite by allocating Avatar of Fire. Damage over Time inflicted on enemies is one of the best ways to deal with bosses, as you don't have to constantly look for the window of opportunity to deal damage - you hit thrice a minute, spending the rest of the fight focusing on dodging and rolling. When the Hammer is on Cooldown you will use Stampede. The build has high boss damage but is also very tanky.
It relies on Maximum Life, Maximum Elemental Resistances, and Armour, which may sound underwhelming, but combined with high Block Chance and Life on Block it makes for an amazing build for mapping. You'll need to avoid large AoE Hits from pinnacle bosses, but it's nearly impossible to die on a regular map. Just be sure to scavenge for Maximum Elemental Resistances whenever applicable, cap Chaos Resistance, use the Life Flask, and get a lot of Armour.
You can also check our other Path of Exile 2 builds right over here Odealo's Crafty Guides - Full List
1. Gameplay
For the majority of a map, you will run around Stampeding the enemies. Occasionally you may use Infernal Cry when you stumble upon a big pack of monsters, but be sure to have it ready for Rare and Unique Enemies - before you hit them with a Hammer. Press the weapon swap button to get the more damage-oriented weapon set before using this attack. To boost your DPS cast Flammability. Your passive skills are Overwhelming Presence and Scavenged Plating.
|
|

2. Build's PROS & CONS
| PROS |
|
| CONS |
|
3. Leveling tips
Begin with Perfect Strike because it has high damage and guaranteed Ignite on Perfect Strike. For clearing use Rolling Slam/Leap Slam and Boneshatter. Implement Herald of Ash too - you can start specializing in Fire Damage right from the start. Later on, you will fully transition into the Stampede and Hammer setup, but that depends on your weapon and character level.
| [DPS] Perfect Strike setup | |
 |
Perfect Strike - Has high damage and always Ignites, but you have to time the strike perfectly. |
 |
Window of Opportunity - If you're good at timing use this Gem for 50% more damage. |
 |
Fire Infusion - Extra Fire Damage, but less Cold and Lightning Damage. |
 |
Searing Flame - Less Hit Damage, but more Ignite Damage. |
| [DPS] Boneshatter setup | |
 |
Boneshatter - If you hit an enemy that's primed for Stun, it releases a Shockwave that deals area damage. |
 |
Impact Shockwave - Creates a Shockwave on a Heavy Stun. |
 |
Close Combat - More Damage against enemies at short range. |
 |
Ignition - 100% more Chance to Ignite. |
| [DPS] Leap Slam setup | |
 |
Leap Slam - Slam into enemies to damage and Stun them. |
 |
Martial Tempo - More Attack Speed. |
 |
Momentum - 40% more Damage if you've leapt over 2 metres. |
 |
Magnified Effect - More Area of Effect. |
| [DPS] Hammer of the Gods setup | |
 |
Hammer of the Gods - Use it against bosses or Rare enemies, it scales well with Gem Level. |
 |
Primal Armament - 25% more Weapon Elemental Damage. |
 |
Fist of War - Ancestrally boosts the Attack, but it takes 6 seconds to recharge. |
 |
Eternal Flame - 100% increased Ignite Duration but less Ignite Chance. It should Ignite with no issues. |
| [UTILITY] other gems | |
 |
Herald of Ash - Converts all Physical Damage to Fire. Upon killing an enemy, it burns all nearby foes to enhance your clear speed. |
 |
Overwhelming Presence - It should make Igniting and Stunning enemies easier. |
 |
Infernal Cry - Empower your next Attack and detonate affected enemies on kill. |
4. Final Skill Tree, Ascendancy Points, and Pantheon
Final Skill Tree:
 |
| The Skill Tree to use with a Shield; it has Block Chance and Attack Speed. |
 |
| The Skill Tree for dual-wield. It doesn't need any Block Chance or Attack Speed. |
|
Click on the image to open the Passive Tree preview in a new window Or import the build into PoB (there are two Skill Trees for two weapon sets): |
Ascendancy points:
Preferably in this order:
- Earthbreaker
- Colossal Capacity
- Hulking Form
- Crushing Impacts
- Mysterious Lineage (respec Earthbreaker)
5. Final Gems links
| [DPS] Hammer of the Gods setup | |
|
Hammer of the Gods - Your main damaging ability. It has a high cooldown so use it only against the toughest enemies. |
|
Searing Flame - 25% Less Damage with Hits and 75% more Magnitude of Ignite inflicted, which results in much more Ignite damage. |
|
Fist of War - Once every 6 seconds, which is less than the inherent skill Cooldown, the next Attack with Hammer is Ancestrally Boosted. |
|
Eternal Flame - Less chance to Ignite and 100% increased Ignite Duration. Chance to Ignite is based on the initial Hit Damage, which is pretty much guaranteed with Hammer of the Gods anyway. |
|
Close Combat - Up to 25% more Damage against enemies close to you. |
|
Primal Armament - 25% more Damage. |
| [DPS] Stampede setup | |
 |
Stampede - Your other damaging ability, to be used against smaller enemies or when the Hammer is on Cooldown. It doubled as a movement skill so it's great for fast clearing maps. |
|
Martial Tempo - 25% more Attack Speed. |
|
Momentum - 40% more Damage if you've moved over two metres while using Stampede; make sure to have some room when charging on rare monsters. |
|
Magnified Effect - 40% more Area of Effect. |
 |
Armour Explosion - Trigger an explosion when the Stampede Fully Breaks enemy's Armour. Passives like Shattering Blow will help you with Breaking Armour. |
|
Fire Infusion - 25% of Damage as Extra Fire Damage, less Cold and Lightning Damage. |
| [UTILITY] Infernal Cry setup | |
|
Infernal Cry - Empowers the next Attack with additional Fire Damage. It has an 8-second cooldown so we recommend using it mainly to boost the Hammer's damage, but causing explosions on death with Combustion may be valid if you struggle with clearing. |
 |
Enraged Warcry - 30% more Damage with the empowered attack if the Warcry can consume 10 Rage. |
 |
Premeditation - 15% more Damage with the empowered attack. |
 |
Raging Cry - Warcry grants 4 Rage per 5 Power. That's 16 Rage when used near a Unique enemy. |
| [MOBILITY] Leap Slam setup | |
|
Leap Slam - It's here only to save time by jumping over moats and bushes given an opportunity. |
 |
Holy Descent - Consecrated Ground on landing. |
| [MOBILITY] Shield Charge setup | |
 |
Shield Charge - A mobility skill to traverse the terrain; it's faster than walking. |
 |
Ingenuity - Increased Cooldown Recovery Rate for Shield Charge. |
| [UTILITY] Flammability setup | |
 |
Flammability - Lowers Fire Resistance, increasing the Ignite Damage. It's the sole reason to look for Intelligence in the build, and a lot of it at that, so you may want to keep it at a low level, or even omit it entirely. |
 |
Heightened Curse - Increased Effect of the Curse. |
 |
Arcane Tempo - More Cast Speed. |
| [UTILITY] Overwhelming Presence setup | |
|
Overwhelming Presence - Nearby enemies are easier to Stun and Ignite. |
 |
Herbalism - 30% increased Life Recovery from a Flask. |
 |
Precision - Increases Accuracy Rating. You cannot miss with Hammer, it is used for other Attacks. |
 |
Cannibalism - Instantly Recovers 4% of Life on Kill. |
| [UTILITY] Scavenged Plating setup | |
 |
Scavenged Plating - Grants stacks of Plating when you fully Break enemies' Armour. When fully stacked, provides you with 70% more Armour and some Throrns. |
 |
Persistence - 40% more Skill Effect Duration. |
|
|
6. Gear Setup
It's a Life build with its primary defensive layer being Block Chance, high Maximum Elemental Resistances, and Armour. The Life Recovery is sourced from the Surrender's Life on Block, Cannibalism, and Life Flask, so passive Regeneration is not needed, even though Blood Magic causes you to lose Life with every skill use. Your gear should be rich in Armour and Maximum Life, which is the role of the Prefixes on most of the gear pieces. For Suffixes, look for Resistances and Attributes. Strength is especially important, because of the Giant's Blood which triples its requirements when it comes to weapons, and you will need a good weapon with a high Strength requirement. To increase Damage, get a good two-hand Mace with high base Physical Damage (later converted to Fire), increased Elemental Damage, and Gem Level to Melee Skills. In the two 2-hand setup, for killing bosses, focus on global modifiers, such as Gem Level and increased Elemental Damage with Attacks.
|
Stat priorities on items:
|
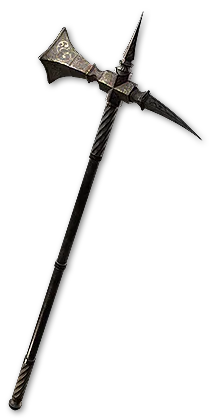 (Weapon) Rare Two Hand Mace - You'll need three of such weapons - one to use with a Shield, and the other two you'll dual wield. They all need high Physical Damage; the single one could use Attack Speed, and the dual Maces are better with global modifiers. (Weapon) Rare Two Hand Mace - You'll need three of such weapons - one to use with a Shield, and the other two you'll dual wield. They all need high Physical Damage; the single one could use Attack Speed, and the dual Maces are better with global modifiers. |
|
| Min. requirements: increased Physical Damage adds Physical Damage increased Elemental Damage with Attacks Level of all Melee Skills Optional affixes: increased Attack Speed Strength |
|
 (Off-hand) The Surrender - The Surrender Recovers Life on Block, so be sure your Block Chance is high when using it. Even if you have high Armour and Maximum Resistances, you probably will still need it. (Off-hand) The Surrender - The Surrender Recovers Life on Block, so be sure your Block Chance is high when using it. Even if you have high Armour and Maximum Resistances, you probably will still need it. |
|
| Grants Skill: Raise Shield (40–60)% increased Block chance (150–200)% increased Armour +(150–200) to Stun Threshold Recover 4% of Life when you Block |
|
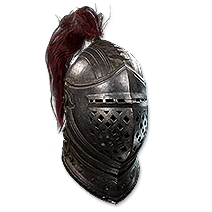 (Helmet) Rare Helmet - Intelligence can be found on all Helmet types so get it here if you need it. Besides that, seek the basic defensive stats. (Helmet) Rare Helmet - Intelligence can be found on all Helmet types so get it here if you need it. Besides that, seek the basic defensive stats. |
|
| Min. requirements: Maximum Life Strength Optional affixes: Elemental and Chaos Resistance Intelligence Armour |
|
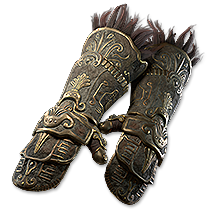 (Gloves) Rare Gloves - Gloves play a big role in Attack builds - try to find a pair with Added Damage, Attributes, and Level of all Melee Skills. (Gloves) Rare Gloves - Gloves play a big role in Attack builds - try to find a pair with Added Damage, Attributes, and Level of all Melee Skills. |
|
| Min. requirements: Maximum Life Level of all Melee Skills Attributes Optional affixes: Elemental and Chaos Resistance increased Attack Speed Added Physical Damage Added Elemental Damage |
|
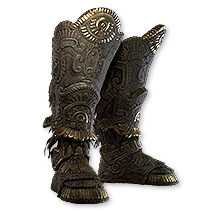 (Boots) Rare Boots - Here try to get high Movement Speed with Resistances and Strength. (Boots) Rare Boots - Here try to get high Movement Speed with Resistances and Strength. |
|
| Min. requirements: increased Movement Speed Maximum Life Elemental and Chaos Resistance Optional affixes: Strength |
|
 (Amulet) Xoph's Blood - It has all you need. It increases your damage and Maximum Life, which is hard to get. (Amulet) Xoph's Blood - It has all you need. It increases your damage and Maximum Life, which is hard to get. |
|
| +(10–15) to Strength (10–15)% increased maximum Life +(20–30)% to Fire Resistance Enemies in your Presence have Fire Exposure |
|
 (Ring) Rare Ring - Rings can roll added Damage, but their primary role is providing you with Attributes and Resistances. They may also increase your Fire Damage, or add Damage to Attacks. (Ring) Rare Ring - Rings can roll added Damage, but their primary role is providing you with Attributes and Resistances. They may also increase your Fire Damage, or add Damage to Attacks. |
|
| Min. requirements: Maximum Life Elemental and Chaos Resistance Attributes Optional affixes: Added Physical Damage Added Fire Damage increased Fire Damage |
|
 (Belt) Rare Belt - Here you should look for Maximum Life, Strength, and Resistances. Life Flask mods or Charm Slots too if you can afford it. (Belt) Rare Belt - Here you should look for Maximum Life, Strength, and Resistances. Life Flask mods or Charm Slots too if you can afford it. |
|
| Min. requirements: Maximum Life Strength Elemental and Chaos Resistance Optional affixes: Armour Life Flask modifiers Charm Slots |
|
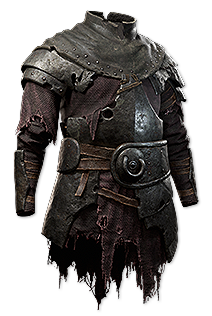 (Body Armour) Rare Body Armour - Find a Body Armour with a lot of basic defensive stats such as Maximum Life, Armour, and Resistances. Not much else is needed here. (Body Armour) Rare Body Armour - Find a Body Armour with a lot of basic defensive stats such as Maximum Life, Armour, and Resistances. Not much else is needed here. |
|
| Min. requirements: Maximum Life Elemental and Chaos Resistance Armour Optional affixes: Attributes |
|
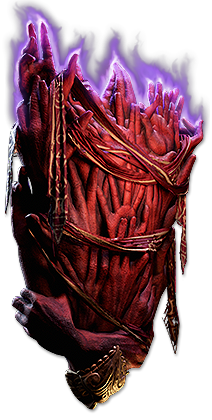
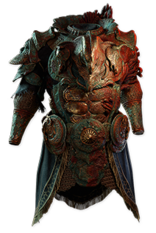 (Body Armour) Titanrot Cataphract - This Armour could be good if you desperately need more Strength. (Body Armour) Titanrot Cataphract - This Armour could be good if you desperately need more Strength. |
|
| (400–500)% increased Armour (15–30)% increased Strength 10% reduced Dexterity 10% reduced Intelligence You have no Life Regeneration |
|
 (Jewel) Rare Ruby Jewels - Ruby Jewels should provide you with Rage on Hit, Fire Damage, and Ignite Damage. (Jewel) Rare Ruby Jewels - Ruby Jewels should provide you with Rage on Hit, Fire Damage, and Ignite Damage. |
|
| Optional affixes: Rain 1 Rage on Melee Hit increased Melee Damage increased Elemental Damage increased Fire Damage increased Magnitude of Ignite you Inflict Maximum Rage Maximum Fire Resistance |
|
 (Jewel) Rare Sapphire Jewels - Sapphire Jewels can increase your Elemental Damage, Maximum Lightning Resistance, and Ignite Damage. (Jewel) Rare Sapphire Jewels - Sapphire Jewels can increase your Elemental Damage, Maximum Lightning Resistance, and Ignite Damage. |
|
| Optional affixes: increased Elemental Damage increased Magnitude of Ailments you Inflict increased Duration of Damaging Ailments you Inflict Maximum Cold Resistance |
|
 (Jewel) Rare Emerald Jewels - On Emerald Jewels look for the same mods as on Sapphire ones, the only difference is that you can find Maximum Lightning, not Cold, Resistance on them. (Jewel) Rare Emerald Jewels - On Emerald Jewels look for the same mods as on Sapphire ones, the only difference is that you can find Maximum Lightning, not Cold, Resistance on them. |
|
| Optional affixes: increased Elemental Damage increased Magnitude of Ailments you Inflict increased Duration of Damaging Ailments you Inflict Maximum Cold Resistance |
|
|
If you have any other build requests please leave that in the comments below. We are always open to suggestions and constructive feedback.
Pictures used in this article are the intellectual property of Grinding Gear Games.