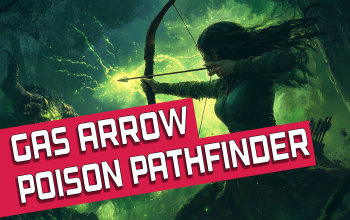
Gas Arrow Pathfinder POE2 Build
One of the best Setups for Pathfinder Ascendency that spreads deadly Poisons using Gas Arrow and Plague BearerPoison Gas Arrow
Pathfinder Build
Updated for Path of Exile 2 Early Access
The Best Crafty Guides by Odealo
| Guide notes |
| January 26, 2025 - Created for Early Access |
| Build Overview | |||
| Tags: [ATTACK] [POISON] [LIFE] [BOW] | |||
|
Budget: Defenses: |
|
Boss DPS: AoE: |
|
Gas Arrow creates a poisonous Cloud upon hitting the terrain or an enemy. It doesn't Hit, but continuously applies Poison at a quick rate, and you can create many Clouds in the same place to apply them even faster. By default, you can apply one stack of Poison, but thanks to the various Notables on the Passive Tree, Corombidity Support, Snakebite Gloves, and the Pathfinder Ascendency you can raise it up to 10 stacks. Doing so greatly reduces the Duration of your Poisons, so you will need sources of additional Arrows to apply all stacks at once.
Thanks to the Pathfinder Ascendency your strongest Poison will propagate to nearby Enemies upon killing the main target, which greatly improves your Clear Speed. If that's not enough, you can also use the Contagion Spell, which also spreads your Poisons to nearby Enemies, but also refreshes their Duration, and has slightly better AoE. You can also use the Tornado Shot to split your Gas Arrow into more Projectiles and cover more Area. Those Skills are completely optional but can be quite useful in certain situations, like Breach or Ritual encounters. You can also use the Corpsewade Boots to create Poisonous Clouds while walking near corpses of defeated enemies, but the lack of Movement Speed will be very noticeable.
This Ailment can be a bit confusing at first. To inflict Poison you have to deal Chaos or Physical Damage. It is also possible to use Plaguefinger Gloves to make your Elemental Damage count towards Poison, but it requires incredibly good Items to make it worth it. Initially, Poison deals only 20% of the initial Damage per second, but you can greatly improve it with Poison Magnitude modifiers. You will also need increases to your Attack or Physical Damage. It deals Chaos Damage and bypasses the Energy Shield of your Enemies, but it won't be affected by increases to Chaos Damage, as it is applied by Physical Damage from your Gas Arrow. However, increasing the Chaos Damage taken by Enemies will affect it, which can be achieved with Wither Debuff and by lowering Chaos Resistance with Despair Curse.
This playstyle is very safe by default, but to make it even safer you should opt for the mix of Energy Shield, Life, and Evasion. Your Evasion will be high enough to Evade most incoming Damage, and a decent amount of Energy Shield will protect your Life from danger. It also Recharges quite quickly, which substitutes for the lack of Leech during Boss encounters.
You can also check our other Path of Exile 2 builds right over here Odealo's Crafty Guides - Full List
1. Gameplay
Use Gas Arrow to create deadly clouds that Poison your Enemies. You can stack them in one place to apply more Stacks at once, up to a limit. Against Bosses, you should apply Wither with Rain of Arrows and lower their Chaos Resistance with Despair Curse.
|
|
|
|
2. Build's PROS & CONS
| PROS |
|
| CONS |
|
3. Leveling tips
You should start with the usual Lightning Arrow and Lightning Rods setup until you complete your second Ascendency Trial, which will allow you to double your Poison limit and transition to that style. Try to always keep your Bow at the relevant power level, as it is your main source of Damage during the campaign.
| [DPS] Lightning Arrow setup | |
 |
Lightning Arrow - fires a Lightning-infused Arrow that creates Chainng Beams upon Hitting an Enemy. |
 |
Martial Tempo - increases your Attack Speed with this Skill. |
 |
Primal Armament - increases the Lightning Damage dealt with Lightning Arrow. |
 |
Inspiration - reduces your Mana Costs significantly. |
| [DPS] Lightning Rod setup | |
 |
Lightning Rod - shoots an Arrow that creates a stationary Rod. The Rods pulse with Damage every time any Beam Chains to it. |
 |
Magnified Effect - increases the AoE of your explosions, making them more likely to overlap. |
 |
Scattershot - allows you to create more Rods with fewer Shots. |
 |
Lightning Infusion - grants Extra Lightning Damage. |
| [DPS] Orb of Storms setup | |
 |
Orb of Storms - creates an Orb that releases Chaining Beams, which activates your Lightning Rods quicker. |
 |
Chain - grants additional Chains, which will trigger more Rods. |
 |
Overabundance - allows you to summon additional Orb. |
 |
Persistence - makes your Orbs last longer. |
4. Final Skill Tree, Ascendancy Points, and Pantheon
Final Skill Tree:
 |
|
Click on the image to open the Passive Tree preview in a new window, or use the full browser version: Passive Tree or use the Path of Building (PoB) tool. |
Ascendancy points:
Preferably in this order:
- Contagious Contamination
- Overwhelming Toxicity
- Running Assault
- Traveler's Wisdom
5. Final Gems links
| [DPS] Gas Arrow setup | |
 |
Gas Arrow - creates a poisonous Cloud that inflicts Poisons on Enemies, but does not Hit them. You can stack many Clouds in the same place to inflict Poisons faster. |
 |
Deadly Poison - grants you a lot of Poison Magnitude. |
 |
Concentrated Effect - lowers the AoE but greatly increases your Damage. You can replace it with Bursting Plague for general Mapping. |
 |
Comorbidity - raises your maximum Poison limit by 1. |
 |
Heft - improves your maximum Physical Damage dealt with this Skill, which leads to stronger Poisons. You can also use the Inspiration to lower the Mana Cost. |
 |
Scattershot - adds two additional Arrows but lowers their Damage. Use it if you can't reach 10 stacks otherwise. |
| [UTILITY] Vine Arrow setup | |
 |
Vine Arrow - creates a Plant that can be Poisoned to deal extra Damage. It also slows the Movement Speed of nearby Enemies. |
 |
Font of Rage - standing near the Plant grants you Rage, which can grant you up to 30% More Damage. The Rage dissipates very quickly. |
 |
Encumbrance - enhances the Slow effect further. |
 |
Font of Mana - grants you Mana Regeneration when standing near the Plant. |
| [DPS] Plague Bearer setup | |
 |
Plague Bearer - accumulates Damage when you inflict Poison with Gas Arrow. Activate it to release a large Nova that inflicts a single, but very powerful Poison. |
 |
Magnified Effect - increases the radius of your Nova. |
 |
Chaos Mastery - increases the Skill Level of Plague Bearer. |
 |
Astral Projection - allows you to release the Nova away from your character, but lowers the AoE. |
| [UTILITY] Rain of Arrows setup | |
 |
Rain of Arrows - fires multiple Arrows from the sky that repeatedly Hit Enemies in its radius. |
 |
Withering Touch - applies Wither Debuff on Enemies with every Hit. |
 |
Chaos Infusion - you can only apply Wither if you deal Chaos Damage with Hit, which can be sourced from this Support. |
 |
Persistence - prolongs the effect of Wither. |
| [UTILITY] Despair setup | |
 |
Despair - a Curse that lowers the Chaos Resistance of affected Enemies. |
 |
Heightened Curse - increases the effect of your Curse. |
 |
Focused Curse - the Curse activates faster. |
| [UTILITY] Grim Feast setup | |
 |
Grim Feast - killing Enemies creates Remnants that restore and Overflow your Energy Shield. |
 |
Clarity - increases your Mana Regeneration. |
| [UTILITY] Wind Dancer setup | |
 |
Wind Dancer - grants you stages that improve your Evasion Rating. Upon taking a Melee Hit it releases a burst of Wind that Hits and Knocbacks Enemies. |
 |
Blind - causes the Windburst to also apply Blind. |
 |
Maim - with this Support, it will also Maim Hit Enemies. |
| [UTILITY] Ghost Dance setup | |
 |
Ghost Dance - a Buff that stores Shrouds that restore your Energy Shield when you get Hit by an Attack. |
 |
Fast Forward - causes Shrouds to generate faster. |
|
|
6. Gear Setup
The only mandatory Unique Item is the Snakebite Gloves, which grants you an additional Poison stack, doubled by your Ascendency. Your Damage will be sourced from your Bow, Quiver, Jewels, and potentially the Ming's Heart Ring. All your other Items should be focused on defense, as you will need a lot of Affixes there. You should seek maximum Life and high Energy Shield and Evasion. You will also need to cap all 4 Resistance types and get a lot of Dexterity and Intelligence. Additional Mana is also mandatory if you don't want to use Mana Flask too often.
|
Stat priorities on items:
|
 (Weapon) Rare Weapon - look for a Bow with the highest Physical Damage you can find. Keep in mind that Attack Speed doesn't affect your Poison Damage. You can get additional Arrows here to replace the Scattershot Support, but it is not always worth it, as such bows are extremely expensive. (Weapon) Rare Weapon - look for a Bow with the highest Physical Damage you can find. Keep in mind that Attack Speed doesn't affect your Poison Damage. You can get additional Arrows here to replace the Scattershot Support, but it is not always worth it, as such bows are extremely expensive. |
|
| Min. requirements: 400+ DPS Optional affixes: Bow Attacks fire an additional Arrow +# to Level of all Projectile Skills +# to Dexterity |
|
 (Quiver) Rare Quiver - on your Quiver, you should look for increases to Projectile Damage or Speed, and additional Projectile Gem Levels. Additional Dexterity is also very valuable here. (Quiver) Rare Quiver - on your Quiver, you should look for increases to Projectile Damage or Speed, and additional Projectile Gem Levels. Additional Dexterity is also very valuable here. |
|
| Min. requirements: 40% increased Damage with Bow Skills 40% increased Projectile Speed Optional affixes: Adds # to # Physical Damage to Attacks Dexterity +# to Level of all Projectile Skills |
|
 (Amulet) Rare Amulet - here you can look for Projectile Gem Levels, increases to Energy Shield, maximum Life, and Resistances. You will also need Mana and Attributes. (Amulet) Rare Amulet - here you can look for Projectile Gem Levels, increases to Energy Shield, maximum Life, and Resistances. You will also need Mana and Attributes. |
|
| Min. requirements: +100 to maximum Life +50% total Resistance Optional affixes: #% increased Mana Regeneration Rate #% increased maximum Energy Shield +# to maximum Mana +# to Level of all Projectile Skills |
|
 (Ring) Rare Ring - look for lots of maximum Life, Resistance, and Mana Regeneration Rate. You can also get a decent amount of flat Damage for Attacks here, but it is not very impactful. (Ring) Rare Ring - look for lots of maximum Life, Resistance, and Mana Regeneration Rate. You can also get a decent amount of flat Damage for Attacks here, but it is not very impactful. |
|
| Min. requirements: +100 to maximum Life +50% total Resistance Optional affixes: #% increased Mana Regeneration Rate Adds # Physical Damage to Attacks |
|
 (Ring) Ming's Heart - this Ring lowers your survivability, but greatly enhances your Damage. It is not recommended for regular Mapping, as you won't have problems with DPS anyway. (Ring) Ming's Heart - this Ring lowers your survivability, but greatly enhances your Damage. It is not recommended for regular Mapping, as you won't have problems with DPS anyway. |
|
| +(7–13)% to Chaos Resistance 20% reduced maximum Life Gain (30–40)% of Damage as Extra Chaos Damage 30% reduced Global Defences |
|
 (Belt) Rare Belt - look for maximum Life, lots of Resistance, and optionally Strength and Mana. Additional Charm slots are also useful. (Belt) Rare Belt - look for maximum Life, lots of Resistance, and optionally Strength and Mana. Additional Charm slots are also useful. |
|
| Min. requirements: +150 to maximum Life +100 to maximum Mana +50% total Elemental Resistance Optional affixes: Strength +# Charm slots |
|
 (Helmet) Rare Helmet - use a Helmet with lots of Energy Shield, maximum Life, and Resistance. It should also provide Mana or Intelligence. (Helmet) Rare Helmet - use a Helmet with lots of Energy Shield, maximum Life, and Resistance. It should also provide Mana or Intelligence. |
|
| Min. requirements: +150 to maximum Life +150 Energy Shield +50% total Elemental Resistance Optional affixes: Attributes Mana |
|
 (Body Armour) Rare Armour - on your Body Armour look for a high amount of Energy Shield and Evasion Rating, as well as maximum Life and Resistance. (Body Armour) Rare Armour - on your Body Armour look for a high amount of Energy Shield and Evasion Rating, as well as maximum Life and Resistance. |
|
| Min. requirements: +1000 to Evasion Rating +250 to Energy Shield +150 to maximum Life Optional affixes: #% total Elemental Resistance +# to Spirit |
|
 (Gloves) Snakebite - as a Pathfinder, those Gloves increase your Poison limit by 2. It is the best option for your Damage in most situations. (Gloves) Snakebite - as a Pathfinder, those Gloves increase your Poison limit by 2. It is the best option for your Damage in most situations. |
|
| (40–60)% increased Evasion Rating +(7–17)% to Chaos Resistance (6–10) Life Regeneration per second (20–30)% chance to Poison on Hit Targets can be affected by +1 of your Poisons at the same time |
|
 (Gloves) Plaguefinger - with those you can use Elemental Damage to inflict Poison. They are very useful in Maps with the Burning Ground effect, as it instantly detonate your Gas Clouds. (Gloves) Plaguefinger - with those you can use Elemental Damage to inflict Poison. They are very useful in Maps with the Burning Ground effect, as it instantly detonate your Gas Clouds. |
|
| (30–50)% increased Evasion and Energy Shield (4–6)% increased Attack Speed (20–30)% chance to Poison on Hit All Damage from Hits Contributes to Poison Magnitude |
|
 (Boots) Rare Boots - look for Boots with high Movement Speed, maximum Life, Energy Shield, and Resistance. It can also lower the Duration of Freeze on you. (Boots) Rare Boots - look for Boots with high Movement Speed, maximum Life, Energy Shield, and Resistance. It can also lower the Duration of Freeze on you. |
|
| Min. requirements: 30% Movement Speed +100 to maximum Life +100 Energy Shield +30% total Elemental Resistance Optional affixes: Attributes % reduced Freeze Duration on you |
|
 (Jewel) Rare Jewel - get at least one Jewel with Mana on Kill modifier. Other than that they should provide Poison or Ailment Magnitude. Lastly, they can boost your Energy Shield, Evasion Rating, or increase your Damage a bit. (Jewel) Rare Jewel - get at least one Jewel with Mana on Kill modifier. Other than that they should provide Poison or Ailment Magnitude. Lastly, they can boost your Energy Shield, Evasion Rating, or increase your Damage a bit. |
|
| Min. requirements: % increased Magnitude of Damaging Ailments you inflict % increased Magnitude of Poison you inflict Recover #% Mana on Kill % increased Projectile Speed % increased Damage % increased maximum Energy Shield |
|
|
If you have any other build requests please leave that in the comments below. We are always open to suggestions and constructive feedback.
Pictures used in this article are the intellectual property of Grinding Gear Games.


