Galvanic Shards Tactician POE 2 Build
A fast Galvanic Shards Tactician build that fires chaining elemental shards, turning the crossbow into a relentless screen‑clearing tool.Galvanic Shards
Tactician Build
Updated for Path of Exile 2 Early Access
The Best Crafty Guides by Odealo
| Guide notes |
| June 30, 2026 - Created for Early Access Patch 0.5.0 |
| Build Overview | |||
| Tags: [CRIT] [ELEMENTAL] [CROSSBOW] [PROJECTILE] | |||
|
Budget: Defenses: |
|
Boss DPS: AoE: |
|
This Galvanic Shards Tactician focuses on fast crossbow gameplay, firing chaining elemental shards that erase packs instantly. Thanks to A Solid Plan, the build stacks many auras for huge passive damage and defense boosts. With Trinity, every shot deals fire, cold and lightning damage, creating explosive, consistent clear.
The core loop revolves around rapid shard volleys that bounce between enemies, scaling through crit, auras and chain mechanics. By dealing fire, cold and lightning damage, the build fully leverages Trinity’s Affinity system for extra elemental scaling. For single target, Stormblast Bolts fire salvos that leave shards on the ground, which are then detonated by your Mirage Archer for heavy burst.
Survivability while mapping is excellent thanks to Tactician’s Pin, which locks enemies in place and prevents them from acting during mapping. Most packs never retaliate, making the build feel safe and controlled. Combined with stacked auras and layered mitigation, it stays stable even in dense encounters.
The build is affordable at the start, but scales extremely well with investment. Better crossbows, aura‑boosting uniques and high‑end crit gear push its damage and safety much higher. Each upgrade improves chaining, elemental output and evasion reliability, turning it into a top‑tier crossbow setup.
You can also check our other Path of Exile 2 builds right over here Odealo's Crafty Guides - Full List
1. Gameplay
The clear loop is fast, simple and extremely consistent. You move through the map, fire all loaded bolts to unleash chaining Galvanic Shards, then dodge roll to instantly reload and repeat the cycle. Herald of Thunder adds extra hits during mapping, helping maintain Affinity gain and contributing to the overall screen‑wide clear. The result is a smooth, explosive rhythm: shoot, roll, reload, and watch entire packs disappear before they can act.
For bosses, you fire Stormblast Bolts, leaving volatile bolts on the ground that store your damage. Once the setup is complete, you dodge roll so your Mirage Archer can detonate them using Explosive Shot, creating repeated high‑impact blasts. This combination of pre‑placed Stormblast shards and automated detonations gives the build strong, reliable single‑target damage while you stay mobile and safe.
|
|

2. Build's PROS & CONS
| PROS |
|
| CONS |
|
3. Leveling tips
You can level this build in a few different ways depending on what feels smoother for you. The first option is to start with Grenades - they have good early damage, easy rotation and don’t require any setup. Another strong alternative is using Permafrost Bolts together with Fragmentation Rounds, which gives stable clear and solid single‑target throughout the campaign.
Once you reach maps and have access to your core gems, auras and crossbow setup, you can safely transition into the final Galvanic Shards Tactician configuration.
4. Final Skill Tree, Ascendancy Points, and Pantheon
Final Skill Tree:
 |
|
Click on the image to open the Passive Tree preview in a new window, or use the Path of Building (PoB) tool, |
Ascendancy points:
Preferably in this order:
- Suppressing Fire
- Right Where We Want Them
- A Solid Plan
- Polish That Gear
5. Final Gems links
| [DPS] Galvanic Shards setup | |
 |
Galvanic Shards - fires charged bolts that fragment mid‑air, releasing chaining lightning beams that wipe packs in a smooth, explosive rhythm. We support it with Dominus' Grasp for more chains, Elemental Armament for more damage, Fork for our projectiles to fork, Garukhan's Resolve for interesting interaction with Critical Strikes, and Ratha's Assault so we can reload while dodging. |
 |
Dominus' Grasp |
 |
Elemental Armament II |
 |
Fork |
 |
Garukhan's Resolve |
 |
Ratha's Assault |
| [DPS] Stormblast Bolts setup | |
 |
Stormblast Bolts - single‑target tool that fires short salvos leaving volatile shards on the ground. Those shards are then detonated by your Mirage Archer with Explosive Shot, creating reliable burst damage. |
 |
Rakiata's Flow |
|
Elemental Armament |
 |
Concentrated Area |
 |
Close Combat II |
 |
Blindside |
| [DPS] Mirage Archer setup | |
 |
Mirage Archer - it's a meta skill that triggers when you dodgeroll. It will create a Mirage that uses a socketed gem for a few seconds and then vanishes. |
 |
Explosive Shot - a flaming bolt that explodes on impact. We use it to detonate lingering Stormblast Bolts. We support it with Magnified Area to increase area of effect and Blind to inflict Blind for Stormblast Bolts's Blindside |
 |
Prolonged Duration II |
 |
Cooldown Recovery II |
 |
Magnified Area II |
 |
Blind II |
| [Utility] Herald of Thunder setup | |
 |
Herald of Thunder - adds extra lightning hits which amplify your clear. We support it with Elemental Armament for more damage, Armour Explosion for massive screen clearing, Deadly Herald for more Herald damage, Magnified Area for bigger area of effect and Longshot to deal more damage the further the chain travels. |
|
Elemental Armament II |
 |
Armour Explosion |
 |
Deadly Herald |
|
Magnified Area II |
 |
Longshot II |
| [DPS] Trinity setup | |
 |
Trinity - gives us a big elemental damage boost as long as we keep triggering all three elements and maintain Affinity. We support it with any of the elemental Mastery supports and Uhtred's Omen to grant Trinity even more levels. |
 |
Fire/Cold/Lightning Mastery |
 |
Uhtred's Omen |
| [Utility] Wind Dancer setup | |
 |
Wind Dancer - build up stages of Wind Dancer that grant more Evasion each. Lose all on getting Hit, and knockback nearby enemies. We support it with Elemental Armaments to deal slightly more damage, Magnified Area for bigger area of effect of knockback, Blind to debuff enemies, Ambush and Close Combat for even more damage of the knockback. |
|
Elemental Armaments II |
|
Magnified Area II |
|
Blind II |
 |
Ambush |
|
Close Combat II |
| [Utility] Berserk setup | |
 |
Berserk - massively boosts our Rage effect, giving as more attack damage at the cost of losing 0,1% life per Rage every second. |
 |
Precision II |
 |
Cannibalism II |
 |
Herbalism II |
| [Utility] Eternal Rage setup | |
 |
Eternal Rage - while active, you constantly regenerate Rage. We support it with Vitality to amplify our Recovery of Life per second and Clarity to increase our Mana Regeneration Rate. |
 |
Vitality II |
 |
Clarity II |
| [Utility] Combat Frenzy setup | |
 |
Combat Frenzy - while active, grants a Frenzy Charge when we Pin enemies. We support it with Charge Profusion so it grants us more Charges, Vitality for even more Life Regen and Cool Headed for 50% less ignite duration on you. |
 |
Charge Profusion II |
|
Vitality II |
 |
Cool Headed |
| [Utility] Charge Regulation setup | |
 |
Charge Regulation - grants us many buffs by consuming our Charges every few seconds. We support it with Precision to increase our Accuracy Rating, Strong Hearted and Warm Blooded for less duration of Shock and Freeze on us. |
 |
Precision |
 |
Strong Hearted |
 |
Warm Blooded |
|
|
6. Gear Setup
Core uniques such as Morior Invictus and Alpha’s Howl provide essential Spirit, while rares fill out missing attributes, speed and elemental damage. The better your rare items stats are, the stronger the build becomes - but it already functions perfectly with just Morior Invictus, Alpha’s Howl and Painter’s Servant.
|
Stat priorities on items:
|
 (Weapon) Rare Crossbow - straightforward item, high Crit Chance, strong Elemental Flat damage, and increased Elemental Damage with Attacks will make your Galvanic Shards unstoppable. (Weapon) Rare Crossbow - straightforward item, high Crit Chance, strong Elemental Flat damage, and increased Elemental Damage with Attacks will make your Galvanic Shards unstoppable. |
|
| Min. requirements: +4% to Critical Hit Chance high Elemental Flat Damage 100% increased Elemental Damage with Attacks Optional affixes: +# to level of all Attack Skills #% chance to gain Onslaught on Killing Hits with this Weapon |
|
 (Weapon) Alpha's Howl - big source of Spirit, enables few more auras and supports for us. (Weapon) Alpha's Howl - big source of Spirit, enables few more auras and supports for us. |
|
| (80—100)% increased Evasion Rating +100 to Spirit +(50—75)% to Cold Resistance Presence Radius is doubled |
|
 (Boots) Morior Invictus - incredibly strong body armour and your best in slot. If you’re on a higher budget, look for a 5‑socket Morior. (Boots) Morior Invictus - incredibly strong body armour and your best in slot. If you’re on a higher budget, look for a 5‑socket Morior. |
|
| (300—400)% increased Armour, Evasion and Energy Shield +(10—14) to Spirit per Socket filled Recommended other mods: +(45—60) to maximum Life per Socket filled +(8—10)% to all Elemental Resistances per Socket filled +(10—13)% to Chaos Resistance per Socket filled (9—12)% increased Global Armour, Evasion and Energy Shield per Socket filled |
|
 (Focus) Painter's Servant - easily solves our elemental distribution problem that comes with playing Trinity (Focus) Painter's Servant - easily solves our elemental distribution problem that comes with playing Trinity |
|
| Gain (5—10)% of Elemental Damage as Extra Cold Damage Gain (5—10)% of Elemental Damage as Extra Fire Damage Gain (5—10)% of Elemental Damage as Extra Lightning Damage 33% of Elemental Damage Converted to Cold Damage 33% of Elemental Damage Converted to Fire Damage 33% of Elemental Damage Converted to Lightning Damage |
|
 (Amulet) Rare Amulet - preferably Solar Amulet, we absolutely need a large amount of spirit, Life and some offensive modifiers. (Amulet) Rare Amulet - preferably Solar Amulet, we absolutely need a large amount of spirit, Life and some offensive modifiers. |
|
|
Min. requirements: |
|
 (Ring) Breach Rare Ring - huge offensive slot, which we can fill with Elemental Flat Damage and the apply Catalyst for attack (Ring) Breach Rare Ring - huge offensive slot, which we can fill with Elemental Flat Damage and the apply Catalyst for attack |
|
| Min. requirements: high Elemental Flat Damage Optional affixes: # to maximum Life #% increased Rarity of Items Found #% total Elemental Resistances #% to Chaos Resistances |
|
 (Left Ring) Rare Ring - we need a lot of resistances from this ring, other than that you can fill it with flat Elemental, Rarity and Life (Left Ring) Rare Ring - we need a lot of resistances from this ring, other than that you can fill it with flat Elemental, Rarity and Life |
|
|
Min. requirements: |
|
 (Belt) Headhunter - while on a higher budget, this belt is a solid choice to further speed up our mapping. (Belt) Headhunter - while on a higher budget, this belt is a solid choice to further speed up our mapping. |
|
|
+(40—60) to maximum Life |
|
 (Belt) Rare Belt - while on a budget a rare belt will do its job too. (Belt) Rare Belt - while on a budget a rare belt will do its job too. |
|
| Min. requirements: 90% total Elemental Resistance +90 to maximum Life Optional affixes: #% increased Rarity of Items found +# to Attributes #% to Chaos Resistances |
|
|
|
|
| Min. requirements: 30% increased Movement Speed +100 to maximum Life 100% total Elemental Resistances Optional affixes: % increased Rarity of Items found +#% to Chaos Resistances #% increased Evasion Rating |
|
 (Jewel) Heart of the Well - we need 2 of Gain #% of Damage as Extra Elemental Damage from this jewel, and the last one we'll get from the Against the Darkness Time-Lost so we don't ruin our Trinity setup. Be careful not to duplicate the same modifier on these two jewels. (Jewel) Heart of the Well - we need 2 of Gain #% of Damage as Extra Elemental Damage from this jewel, and the last one we'll get from the Against the Darkness Time-Lost so we don't ruin our Trinity setup. Be careful not to duplicate the same modifier on these two jewels. |
|
| Recomended Modifiers: Gain (9—15)% of Damage as Extra Lightning Damage Gain (9—15)% of Damage as Extra Fire Damage Gain (9—15)% of Damage as Extra Cold Damage |
|
 (Jewel) Agains the Darkness - as mentioned in the Heart of the Well section we need 1 of the missing Damage as Extra element modifier. (Jewel) Agains the Darkness - as mentioned in the Heart of the Well section we need 1 of the missing Damage as Extra element modifier. |
|
| Notable Passive Skills in Radius also grant Gain (2—4)% of Damage as Extra Cold Damage Notable Passive Skills in Radius also grant Gain (2—4)% of Damage as Extra Fire Damage Notable Passive Skills in Radius also grant Gain (2—4)% of Damage as Extra Lightning Damage |
|
 (Jewel) Prism of Belief - very strong jewel because + levels to all Galvanic Shards skills translates directly into a huge damage increase (Jewel) Prism of Belief - very strong jewel because + levels to all Galvanic Shards skills translates directly into a huge damage increase |
|
| +3 to Level of all Galvanic Shards Skills | |
| (Jewel) Heart of the Well - as in almost every build, a fantastic jewel choice. Whether you hit extra Chaos, Crit, Movement Speed, or ES, it always delivers value. |
|
|
Recomended Modifiers: |
|
 (Jewel) Undying Hate - we use it to transform the Vaal Pact keystone on the passive tree into the Amanamu version. (Jewel) Undying Hate - we use it to transform the Vaal Pact keystone on the passive tree into the Amanamu version.To enable this conversion, the jewel must have the “in tribute to Amanamu” modifier |
|
| Glorifying the defilement of (79—30977) souls in tribute to Amanamu Passives in radius are Conquered by the Abyssals Desecration makes this item unstable Historic |
|
 (Jewel) Rare Jewel - socket similar jewels in every slot you can. (Jewel) Rare Jewel - socket similar jewels in every slot you can. |
|
| Recomended Modifiers: (6—16)% increased Critical Hit Chance for Attacks (10—20)% increased Critical Damage Bonus for Attack Damage (10—20)% increased Damage with Hits against Rare and Unique Enemies (2—4)% increased Attack Speed |
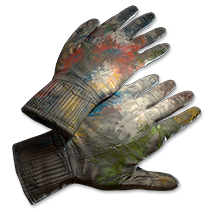
 (Gloves) Rare Boots - typical evasion boots, nothing supprising here, just Movement Speed, Life and Resistances.
|
|
If you have any other build requests please leave that in the comments below. We are always open to suggestions and constructive feedback.
Pictures used in this article are the intellectual property of Grinding Gear Games.