Flicker Strike Martial Artist POE 2 Build
Martial Artist, fueled by Power Charges, with insane mobility and damage on Flicker Strike and Falling Thunder.Flicker Strike
Martial Artist Build
Updated for Path of Exile 2 Early Access
The Best Crafty Guides by Odealo
| Guide notes |
| June 15, 2026 - Created for Early Access. |
| Build Overview | |||
| Tags: [MELEE] [ELEMENTAL] [ENERGY SHIELD] | |||
|
Budget: Defenses: |
|
Boss DPS: AoE: |
|
The build uses Flicker Strike with Falling Thunder to deal extremely high damage by expending Power Charges on them. These Power Charges are generated with Shattering Palm. We have to link it with Living Lightning, Culmination, and Ailith's Chimes for that to work. The Minions spawned by this skill will generate Combo at a rapid pace, which can be spent with the same skill after linking it with Culmination. Ailith's Chimes provides a Chance to get Power Charges the more Combo you've built up. There are several other sources of Power Charges, all much less reliable, and a high chance to retain these Charges after using a Skill that consumes them, so the build rarely runs out of fuel. We have selected Flicker Strike as it's fast and great at dashing through the map, and Falling Thunder because of its damage, which is the best in such a setup. It scales really well with Maximum Power Charges and Critical Hit enhancements. The damage is further improved with Charged Staff and Mantra of Destruction; the clear speed is great thanks to the Herald of Ice. Defensively, the build takes advantage of the ES starting to recharge with almost no delay; thus it can specialise in Energy Shield with Chaos Inoculation. Add to that Evasion to avoid getting hit.
For the ascendancy, pick Martial Artist. Martial Adept allows you to build up Combo twice as fast, and hasten up the ES Recharge Delay. Down this branch you can find Martial Master that enables the whole Living-Lightning/Shattering-Palm-Combo-Generating technique. Way of the Stonefists transforms your Gloves into ones that offer better possibilities for more damage. Lastly, Runic Meridians lets you socket additional Runes into the character.
You can also check our other Path of Exile 2 builds right over here Odealo's Crafty Guides - Full List
1. Gameplay
Start a map with Shattering Palm and use it once again later to spend Combo and generate Power Charges. These should be spent on Charged Staff for a buff that lasts for around a minute. Generate Charges again to spend them on Flicker Strike or Falling Thunder, whichever is more suitable at that time. If in need of more damage, cast Mantra of Destruction to Empower your next attack and get a buff for a lot of extra Chaos Damage. Herald of Ice, Wind Dancer, Charge Regulation, and Spirit Vessel work in the background.
|
|
|
|

2. Build's PROS & CONS
| PROS |
|
| CONS |
|
3. Leveling tips
The build will not work until you do the second ascendancy, but even then, we do not recommend jumping into it right away. You need to start smaller. We do, however, recommend starting with Falling Thunder, but the Charges for it will be clumsily generated with Wyvern's Devour or Killing Palm. To kill the Act 1 boss, prime him for Stun with a Skill that will build up Stun quicker (use Support Gems like Brink and Stun) and use Wing Blast to get Power Charges. In Act 2, you'll unlock much better sources of Power Charges like Lingering Illusion or Siphoning Strike. Cold Damage improved with Frost Bomb to inflict Exposure. For unique items, we recommend Grip of Winter Gloves and Pillar of the Caged God Staff, if you have Rings with added flat damage and other items with Attributes.
| various skills | |
 |
Devour - Generates Power Charges by culling enemies or eating their corpses. |
 |
Herald of Thunder - Extra Damage and improved clear speed on builds with Lightning Damage. |
 |
Wing Blast - Use it against enemies that are Primed for Stun (are nearly Stunned) to get Power Charges. |
 |
Frost Bomb - Cold Damage with Cold Exposure. |
| [DPS] Rend setup | |
 |
Rend - A Wyvern Skill that can consume a Power Charge to gain extra damage. Can be replaced with any other Quarterstaff Attack |
 |
Rage |
 |
Brink |
| [DPS] Falling Thunder setup | |
 |
Falling Thunder |
 |
Elemental Armament |
 |
Perpetual Charge |
4. Final Skill Tree, Ascendancy Points, and Pantheon
Final Skill Tree:
 |
|
Click on the image to open the Passive Tree preview in a new window Or import the build into PoB: |
Ascendancy points:
Preferably in this order:
- Way of Stonefists
- Martial Adept
- Martial Master
- Runic Meridians
5. Final Gems links
| [DPS] Flicker Strike setup | |
 |
Flicker Strike - Dash to a nearby enemy and Strike them. It can consume a Power Charge to perform this skill two times more, nearly instantly. |
|
Perpetual Charge |
 |
Close Combat |
 |
Hit and Run |
 |
Concentrated Area |
 |
Blindside |
| [UTILITY] Shattering Palm setup | |
 |
Shattering Palm - Another Strike-Dash, but in contrast to Flicker Strike, it generates Power Charges thanks to its Support Gems. It also coats enemies in Ice, so that they will explode on kill. Use it with Combo. |
 |
Ailith's Chimes |
 |
Culmination |
 |
Charge Profusion |
 |
Living Lightning |
|
Rage |
| [UTILITY] Herald of Ice setup | |
 |
Herald of Ice - A passive Herald Buff that causes Frozen enemies to Shatter on kill, dealing Cold Area Damage, which immensely improves clear speed. |
 |
Elemental Focus |
 |
Magnified Area |
 |
Longshot |
|
Elemental Armament |
 |
Cold Mastery |
| [DPS] Falling Thunder setup | |
 |
Falling Thunder - A Melee Slam that fires Projectiles if able to consume Power Charge. You will use it instead of Flicker Strike against bosses, or if there are too many enemies nearby to handle, and to reach ones that are further away. |
|
Culmination |
 |
Nova Projectiles |
 |
Ricochet |
|
Elemental Armament |
|
Blindside |
| [UTILITY] Charged Staff setup | |
 |
Charged Staff - A Buff that consumes all your Power Charges to add Lightning Damage to all Attacks, and fires Shockwaves on Attack, for 6 seconds per one Power Charge consumed. It will last a long time; be sure it's always on. |
 |
Oisín's Oath |
 |
Prolonged Duration |
 |
Blazing Critical |
 |
Blind |
 |
Thrill of the Kill |
| [UTILITY] Mantra of Destruction setup | |
 |
Mantra of Destruction - Spend your Combo to Empower your next Attack with tons of extra Chaos Damage. For each enemy killed with this Empowered Attack, you gain a Purple Flame of Chayula, which adds extra Chaos Damage and lasts 20 seconds. |
 |
Delayed Gratification |
|
Prolonged Duration |
 |
Mobility |
 |
Chaos Mastery |
| [UTILITY] Wind Dancer setup | |
 |
Wind Dancer - Build up stages of Wind Dancer that grant more Evasion each. Lose all on getting Hit, and knock back nearby enemies. |
 |
Maim |
|
Magnified Area |
 |
Knockback |
 |
Freeze |
| [UTILITY] Charge Regulation setup | |
 |
Charge Regulation - Periodically consumes Charges to get you a Buff. Power Charges grant more Critical Hit Chance, but sometimes you also generate Endurance and Frenzy Charges, which grant more Defences and increase Skill Speed. |
 |
Clarity |
| [UTILITY] Spirit Vessel setup | |
 |
Spirit Vessel - Summons a Companion. It won't do much, but that can be adjusted with Support Gems, which redirect some of the incoming damage to the Minion and grant you various buffs. It comes from the Forgotten Warden Body Armour. |
 |
Romira's Requital |
 |
Catha's Brilliance |
 |
Amanamu's Tithe |
 |
Hulking Minions |
 |
Meat Shield |
|
|
6. Gear Setup
The build specialises in Cold Damage, with added Lightning and Chaos Damage, with even some Fire Damage - all from Skills. However, the base damage depends mainly on the Staff and Gem Level of Charged Staff, and all that's on top is extra. For the Weapon, Rings, Amulet, and Gloves (more on that in the Gloves section), we will prioritise maximising Added Cold, Lightning, and Fire Damage with Gem Levels for Melee Skills. Then, get Critical Hit Chance and Critical Damage Bonus. Lastly, try to obtain increases to Elemental Damage, Elemental Penetration, and Damage as Extra Damage. Defensively, the build relies solely on Energy Shield and Evasion. With Chaos Inoculation, it's quite important to get a lot of these defences and pay no mind to Maximum Life. Spirit is also not needed, unless you want to include Ghost Dance. To gain Power Charges, besides using Shattering Palm, we can invest in items like Nascent Hope, Desecrated mod on Rare Fists of Stone Gloves, and Anoint the Amulet with Thaumaturgic Generator or Lust for Power. Don't forget to have one source of Mana Leech.
|
Stat priorities on items:
|
 (Helmet) Rare Helmet - On a Helmet, try to get lots of Energy Shield, because it grants Evasion with Subterfuge Mask notable, or go for a mixed ES-Evasion Helmet if your budget allows for it. For Suffixes, get Increased Crit Chance and Resistances. (Helmet) Rare Helmet - On a Helmet, try to get lots of Energy Shield, because it grants Evasion with Subterfuge Mask notable, or go for a mixed ES-Evasion Helmet if your budget allows for it. For Suffixes, get Increased Crit Chance and Resistances. |
|
| Min. requirements: 300 Energy Shield +40% total Elemental Resistance Optional affixes: increased Critical Hit Chance Accuracy Rating |
|
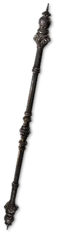 (Weapon) Rare Quarterstaff - On a Staff, prioritise added flat Elemental Damage, primarily Cold and Lightning, alongside Gem Levels for all Melee Skills, then try to score high increased Elemental Damage, Attack Speed, and Critical Hit Chance. Critical Damage Bonus will be great. Physical Damage is not really relevant. (Weapon) Rare Quarterstaff - On a Staff, prioritise added flat Elemental Damage, primarily Cold and Lightning, alongside Gem Levels for all Melee Skills, then try to score high increased Elemental Damage, Attack Speed, and Critical Hit Chance. Critical Damage Bonus will be great. Physical Damage is not really relevant. |
|
| Min. requirements: +4 to Level of all Melee Skills Added Elemental Damage increased Attack Speed Critical Hit Chance Optional affixes: Critical Damage Bonus increased Elemental Damage with Attacks Gain #% of Damage as Extra Cold Damage (Essence Prefix) |
|
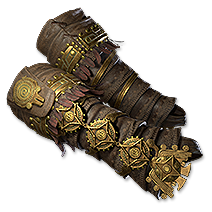 (Gloves) Rare Gloves - Your Gloves will be transformed with Way of the Stonefist, and it's one of the most important gear pieces. You're looking for the "damage as extra Elemental Damage" (that's added Damage on regular gloves) on Prefixes, or Evasion and ES if you want defences. On Suffixes, you want Onslaught on Hit (increased Attack Speed) and Resistances or Gem Quality (Level) of Melee Skills. You can also go for Desecrated Arcane Surge on Crit and turn it into Power Charge on Crit, or turn Cast Speed on Full Life into Attack Speed. (Gloves) Rare Gloves - Your Gloves will be transformed with Way of the Stonefist, and it's one of the most important gear pieces. You're looking for the "damage as extra Elemental Damage" (that's added Damage on regular gloves) on Prefixes, or Evasion and ES if you want defences. On Suffixes, you want Onslaught on Hit (increased Attack Speed) and Resistances or Gem Quality (Level) of Melee Skills. You can also go for Desecrated Arcane Surge on Crit and turn it into Power Charge on Crit, or turn Cast Speed on Full Life into Attack Speed. |
|
| Min. requirements: Adds # Elemental Damage to Attacks Level of all Melee Skills increased Critical Damage Bonus for Attack Damage Optional affixes: Elemental Resistances increased Evasion and Maximum Energy Shield chance to Gain Arcane Surge when you deal a Critical Hit (Desecrated Suffix) increased Attack Speed increased Cast Speed when on Full Life (Desecrated Suffix) |
|
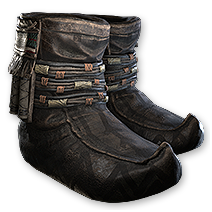 (Boots) Rare Boots - On Boots focus on Movement Speed, Elemental Resistances, and Evasion mixed with Maximum Energy Shield. Try to get as much of these as you can afford. (Boots) Rare Boots - On Boots focus on Movement Speed, Elemental Resistances, and Evasion mixed with Maximum Energy Shield. Try to get as much of these as you can afford. |
|
| Min. requirements: high Evasion and Energy Shield +70% total Elemental Resistances 30% increased Movement Speed Optional affixes: Skills have #% chance to not remove Charges but still count as consuming them (Uhtred's Sidereus Suffix) |
|
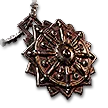 (Amulet) Rare Amulet - On Amulets, we don't need Spirit or Maximum Life, so Prefixes can be entirely designated for Evasion and Energy Shield. For Suffixes, look for Critical Hit Chance, Critical Damage, Bonus, and Gem levels for Melee Skills, of course. (Amulet) Rare Amulet - On Amulets, we don't need Spirit or Maximum Life, so Prefixes can be entirely designated for Evasion and Energy Shield. For Suffixes, look for Critical Hit Chance, Critical Damage, Bonus, and Gem levels for Melee Skills, of course. |
|
| Min. requirements: +3 to Level of all Melee Skills Optional affixes: Elemental Resistance increased Critical Hit Chance for Attacks increased Critical Damage Bonus Maximum Energy Shield increased Maximum Energy Shield increased Evasion Anointment: Thaumaturgic Generator Critical Exploit Well of Power Lust for Power |
|
 (Ring) Rare Ring - On Rings, definitely go for added Elemental Damage (preferably all three types, high tier each), and add Elemental Resistances or Attributes, whichever you need more. Also, get Mana Leech here. (Ring) Rare Ring - On Rings, definitely go for added Elemental Damage (preferably all three types, high tier each), and add Elemental Resistances or Attributes, whichever you need more. Also, get Mana Leech here. |
|
| Min. requirements: Elemental Resistances Adds # Elemental Damage to Attacks Leech #% of Physical Attack Damage as Mana Optional affixes: Attributes Mana on Kill increased Cold Damage |
|
 (Belt) Shavronne's Satchel - Since we have poor ES recovery, and we rely on it entirely, Shavronne's Satchel makes a lot of sense. With it, you can use Life Flask to Recover ES. (Belt) Shavronne's Satchel - Since we have poor ES recovery, and we rely on it entirely, Shavronne's Satchel makes a lot of sense. With it, you can use Life Flask to Recover ES. |
|
| Has (1-3) Charm Slots Flasks gain 0.17 charges per Second (30-20)% reduced Flask Life Recovery rate +(20-30) to Intelligence (20-30)% increased Flask Charges gained Life Recovery from Flasks also applies to Energy Shield |
|
 (Body Armour) Forgotten Warden - Grants dynamic Deflection Rating, Evasion with Energy Shield, and the unique Spirit Vessel Skill. It's a defensive tool we use to shift some of the damage to be taken by the animal from this Skill. It may not look like much, but it is quite powerful. Socket the Idol of Eramir here. (Body Armour) Forgotten Warden - Grants dynamic Deflection Rating, Evasion with Energy Shield, and the unique Spirit Vessel Skill. It's a defensive tool we use to shift some of the damage to be taken by the animal from this Skill. It may not look like much, but it is quite powerful. Socket the Idol of Eramir here. |
|
| Grants Skill: Level (17-20) Spirit Vessel +(70-100) to Deflection Rating per 50 missing Energy Shield (200-300)% increased Evasion and Energy Shield +(20-30) to Dexterity Companions have (30-50)% increased maximum Life (10-15)% of Damage from Deflected Hits is taken from Damageable Companion's Life before you |
|
 (Jewel) Rare Jewels - Sapphires are the best. Here, get Maximum Energy Shield, Critical Hit mods, increased Damage, and maybe Mana on Kill if you struggle with Mana sustain. (Jewel) Rare Jewels - Sapphires are the best. Here, get Maximum Energy Shield, Critical Hit mods, increased Damage, and maybe Mana on Kill if you struggle with Mana sustain. |
|
| Optional affixes: increased Energy Shield increased Critical Hit Chance increased Critical Damage Bonus Recover Mana on Kill increased Elemental/Elemental Damage increase Magnitude of Ailments you Inflict |
|
|
If you have any other build requests please leave that in the comments below. We are always open to suggestions and constructive feedback.
Pictures used in this article are the intellectual property of Grinding Gear Games.