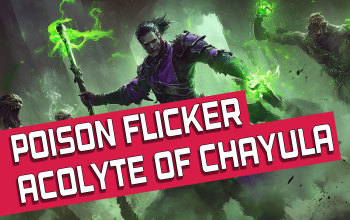
Flicker Strike Acolyte of Chayula Monk POE2 Build
An unconventional take on the Flicker Strike ability that benefits from the Acolyte of Chayula's unique boonsPoison Flicker Strike
Acolyte of Chayula Monk Build
Updated for Path of Exile 2 Early Access
The Best Crafty Guides by Odealo
| Guide notes |
| February 04, 2025 - Created for Early Access. |
| Build Overview | |||
| Tags: [MELEE] [POISON] [HYBRID] | |||
|
Budget: Defenses: |
|
Boss DPS: AoE: |
|
The Acolyte of Chayula is arguably one of the most underwhelming and unpopular classes in Path of Exile 2. Its mechanics seem clunky, its defenses are unreliable, and its offensive potential is overshadowed by many other classes that perform far better with less effort. It’s a class that struggles to find an identity, let alone an optimized playstyle - but that’s where this build comes in. Today, we’re taking a deep dive into a build that fully embraces the Acolyte of Chayula’s unique strengths and pushes them to their limit, turning what many consider a weak option into a viable, high-damage, and surprisingly effective playstyle. This build revolves around Flicker Strike - one of the game's most chaotic, inconsistent, yet potentially devastating movement-based Melee Attacks.
Flicker Strike isn’t fully polished yet, and its performance is all over the place. Sometimes, you’ll teleport through entire packs of enemies, shredding them instantly. Other times, the ability breaks after a single animation or locks onto a distant enemy, completely killing your momentum. This unpredictability makes Flicker Strike a risky choice, especially on a class that doesn’t have a strong safety net. But instead of fighting against these flaws, we’ve built around them - harnessing the Acolyte’s innate strengths in Chaos and Poison damage, pairing it with Tempest Flurry, and ensuring that our charge generation is as consistent as possible. This build doesn’t turn the Monk into a top-tier class, but it does make it a much more reasonable option - one that’s not just playable but genuinely fun. Let’s get into the details.
This Poison build aims at maximizing not only the potential of Acolyte of Chayula's bonus Chaos Damage but also the Mantra of Destruction buff, which applies only to a single Attack after accumulating sufficient Combo points. It's commonly used to buff the Tempest Bell, as the damage bonuses will apply to all consecutive hits on it, but similarly, it can massively boost the damage of all the additional Flicker Strike's strikes - and you can hit up 17 times with it. Well-timed Flicker Strike will easily build up 10 Purple Flames of Chayula stacks, giving you 140% extra gained Chaos Damage - even with relatively short duration, it can be still put to some good use.
Flicker Strike is but a finisher move, and has to be timed well, so you are going to deal with most enemies using Tempest Flurry. This build offers a similar playstyle to your regular Elemental Quarterstaff builds, but instead of stacking Herald Explosions, you are going to utilize spreading Poison and Plague debuffs using Herald of Plague and the corresponding Support Gem. Surprisingly enough, just the basic Attack will deal with most enemies and rares, and deal solid damage against Bosses too. For the defenses, this is a Hybrid build, with a high chance to Evade Attacks, 85% Chaos Resistance and a very good self-sustain thanks to the Chayula Flames, overall making it a very solid pick for any type of player.
You can also check our other Path of Exile 2 builds right over here Best PoE2 Build Guides by Odealo.com
1. Gameplay
You are going to play a typical Quarterstaff build, launching series of devastating Tempest Flurry combinations on your enemies, and generating Power Charges by Electrocuting enemies with the Lightning Damage from this skill or Herald of Thunder. You need to keep the Charged Staff buff active at all times, increasing your AoE and damage. All types of damage you deal will inflict Poison as you should use the Plaguefinger Gloves, making Tempest Flurry enough to deal with basically all enemies, but offering very little in terms of clear speed. Spreading Poison with Herald of Plague and by linking Charged Staff with Bursting Plague Support should help greatly in that regard. When you accumulate Power Charges, you can use Mantra of Destruction and then Flicker Strike to kill most of the enemies on your screen (assuming the targeting or the skill itself doesn't break). Against Bosses, you can also manually cast Sniper's Mark to get the necessary charges - to get your optimal rotation going.
|
|
|
|

2. Build's PROS & CONS
| PROS |
|
| CONS |
|
3. Leveling tips
You can begin with Tempest Flurry, as it works great even on lower levels. However, early on, you will not benefit that much from Critials and Poison, so it's recommended to just stick to Attack/Melee and Elemental Damage nodes. Getting Ghostwrithe is a great idea, since it grants you a very high effective health pool, and you can pick the Energy Shield nodes you are going to use later on anyway for a solid defensive boost. Some useful low-level Uniques are Goldrim with tons of Resistances or items like Surefooted Sigil and Wanderlust which massively boost your mobility. Also, try getting a Jewel with "Gain 1 Rage on Melee Hit" which grants a very high DPS bonus almost for free.
| [DPS] Tempest Flurry setup | |
 |
Tempest Flurry - Your damaging ability; it deals Lightning Damage, and it's particularly powerful against Bosses even on lower levels |
 |
Martial Tempo - grants 25% more Attack Speed, which helps you generate Combo Points, on top of offering the obvious DPS boost |
 |
Lightning Infusion - grants additional Lightning Damage to supported Attack, making it deal less Fire and Cold Damage |
 |
Concentrated Effect - increases your damage at the cost of reducing your AoE |
| [DPS] Tempest Bell setup | |
 |
Tempest Bell - deploy it when fighting Bosses or bigger packs. It basically multiples your damage, AoE, and spreads Elemental Ailments |
 |
Rage - grants some Rage on Hit |
 |
Font of Rage - generates Rage every second when you are near your Bell |
 |
Heavy Swing - more Damage with the Bell with no downside, since the Attack Speed is based on your own weapon not the skill itself |
| [UTILITY] Utility gems | |
 |
Herald of Thunder - improves your clear speed and converts damage. You will deal mainly Cold Damage at first, don't bother with Lightning Damage. |
 |
Conductivity - Curse skill that lowers the Lightning Resistance of affected enemies |
4. Final Skill Tree, Ascendancy Points, and Pantheon
Final Skill Tree:
 |
|
Click on the image to open the Passive Tree preview in a new window Or import the build into PoB: |
Ascendancy points:
Preferably in this order:
- Waking Dream
- Lucid Dreaming
- Reality Rending
- Chayula's Gift
5. Final Gems links
| [DPS] Tempest Flurry | |
|
Tempest Flurry - it's your primary Attack that will be used against pretty much all enemies to either kill them directly or generate Charges and Combo Points |
 |
Inspiration - reduces the Mana cost of linked skills allowing you to spam it effortlessly. If you have high Physical DPS and sufficient Leech, you can replace it with Gems to boost your Elemental Damage or Chance to Shock |
|
Martial Tempo - grants 25% more Attack Speed making it a core Support for this skill |
 |
Innervate - after killing Shocked enemies, you will gain a temporary buff that grants bonus Lightning Damage to all your Attacks |
|
Rage - generates Rage on Melee Hits with Tempest Flurry, increasing your Attack Damage |
 |
Practiced Combo - makes Tempest Flurry generate more Combo Points, which are used for Flicker Strike and Mantra of Destruction |
| [DPS] Flicker Strike | |
 |
Flicker Strike - consider it your finishing move which should be done when you have maximum stacks available, and can cast Mantra of Destruction, for simply devastating one-shots against Bosses and tougher enemies. You are looking to maximize the DPS of this skill as you are going to use it with delays |
 |
Combo Finisher - consumes 5 Combo Points on use, greatly increasing the damage of Flicker Strike |
 |
Inevitable Critical - grants a high bonus Crit Chance over time which is "consumed on use". Since you need proper timing, Combo Points, and Charges, you won't be using this ability constantly allowing you always to use Flicker with the maximum bonus from this Gem |
 |
Close Combat - with Flicker Strike, all enemies you hit will be in close melee range, so this is yet another extremely powerful Gem for this Skill |
 |
Rageforged - consumes 10 Rage if possible to boost the damage of the next Attack significantly |
|
Heavy Swing - less Attack Speed but much more Melee Damage. Flicker has a massive Attack Speed boost, so this downside is negligible. You can alternatively use  Perpetual Charge if you don't mind dealing more damage, but make the build feel less clunky Perpetual Charge if you don't mind dealing more damage, but make the build feel less clunky |
| [UTILITY] Mantra of Destruction setup | |
 |
Mantra of Destruction - a powerful buff Skill that empowers your next Melee Attack if you spend Combo Points. It is particularly powerful with Flicker Strike as the massive bonus will apply to all consecutive hits |
 |
Chaos Mastery - increases the level of Mantra Gem by 1 |
 |
Premeditation - Attacks empowered by the Mantra will deal 15% more Damage |
 |
Murderous Intent - Attacks empowered by the Mantra will gain Culling Strike |
| [UTILITY] Herald of Thunder setup | |
|
Herald of Thunder - this Herald is used to trigger Lightning Bolts after you kill Shocked enemies. In this build, it's used to Electrocute enemies with those Hits, generating Power Charges for your Flicker Strike |
 |
Lightning Infusion - Grants 25% of Damage as extra Lightning Damage, but deals 50% less Cold and Fire Damage |
 |
Lightning Mastery - Increases the Gem Level of Herald of Thunder |
 |
Electrocute - makes the skill inflict Electrocute instead of Shock - which Herald of Thunder can't anyway |
 |
Neural Overload - effectively increases the chances of Electrocuting enemies with Herald of Thunder |
| [UTILITY] Herald of Plague | |
 |
Herald of Plague - spreads the most powerful Poison from slain enemies increasing your clear speed. Unfortunately, there aren't any actual Support gems you can use here to boost the skill's effect |
| [UTILITY] Charged Staff setup | |
 |
Charged Staff - It empowers your weapon with added Lightning Damage and causes Shockwaves when you Attack. You must keep this buff up at all times, which spends your Power Charges. You can refresh its duration with max stacks even if you cast it with less |
 |
Persistence - increases Charged Staff's buff duration |
 |
Withering Touch - applies Withered on Hit, which increases Chaos Damage taken by enemies. It will be applied by the Shockwaves without reducing the DPS of your main Attacks |
 |
Bursting Plague - Poison inflicted by Shockwaves will apply a debuff that deals extra AoE damage when you kill enemies |
 |
Magnified Effect - optional Gem that increases the radius of the Shockwaves |
| [UTILITY] Wind Dancer setup | |
 |
Wind Dancer - grants a stackable buff that increases your Evasion Rating. The buff is removed when you are Hit, damaging enemies and knocking them back |
 |
Blind - Wind Dancer Blinds nearby enemies when it breaks. It makes enemies less Accurate and Evasive |
 |
Maim - Wind Dancer also Maims enemies, which reduces their Movement Speed |
 |
Culling Strike - Wind Dancers hit will instantly kill targets below a certain Life threshold |
| [UTILITY] Combat Frenzy setup | |
 |
Combat Frenzy - Grants a Power Charge when you Freeze, Electrocute or Pin an enemy. With Resonance Keystone allocated, it will generate Power Charges to fuel your other abilities |
 |
Profusion - gives a 50% chance to grant an additional Charge. If you are using Serpent's Egg, the bonus doesn't stack; and we are not sure if that is a bug or intended |
| [UTILITY] Sniper's Mark | |
 |
Sniper's Mark - when you Critically Strike a marked enemy, your Critical Damage bonus will be increased, and you will gain a Frenzy Charge (converted to Power Charge). Self-casting this ability against tougher Bosses will be your main Power Charge source |
 |
Arcane Tempo - increases the Cast Speed of Sniper's Mark |
 |
Ingenuity - reduces the cooldown of linked Skills, allowing you to cast Sniper's Mark more frequently |
| [UTILITY] Into the Breach | |
 |
Into the Breach - exclusive Buff available only to Acolyte of Chayula. It creates the Chayula Flames for various bonuses around your character. You don't need to activate this ability if you have the Ascendency point allocated, but it's worth noting that you can link various Persistent Buffs/Auras to it, without any extra reservation cost |
 |
Cannibalism - you recover 4% of your Life on kill |
 |
Clarity - increases Mana Regeneration Rate |
 |
Precision - increases your Accuracy Rating |
 |
Herbalism - increases Life Recovery from Flasks |
 |
Vitality - Regenerates 1% of your Maximum Life per second |
|
|
6. Gear Setup
This build is quite easy to assemble, as it mainly consists of generic Rares with defensive stats and high Physical Damage Weapon. The two only mandatory Uniques are low-level ones: Plaguefinger, which greatly increases the Poison DPS of your main Tempest Flurry Attack, and to some extent also Flicker Strike depending on your Rare Rings and their bonuses. It's also recommended to get Serpent's Egg which doubles your charge generation. Other than that, cap your Resistances, find Attributes to use all Gems, and stack as much defensive stats on your gear as possible. It's best to take Evasion/Energy Shield bases pretty much in every slot, and add flat Physical and Elemental Damage on your Rings - they are your only items that can.
|
Stat priorities on items:
|
 (Weapon) Rare Quarterstaff - simply define your budget and try looking for the highest Physical DPS weapon you can afford. Extra Attack Speed, Critical Hit Chance, or any Elemental Damage is a nice addition here (Weapon) Rare Quarterstaff - simply define your budget and try looking for the highest Physical DPS weapon you can afford. Extra Attack Speed, Critical Hit Chance, or any Elemental Damage is a nice addition here |
|
| Min. requirements: 400+ Physical DPS Critical Hit Chance Optional affixes: Critical Damage Bonus Attack Speed Added Elemental Damage |
|
 (Helmet) Rare Helmet - find a Hybrid base with at least 100% Total Elemental Resistances. Some extra Mana or Life will also come in handy (Helmet) Rare Helmet - find a Hybrid base with at least 100% Total Elemental Resistances. Some extra Mana or Life will also come in handy |
|
| Min. requirements: 400 Evasion Rating 150 Energy Shield 100% Total Elemental Resistances Optional affixes: Maximum Life/Mana |
|
 (Gloves) Plaguefinger - this Pair of Gloves allows you to inflict Poison will all types of damage, including Elemental. This is particularly important for the DPS of Tempest Flurry, your main damaging ability. It's a cheap Item, so it's recommended to get a pair with 30% Chance to Poison and two Rune sockets (Gloves) Plaguefinger - this Pair of Gloves allows you to inflict Poison will all types of damage, including Elemental. This is particularly important for the DPS of Tempest Flurry, your main damaging ability. It's a cheap Item, so it's recommended to get a pair with 30% Chance to Poison and two Rune sockets |
|
| (30–50)% increased Evasion and Energy Shield (4–6)% increased Attack Speed (20–30)% chance to Poison on Hit All Damage from Hits Contributes to Poison Magnitude |
|
 (Boots) Rare Boots - 25% (or preferably 30%) bonus Movement Speed is a must. You should also get a high Evasion Rating, Energy Shield, Resistances, and Attributes. (Boots) Rare Boots - 25% (or preferably 30%) bonus Movement Speed is a must. You should also get a high Evasion Rating, Energy Shield, Resistances, and Attributes. |
|
| Min. requirements: 25% Increased Movement Speed Elemental/Chaos Resistance 100 Maximum Life High Energy Shield and Evasion Optional affixes: Attributes |
|
 (Amulet) Serpent's Egg - a must-have Amulet that doubles your Charge generation - which is the main limiting factor to this build's true potential. For the Anointment take Giantslayer if you don't have capped Poison Chance, or Reaching Strike to make your Attacks much smoother, and improve Flicker Strike targeting (Amulet) Serpent's Egg - a must-have Amulet that doubles your Charge generation - which is the main limiting factor to this build's true potential. For the Anointment take Giantslayer if you don't have capped Poison Chance, or Reaching Strike to make your Attacks much smoother, and improve Flicker Strike targeting |
|
| (12-20) to increased Rarity of items found +(10-20) to all Attributes +(17-23)% to Chaos Resistance (20-30)% increased Mana Regeneration Rate Gain an additional Charge when you gain a Charge Anointments: Reaching Strike Giantslayer |
|
 (Ring) Rare Rings - Rings can roll added Damage, but also provide necessary Attributes and Resistances. You should also get Mana Leech or Mana per Enemy killed to help your Mana Sustain (Ring) Rare Rings - Rings can roll added Damage, but also provide necessary Attributes and Resistances. You should also get Mana Leech or Mana per Enemy killed to help your Mana Sustain |
|
| Min. requirements: Added Physical/Elemental Damage 100 Maximum Life Elemental Resistance Attributes Optional affixes: Evasion Rating Maximum Mana Physical Damage Leeched as Mana Mana per Enemy Killed |
|
 (Belt) Rare Belt - Belt is a simple case. There are not many useful Prefixes except for Maximum Life, and maybe Maximum Mana or Flask modifiers. What you want are Resistances, Charm Slots, and maybe Strength (Belt) Rare Belt - Belt is a simple case. There are not many useful Prefixes except for Maximum Life, and maybe Maximum Mana or Flask modifiers. What you want are Resistances, Charm Slots, and maybe Strength |
|
| Min. requirements: Missing Resistances 150 Maximum Life Charm Slots Optional affixes: Maximum Mana Strength |
|
 (Belt) Ingenuity - Rings have a much better mod pool than a Belt does making this the best in-the-slot item for this build (but also in the game) (Belt) Ingenuity - Rings have a much better mod pool than a Belt does making this the best in-the-slot item for this build (but also in the game) |
|
| +(40-80)% increased bonuses gained from Equipped Rings | |
 (Body Armour) Rare Body Armour - look for the highest Maximum Evasion and Energy Shield with extra Life and Spirit. Extra Resistances or Attributes are also a good addition here (Body Armour) Rare Body Armour - look for the highest Maximum Evasion and Energy Shield with extra Life and Spirit. Extra Resistances or Attributes are also a good addition here |
|
| Min. requirements: 350 Maximum Energy Shield 800 Evasion Rating 100 Maximum Life Spirit Optional affixes: Attributes Resistances |
|
 (Jewel) Rare Ruby Jewel - one of your Jewels should be a Ruby with extra Rage generation on Melee hits (Jewel) Rare Ruby Jewel - one of your Jewels should be a Ruby with extra Rage generation on Melee hits |
|
| Optional affixes: Rain 1 Rage on Melee Hit increased Melee Damage Empowered Attacks deal #% Increased Damage |
|
 (Jewel) Rare Emerald Jewels - you need three Emeralds with a Chance to Inflict Poison (possibly all at 10%). Other valuable bonuses are Magnitude of Poisons, Damage with Quarterstaffs, Critical Hit Chance for Attacks, or Evasion Rating (Jewel) Rare Emerald Jewels - you need three Emeralds with a Chance to Inflict Poison (possibly all at 10%). Other valuable bonuses are Magnitude of Poisons, Damage with Quarterstaffs, Critical Hit Chance for Attacks, or Evasion Rating |
|
| Optional affixes: Chance to Inflict Poison Magnitude of Poison you Inflict Damage with Quarterstaffs Critical Hit Chance for Attacks Evasion Rating Attack Speed with Quarterstaffs |
|
|
If you have any other build requests please leave that in the comments below. We are always open to suggestions and constructive feedback.
Pictures used in this article are the intellectual property of Grinding Gear Games.