Fishing Rod Arc Surfcaster
The best Setup for the Surfcaster Ascedency that allows you to use any Spell with the Fishing Rod for shocking results!Fishing Rod Arc
Surfcaster
Created for Legacy of Phrecia
The Best Crafty Guides by Odealo
| Guide notes |
| March 05, 2025 -Build created |
| Build overview | |||
| Tags: [ELEMENTAL] [LIFE] [CRIT] [CASTER] | |||
|
Budget: Defenses: |
|
Boss DPS: AoE: |
|
The Surfcaster is the first and only Ascendency in the game that makes good use of a renowned Fishing Rod. It is a very special type of Weapon that provides little to no offensive modifiers, but greatly enhances your Fishing capabilities. The only combat-oriented modifier available here is the Cast Speed. It also can't be used with most Melee Skills anyway. However, as a Surfcaster you can pick up two Ascendency Notables that make all your Hits always Critically Strike and grant you 50% More Cast Speed. It is an insanely powerful boost to your Damage that easily offsets the lack of a usual Wand or Staff. The other important aspect of this Ascendency grants you 100% Lightning Damage converted to Cold Damage, but also enables your Cold Damage to inflict Shock, on top of the usual Freeze. The final Ascendency Notable is a flexible choice - you can decide to affect the Damage dealt and received by Chilled Enemies, reverse the effect of Chill on you, or increase your Movement and Cast Speed a bit.
Thanks to the powerful modifiers granted by your Fishing Rod you can use basically any Spell in the game, but naturally the Cold and Lightning Spells are preferred. Our choice is the Arc for its amazing Clear Speed capabilities, but you can also consider Crackling Lance if you value powerful Single-target Damage the most. The guaranteed Critical Strike Chance also affects your Herald Skills, making your Herald of Ice a very effective tool to further enhance your AoE coverage.
Having insane Cast Speed is great for Damage output and smooth gameplay, but it makes sustaining the Mana Cost very problematic. The easiest and recommended solution for this problem is the Eldritch Battery Keystone which turns your Energy Shield into a resource you can spend to Cast Spells, but it no longer protects your Life. You could also use the Crest of Desire Helmet that greatly boosts the Damage of your Skill without adding the Mana Costs of Support Gems, but it is usually weaker than a regular Six-link setup.
You can also check all our Guides for the on-going Event right here: Best Builds for Legacy of Phrecia
1. Gameplay
For the most part, you will be using only the Arc, supplemented by the Vaal Arc for even better AoE. To improve your Damage you should cast the Frostbite Curse and apply Chill with a secondary Skill linked to Bonechill Support, usually Frostblink or Orb of Storms. The Vaal Arc is also useful here, as it buffs your regular Arc for 4 seconds upon use. For Movemen,t you should use the Frostblink of Wintry Blast, which will be insanely fast thanks to your massive Cast Speed.
|
|
|
|

2. Build's PROS & CONS
| PROS |
|
| CONS |
|
3. Leveling tips
You can start using the Fishing Rod as soon as you complete your first Ascendency, and the second one will boost you even more. The Arc is not the best choice for leveling - it lacks Damage against Bosses, which will slow you down considerably. We recommend using Cold Spells, such as Freezing Pulse or Ice Nova of Frostbolts. You can check out our Top 10 Leveling Unique Items for more tips and ideas on how to speed up your leveling process.
Bandits:
We recommend helping the Alira Bandit for the bonus Elemental Resistance.
Leveling Skill Trees:
34 Points Passive Tree
Pick up Elemental Damage, Crit, and Life bonuses. Spell Suppression will also greatly help with any Casters during the campaign, especially if you can't cap your Elemental Resistances easily.
60 Points Passive Tree
Head towards the major Cold Damage Cluster. You should also pick the Glacial Cage and nearby Life and Mana Notables. After you get your second Ascendency you can replace the Doom Cast with the Throatseeker Notable for more Crit Multiplier.
4. Final Skill Tree, Ascendancy Points, and Pantheon
Final Skill Tree:
104 Points Final Skill Tree (doesn't include Unique or Cluster Jewels)
119 Points Path of Building(PoB) link
Ascendancy points:
Preferably in the order:
- Screaming Reels
- Baited Breath
- Ghost of the Deep
- Stormy Seas
Pantheon:
Major God: Soul of Arakaali: 10% reduced Damage taken from Damage Over Time; +40% Chaos Resistance against Damage Over Time
Minor God: Soul of Ralakesh: 25% reduced Physical Damage over Time taken while moving, Moving while Bleeding doesn't cause you to take extra Damage
5. Final Gems links
| [DPS] Arc setup | |
 |
Arc - a beam of lightning strikes a selected target and chains to nearby Enemies. You can also use the Vaal version which chains more times and grants you a Buff for 4 seconds that makes your regular Arc lucky. |
 |
Controlled Destruction Support - the Awakened version applies the Unnerved Debuff. |
 |
Spell Echo Support |
 |
Added Lightning Damage Support |
 |
Cold Penetration Support - the Awakened version applies Cold Exposure, saving you 1 Passive Point. |
 |
Hypothermia Support - you can also use the Critical Damage Support if your Critical Strike Multiplier is still low. |
| [UTILITY] Auras setup | |
 |
Wrath - improves your Damage with Lightning Spells. If you want to use Cold Spells, you should use the Zealotry Aura instead. |
 |
Purity of Elements - a defensive Aura that grants you a lot of Elemental Resistance and makes you immune to Ailments. |
 |
Petrified Blood - half of the incoming Damage from Hits will be taken over time instead, allowing for easier recovery. |
 |
Vitality - it grants you a bit of Life Regeneration and enables certain Watcher's Eye modifiers. You could also use Precision or Clarity if their modifiers interest you more. |
| [UTILITY] Arrogance setup | |
 |
Herald of Ice - causes Cold AoE explosions when you shatter a Frozen enemy. Thanks to your Fishing Rod it will Critical Strike as well, massively improving the effectiveness of this Skill. |
 |
Arrogance Support |
| [UTILITY] Orb of Storms setup | |
 |
Orb of Storms - creates a stationary Orb that fires a lightning beam at nearby Enemies every time you use a Lightning Spell in its proximity. |
| Bonechill Support - Chill applied by this Skill will increase all Cold Damage taken by Enemies. | |
|
Added Lightning Damage Support |
|
Controlled Destruction Support |
| [UTILITY] Movement and Curse setup | |
 |
Frostblink of Wintry Blast - a quick teleport that benefits massively from your insane Cast Speed. |
 |
Frostblink - the regular Frostblink is still useful for instant mobility, especially while you are Casting other Skills. |
 |
Frostbite - this Curse lowers the Cold Resistance of affected targets and makes Freeze on them last longer. |
 |
Faster Casting Support |
| [UTILITY] Guard setup | |
 |
Immortal Call - greatly lowers the Damage you take for a short period. Try to keep its level as low as possible to match the requirements of the Support Gem. |
 |
Cast when Damage Taken Support - the lower the level of this Support the faster it activates, but it can only trigger Spells on a similar level. |
|
|
5. Gear Setup
You will obviously need the Fishing Rod for this Setup, although the Build will work well with just regular Rare Weapons with some adjustments on the Passive Tree. To improve your Damage you should aim for Cast Speed, increases to your Elemental Damage, and Critical Strike Multiplier. For defense, you will only need maximum Life, but an Energy Shield is also very important to sustain your Mana Costs. It is mandatory to cap your Elemental Resistances and Attribute Requirements, but lacking a bit of Chaos Resistance or spell Suppression Chance won't be a big problem.
|
Stat priorities on items:
|
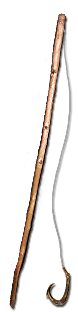 (Weapon) Fishing Rod - this Weapon type can grant only one offensive modifier, which is the Cast Speed. The fishing modifiers should be picked according to your preferences. (Weapon) Fishing Rod - this Weapon type can grant only one offensive modifier, which is the Cast Speed. The fishing modifiers should be picked according to your preferences. |
|
| Min. requirements: 25% increased Cast Speed |
|
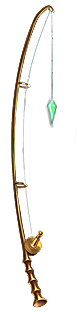 (Weapon) Reefbane - this Rod offers higher Cast Speed than a regular Fishing Rod. It also makes catching a Unique Fish easier thanks to the Glowing effect. (Weapon) Reefbane - this Rod offers higher Cast Speed than a regular Fishing Rod. It also makes catching a Unique Fish easier thanks to the Glowing effect. |
|
| (30-40)% increased Cast Speed Thaumaturgical Lure (10-20)% increased Quantity of Fish Caught Glows while in an Area containing a Unique Fish |
|
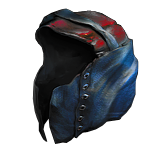
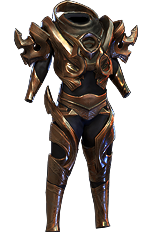 (Body Armour) Doppelgänger Guise - the best Armour for this Build. It offers massive Physical and Chaos Damage Reduction, which is very hard to obtain otherwise. You can get a Corrupted version that raises the Gem Levels of your Skill and link it using the Tainted Currency. (Body Armour) Doppelgänger Guise - the best Armour for this Build. It offers massive Physical and Chaos Damage Reduction, which is very hard to obtain otherwise. You can get a Corrupted version that raises the Gem Levels of your Skill and link it using the Tainted Currency. |
|
| Grants Level 20 Unhinge Skill (40-60)% more Critical Strike Chance while Insane Enemies Killed by your Hits are destroyed while Insane (40-30)% less Physical and Chaos Damage Taken while Sane Regenerate 10% Life over one second when Hit while Sane |
|
 (Amulet) Marylene's Fallacy - the Amulet is also very static - only the Marylene's Fallacy is worth using on this Build. It offers a massive amount of Critical Strike Multiplier and Culling Strike, while the downside does not apply. (Amulet) Marylene's Fallacy - the Amulet is also very static - only the Marylene's Fallacy is worth using on this Build. It offers a massive amount of Critical Strike Multiplier and Culling Strike, while the downside does not apply. |
|
| +(20-30) to Intelligence +(80-120) to Accuracy Rating +(210-240)% to Global Critical Strike Multiplier +(80-100) to Evasion Rating (10-15)% increased Light Radius 40% less Critical Strike Chance Critical Strikes have Culling Strike |
|
 (Helmet) Rare Helmet - use a Helmet that grants you tons of Energy Shield, maximum Life, and Resistance. Ideally, you would also include Spell Suppression here, but it requires you to get enough ES on your other pieces to sustain the Mana Costs. (Helmet) Rare Helmet - use a Helmet that grants you tons of Energy Shield, maximum Life, and Resistance. Ideally, you would also include Spell Suppression here, but it requires you to get enough ES on your other pieces to sustain the Mana Costs. |
|
| Min. requirements: +100 to maximum Life 200 Energy Shield +80% to Elemental and Chaos Resistance Optional affixes: #% of Physical Damage from Hits taken as Elemental Damage % chance to Suppress Spell Damage % increased Mana Reservation Efficiency of Skills Attributes |
|
 (Helmet) Replica Heatshiver - this Helmet will grant you an immense amount of Damage, but it depends heavily on your Shock effectiveness. It also lacks proper defensive modifiers. (Helmet) Replica Heatshiver - this Helmet will grant you an immense amount of Damage, but it depends heavily on your Shock effectiveness. It also lacks proper defensive modifiers. |
|
| (80-100)% increased Evasion Rating 60% increased Mana Regeneration Rate +(20-30)% to Cold Resistance +(20-30)% to Lightning Resistance Gain 1% of Lightning Damage as Extra Cold Damage per 2% Shock Effect on Enemy |
|
 (Gloves) Rare Gloves - there are many important modifiers on Gloves, but you will also need the usual maximum Life, Suppression, and Resistances here. The Eldritch modifiers are very useful too, but some of them can be obtained from Cluster Jewels instead. (Gloves) Rare Gloves - there are many important modifiers on Gloves, but you will also need the usual maximum Life, Suppression, and Resistances here. The Eldritch modifiers are very useful too, but some of them can be obtained from Cluster Jewels instead. |
|
| Min. requirements: +100 to maximum Life +60% to Elemental and Chaos Resistance 10% chance to Suppress Spell Damage Optional affixes: Freezes you inflict spread to other Enemies within 1.2 metres % chance to Unnerve Enemies for 4 seconds on Hit #% increased Damage with Hits against Chilled Enemies % increased Damage while Leeching % of Cold Damage Leeched as Life |
|
 (Belt) Rare Belt - try to get the Stygian Vise to use an additional Abyss Jewel. It should grant you maximum Life, Strength, and Resistances. You can improve your Sustain considerably by using a Crafted modifier. (Belt) Rare Belt - try to get the Stygian Vise to use an additional Abyss Jewel. It should grant you maximum Life, Strength, and Resistances. You can improve your Sustain considerably by using a Crafted modifier. |
|
| Min. requirements: +100 to maximum Life +60% to Elemental and Chaos Resistance +45 to Strength Optional affixes: Flask modifiers Regenerate 150 Energy Shield per second while a Rare or Unique Enemy is Nearby |
|
 (Jewel) Rare Abyss Jewels - here look for Critical Strike Multiplier, Cast Speed, and maximum Life. It can also cover lacking Attributes or Resistance. (Jewel) Rare Abyss Jewels - here look for Critical Strike Multiplier, Cast Speed, and maximum Life. It can also cover lacking Attributes or Resistance. |
|
| Recommended affixes: +# to maximum Life % to Global Critical Strike Multiplier % increased Cast Speed if you've dealt a Critical Strike Recently Resistance Attribute |
|
 (Boots) Rare Boots - you will have great mobility with Frostblink, but extra Movement Speed is still important. Other than that, try to get high maximum Life, Resistances, Suppression, and possibly Energy Shield. You can Craft a modifier to improve your Shocks on Enemies. (Boots) Rare Boots - you will have great mobility with Frostblink, but extra Movement Speed is still important. Other than that, try to get high maximum Life, Resistances, Suppression, and possibly Energy Shield. You can Craft a modifier to improve your Shocks on Enemies. |
|
| Min. requirements: +100 to maximum Life +80% to Elemental and Chaos Resistance 10% chance to Suppress Spell Damage +30% Movement Speed Optional affixes: 5% Action Speed (Exarch Influence) Onslaught on Kill % increased Effect of Non-Damaging Ailments |
|
 (Ring) Rare Ring - at first you will need a lot of Resistance and Attributes here, but as your gear improves you will be able to fit more Damage too. Try to get Cast Speed, Critical Strike Multiplier, or increases to Damage. You can also craft a minimum Frenzy or Endurance Charge. (Ring) Rare Ring - at first you will need a lot of Resistance and Attributes here, but as your gear improves you will be able to fit more Damage too. Try to get Cast Speed, Critical Strike Multiplier, or increases to Damage. You can also craft a minimum Frenzy or Endurance Charge. |
|
| Min. requirements: +80 to maximum Life +60 to Elemental and Chaos Resistance Optional affixes: % to Global Critical Strike Multiplier % increased Cold Damage % increased Cast Speed +1 to minimum Frenzy/Endurance Charge Attribute |
|
 (Jewel) Brutal Restraint - this Jewels grants you tons of Dexterity but also offers bonuses to Elemental Damage, Life, Cast Speed, or grants you the Onslaught on Kill. You can also use the Lethal Pride for Strength and Double Damage Chance. (Jewel) Brutal Restraint - this Jewels grants you tons of Dexterity but also offers bonuses to Elemental Damage, Life, Cast Speed, or grants you the Onslaught on Kill. You can also use the Lethal Pride for Strength and Double Damage Chance. |
|
| Denoted service of (500-8000) dekhara in the akhara of (Asenath-Balbala-Nasima) Passives in radius are Conquered by the Maraketh Historic |
|
 (Jewel) Watcher's Eye - grants you very powerful modifiers depending on the Auras you use. Look for increased Lightning Damage with Wrath, and some other useful bonuses for Purity of Elements. You can also replace the Vitality with Precision if you want extra Crit Multiplier. (Jewel) Watcher's Eye - grants you very powerful modifiers depending on the Auras you use. Look for increased Lightning Damage with Wrath, and some other useful bonuses for Purity of Elements. You can also replace the Vitality with Precision if you want extra Crit Multiplier. |
|
| (4-6)% increased maximum Energy Shield (4-6)% increased maximum Life (4-6)% increased maximum Mana <Two or Three random aura modifiers> Recommended modifiers: (40-60)% increased Lightning Damage while affected by Wrath +(20-30)% to Critical Strike Multiplier while affected by Precision (0.8-1.2)% of Damage leeched as Life while affected by Vitality |
|
 (Jewel) Light of Meaning - instead of the Brutal Restraint you could also use this Jewel for the massive amount of increased Damage it grants. However, getting enough Attributes might be too problematic to make it worth it. (Jewel) Light of Meaning - instead of the Brutal Restraint you could also use this Jewel for the massive amount of increased Damage it grants. However, getting enough Attributes might be too problematic to make it worth it. |
|
| Passive Skills in Radius also grant 6% increased Cold/Lightning Damage | |
 (Jewel) Large Cluster Jewel - the Notables here can grant you a lot of Damage, but also important Utility, such as Life Leech, the proliferation of Freeze Ailment, or Blinding nearby Enemies. The Snowstorm and Stormrider grants a lot of Damage, and are usually much cheaper than the popular Blanketed Snow Notable. (Jewel) Large Cluster Jewel - the Notables here can grant you a lot of Damage, but also important Utility, such as Life Leech, the proliferation of Freeze Ailment, or Blinding nearby Enemies. The Snowstorm and Stormrider grants a lot of Damage, and are usually much cheaper than the popular Blanketed Snow Notable. |
|
| Recommended affixes: 1 Added Passive Skill is Blanketed Snow 1 Added Passive Skill is Disorienting Display 1 Added Passive Skill is Snowstorm 1 Added Passive Skill is Doryani's Lesson 1 Added Passive Skill is Blast-Freeze 1 Added Passive Skill is Stormrider |
|
|
Other suggested Flasks:
|
|
     |
|
|
If you have any other build requests please leave that in the comments below. We are always open to suggestions and constructive feedback.
Pictures used in this article are the intellectual property of Grinding Gear Games.
