 Buy/Sell
 Log in


Earthshatter Titan POE 2 Build
Attack speed stacking Earthshatter Titan - one of the fastest builds in the game, exploding screens while zooming through maps.Earthshatter
Titan Build
Updated for Path of Exile 2 Early Access
The Best Crafty Guides by Odealo
| Guide notes |
| July 7, 2026 - Created for Early Access Patch 0.5.0 |
| Build Overview | |||
| Tags: [MELEE] [ATTACK] [ARMOUR] | |||
|
Budget: Defenses: |
|
Boss DPS: AoE: |
|



This Earthshatter Titan build stacks extremely high attack speed, letting every slam create multiple spikes that instantly fill the arena. Thanks to Titan’s Aftershock, all spikes detonate at once for massive burst damage. It’s one of the fastest melee builds in the game, almost directly lifted from PoE1.
The core loop is simple and incredibly fluid: you move through maps using Boneshatter as your mobility tool, then slam with Earthshatter to generate spikes. Titan’s Aftershock detonates them in huge waves, giving explosive clear and strong single‑target. High attack speed keeps the rhythm tight and relentless.
Defensively, the build leans on high armour and multiple sources of armour also applies to elemental damage, giving you strong mitigation once the setup comes online. Early on it’s not the tankiest build, but there’s an alternative, heavier version for players who prefer more durability and smoother face‑tank potential.
The build is very cheap to start, letting you jump into maps with almost no investment. As you upgrade your weapon, stack more attack speed and improve supports, Earthshatter Titan scales to incredible heights, turning into a brutally strong endgame melee monster.
You can also check our other Path of Exile 2 builds right over here Odealo's Crafty Guides - Full List
1. Gameplay
The clear loop is fast, simple and extremely consistent. You move through the map, fire all loaded bolts to unleash chaining Galvanic Shards, then dodge roll to instantly reload and repeat the cycle. Herald of Thunder adds extra hits during mapping, helping maintain Affinity gain and contributing to the overall screen‑wide clear. The result is a smooth, explosive rhythm: shoot, roll, reload, and watch entire packs disappear before they can act.
For bosses, you fire Stormblast Bolts, leaving volatile bolts on the ground that store your damage. Once the setup is complete, you dodge roll so your Mirage Archer can detonate them using Explosive Shot, creating repeated high‑impact blasts. This combination of pre‑placed Stormblast shards and automated detonations gives the build strong, reliable single‑target damage while you stay mobile and safe.
|
|
|
|


2. Build's PROS & CONS
| PROS |
|
| CONS |
|
3. Leveling tips
You can level this build in a few different ways depending on what feels smoother for you. Since this is an endgame setup, it only spreads its wings once you reach higher levels and unlock the core mechanics. Until then, you can comfortably level with Shield Wall, Boneshatter or any other comfortable leveling build you enjoy.
Once you enter maps and have access to your key gems, supports and ascendancy interactions, you can safely swap into the final configuration. From that point on, the build plays exactly as intended - fast, explosive and fully powered by its endgame scaling.
4. Final Skill Tree, Ascendancy Points, and Pantheon
Final Skill Tree:
 |
|
Click on the image to open the Passive Tree preview in a new window, or use the Path of Building (PoB) tool, |
Ascendancy points:
Preferably in this order:
- Earthbraker
- Ancestral Empowerment
- Colossal Capacity
- Hulking Form
5. Final Gems links
| [DPS] Earthshatter setup | |
 |
Earthshatter - slam that sends a damaging fissure forward and leaves spikes that can be shattered for extra AoE bursts, creating a fast, explosive melee rhythm. We support it with Dialla's Desire to get more gem quality, Branching Fissures for more spikes, Aftershock for additional aftershocks, Rapid Attacks for more attack speed, and Armour Break so we can get endurance charges and break enemy's armour easier. |
 |
Dialla's Desire |
 |
Branching Fissures II |
 |
Aftershock II |
 |
Rapid Attacks II |
 |
Armour Break III |
| [Mobility] Boneshatter setup | |
 |
Boneshatter - due to its short animation, with enough atttack speed it becomes our fastest way to move across the map. Just spam it to get from pack to pack. |
 |
Rage III |
|
Rapid Attacks III |
 |
Efficiency II |
| [Utility] Harbringer of Madness setup | |
 |
Harbringer of Madness - a persistent buff granted from our Sadist's Mercy mace. It spawns balls that chase enemies and deal damage based on the power of the enemy you killed or hit to create them. |
|
Armour Break III |
 |
Stun III |
 |
Brutality III |
 |
Magnified Area II |
 |
Uruk's Smelting |
| [Utility] Herald of Ice setup | |
 |
Herald of Ice - adds ice explosion to our clear, enabled thanks to Vestige of Darkness We support it with Elemental Armament for more damage, Armour Explosion for massive screen clearing, Deadly Herald for more Herald damage, Magnified Area for bigger area of effect and Cold Penetration to deal more cold damage |
 |
Elemental Focus |
 |
Cold Mastery |
 |
Elemental Armament II |
|
Magnified Area II |
 |
Cold Penetration |
| [Utility] Purity of Fire setup | |
|
Purity of Fire - gives as fire resistances, but mainly used because it comes from Sceptre and its a 0 Spirit aura. We support it with Vitality for maximum Life per second recovery, Clarity for mana regen and Cannibalism to get Life recovery on kill. |
 |
Vitality II |
 |
Clarity II |
 |
Cannibalism II |
| [Utility] Combat Frenzy setup | |
 |
Combat Frenzy - gives as Frenzy Charge on Freeze, every few seconds. We support it with Charge Profusion for a chance to get even more charges from it. |
 |
Charge Profusion II |
| [Utility] Charge Regulation setup | |
 |
Charge Regulation - it consumes our charges but grants us buffs based on your active charges. |
|
Cannibalism I |
| [Utility] War Banner setup | |
 |
War Banner - our single target placed buff. It grants us more damage and more attack speed. We support it with Prolonged Duration to make it last longer, Refraction so it will apply Refractive Dissolution debuff to enemies in radius for additional Elemental Exposure, Magnified Area to increase banner's radius and Daresso's Passion for less Glory costs. |
 |
Prolonged Duration II |
 |
Refraction III |
|
Magnified Area II |
 |
Daresso's Passion |
| [Utility] Scavenged Plating setup | |
 |
Scavenged Plating - it gives us a lot of Armour by repeatedly breaking enemy Armour We support it with Prolonged Duration for longer armour buffs, Armour Demolisher to buff our thorns and Physical Mastery to get +1 level. |
|
Prolonged Duration II |
 |
Armour Demolisher II |
 |
Physical Mastery |
|
|
6. Gear Setup
This build is an attack speed stacker, so we naturally focus on getting as much attack speed as possible. We also need capped Elemental Resistances, at least 30 Spirit from the Amulet, high Armour on our gear, plenty of Attributes, and strong Flat Damage - since we attack so often, these mods scale extremely well and noticeably boost both clear and single‑target.
|
Stat priorities on items:
|
 (Weapon) Sadist's Mercy - our must have item, get one with as high attack speed roll as possible, other mods doesn't matter that much. (Weapon) Sadist's Mercy - our must have item, get one with as high attack speed roll as possible, other mods doesn't matter that much. |
|
| Grants Skill: Level 16 Harbinger of Madness (240—300)% increased Physical Damage +(5—8)% to Critical Hit Chance (14—22)% increased Attack Speed Hits with this Weapon inflict (2—5) Gruelling Madness Enemies in your Presence have additional Power equal to their Gruelling Madness |
|
 (Weapon) Sacred Flame - big source of Spirit, and gives as a solid 50%+ damage as Extra Fire Damage. Its an easier to build option, since it gives as a lot of spirit at the cost of survivability. (Weapon) Sacred Flame - big source of Spirit, and gives as a solid 50%+ damage as Extra Fire Damage. Its an easier to build option, since it gives as a lot of spirit at the cost of survivability. |
|
| Grants Skill: Purity of Fire Gain (40—60)% of Damage as Extra Fire Damage Allies in your Presence Regenerate (2—3)% of their Maximum Life per second Allies in your Presence Gain (20—30)% of Damage as Extra Fire Damage Enemies in your Presence Resist Elemental Damage based on their Lowest Resistance |
|
 (Shield) Chernobog's Pillar - second option to use instead of Sacred Flame it requires at least 1 rune for increased block chance, and some skill tree changes, but its an overall best option to use. (Shield) Chernobog's Pillar - second option to use instead of Sacred Flame it requires at least 1 rune for increased block chance, and some skill tree changes, but its an overall best option to use. |
|
| (100—150)% increased Armour +(30—40)% to Fire Resistance +(23—29)% to Chaos Resistance +(150—200) to Stun Threshold Gain 1% of damage as Fire damage per 1% Chance to Block |
|
 (Helmet) Vestige of Darkness - it enables Herald of Ice to work and gives as a solid defense in form of Chill and Freeze (Helmet) Vestige of Darkness - it enables Herald of Ice to work and gives as a solid defense in form of Chill and Freeze |
|
| (150—200)% increased Armour and Energy Shield +(20—30) to Strength and Intelligence Physical damage from Hits Contributes to Chill Magnitude and Freeze Buildup Enemies in your Presence are Blinded The Bodach haunts your Presence |
|
 (Body Armour) Morior Invictus - incredibly strong body armour and your best in slot. If you’re on a higher budget, look for a 5‑socket Morior. (Body Armour) Morior Invictus - incredibly strong body armour and your best in slot. If you’re on a higher budget, look for a 5‑socket Morior. |
|
| (300—400)% increased Armour, Evasion and Energy Shield +(10—14) to Spirit per Socket filled Recommended other mods: +(45—60) to maximum Life per Socket filled +(8—10)% to all Elemental Resistances per Socket filled +(10—13)% to Chaos Resistance per Socket filled (9—12)% increased Global Armour, Evasion and Energy Shield per Socket filled |
|
 (Amulet) Rare Amulet - preferably Absent Amulet, with which we can then use Eternal Rage for free to sustain Rage easier, but its not a must have. (Amulet) Rare Amulet - preferably Absent Amulet, with which we can then use Eternal Rage for free to sustain Rage easier, but its not a must have. |
|
|
Min. requirements: |
|
 (Ring) Rare Ring - one of our rings HAVE TO include 1 Mana Leech mod. Without it we can't sustain our absurd attack speed mana costs. (Ring) Rare Ring - one of our rings HAVE TO include 1 Mana Leech mod. Without it we can't sustain our absurd attack speed mana costs. |
|
|
Min. requirements: |
|
 (Belt) Mageblood - absolutely amazing option if you can get at least one Legacy of Silver (Belt) Mageblood - absolutely amazing option if you can get at least one Legacy of Silver |
|
| All Mage's Legacies have (25—50)% increased effect per duplicate Mage's Legacy you have Legacy of Mages Legacy Legacy of Mages Legacy Legacy of Mages Legacy Legacy of Mages Legacy |
|
 (Belt) Rare Belt - while on a budget a rare belt will do its job too. (Belt) Rare Belt - while on a budget a rare belt will do its job too. |
|
| Min. requirements: 90% total Elemental Resistance +100 to maximum Life Optional affixes: #% increased Rarity of Items found +# to Attributes #% to Chaos Resistances # to Armour |
|
|
|
|
| Min. requirements: 30% increased Movement Speed +100 to maximum Life 100% total Elemental Resistances Optional affixes: % increased Rarity of Items found +#% to Chaos Resistances #% increased Armour |
|
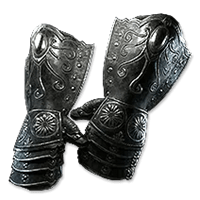 (Gloves) Rare Gloves - an amazing offensive slot that perfectly complements this build. (Gloves) Rare Gloves - an amazing offensive slot that perfectly complements this build. |
|
| Min. requirements: 14% increased Attack Speed +2 to level of all Melee Skills 500 armour Optional affixes: % increased Rarity of Items found +#% to Chaos Resistances #% increased Armour # to maximum Life |
|
 (Jewel) Heart of the Well - most versatile unique jewel in the game comes in handy in this build aswell. Try to get some Extra Elemental Damage, and preferably attack speed. (Jewel) Heart of the Well - most versatile unique jewel in the game comes in handy in this build aswell. Try to get some Extra Elemental Damage, and preferably attack speed. |
|
| Recomended Modifiers: Gain (9—15)% of Damage as Extra Lightning Damage Gain (9—15)% of Damage as Extra Fire Damage Gain (9—15)% of Damage as Extra Cold Damage (2—3)% increased Attack Speed |
|
 (Jewel) From Nothing - lets us allocate strong passives inside its radius without connecting them to the tree, giving us access to high‑impact nodes for a very small point investment (Jewel) From Nothing - lets us allocate strong passives inside its radius without connecting them to the tree, giving us access to high‑impact nodes for a very small point investment |
|
| Passives in Radius of Blood Magic can be Allocated without being connected to your tree | |
 (Jewel) Prism of Belief - very strong jewel because + levels to all Earthshatter skills translates directly into a huge damage increase (Jewel) Prism of Belief - very strong jewel because + levels to all Earthshatter skills translates directly into a huge damage increase |
|
| +3 to Level of all Earthshatter Skills | |
 (Jewel) Undying Hate - we can use it to transform the Vaal Pact keystone on the passive tree into the Amanamu version. (Jewel) Undying Hate - we can use it to transform the Vaal Pact keystone on the passive tree into the Amanamu version.To enable this conversion, the jewel must have the “in tribute to Amanamu” modifier |
|
| Glorifying the defilement of (79—30977) souls in tribute to Amanamu Passives in radius are Conquered by the Abyssals Desecration makes this item unstable Historic |
|
 (Jewel) Rare Jewel - socket similar jewels in every slot you can. (Jewel) Rare Jewel - socket similar jewels in every slot you can. |
|
| Recomended Modifiers: Gain 1 Rage on Melee Hit (10—20)% increased Armour (5—15)% increased Global Physical Damage (2—4)% increased Attack Speed |
 (Boots) Rare Boots - typical boots, nothing supprising here, just Movement Speed, Life and Resistances.
|
|
If you have any other build requests please leave that in the comments below. We are always open to suggestions and constructive feedback.
Pictures used in this article are the intellectual property of Grinding Gear Games.