Blackflame Fireball Blood Mage POE2 Build
A Blackflame build for Blood Mage that uses Fireball and Ember Fusillade to deal tons of Chaos Spell DamageBlackflame Covenant Fireball
Blood Mage Build
Updated for Path of Exile 2 Early Access
The Best Crafty Guides by Odealo
| Guide notes |
| September 3, 2025 - Created for Early Access. |
| Build Overview | |||
| Tags: [CHAOS] [CASTER] [LIFE] | |||
|
Budget: Defenses: |
|
Boss DPS: AoE: |
|
This build takes advantage of the Blackflame Covenant Keystone that turns your Fire Spells purple. It also Converts all your Fire Spells' Fire Damage into Chaos Damage. The Ignite mechanic is also transmogrified to deal Chaos Damage, but that's of no importance to us. Keep that in mind when looking for damage modifiers, since you'll scale with Chaos Damage instead of Fire Damage. Now you can take advantage of Withered debuff and Despair Curse to make enemies take increased Chaos Damage and reduce their Chaos Resistance. The Fire Spells you will use are Fireball and Ember Fusillade. They are basic abilities with high damage and low Critical Hit Chance, but that's not an issue since your base Crit Chance is fixed at 15% with Sunder the Flesh. Both are Projectiles, so you can go for various Projectile modifiers too.
Sunder the Flesh is one of the reasons to pick Bloodmage. This ascendancy has one of the best Life Recovery tools in the game, such as Grasping Wounds combined with Recoup, or Vitality Siphon combined with Atziri's Acuity. The Life you spend on Spells will be quickly replenished. Mana sustain is also not a big deal if you have Mask of the Sanguimancer or Atalui's Bloodletting. After that, you can go for Crimson Power and increase your Maximum Life, or Gore Spike to gain additional Critical Damage Bonus. The vast Life Pool can be a source of damage and durability alike, so the build is quite tanky. There are not that many attacks that can one-shot you, and you can get back on your feet rapidly after any other blow. Defiance of Destiny can further improve this build, making you nearly-immortal.
You can also check our other Path of Exile 2 builds right over here Odealo's Crafty Guides - Full List
1. Gameplay
You will cast Fireball and Ember Fusillade to slay foes of all types. Against bosses, cast Frost Wall on top of them. Despair may be applied automatically with Blasphemy if you have Spirit for that, or cast manually if not. Withering Presence will inflict Withered. To Infuse your Fire Spells, you have to cast Living Bomb, Snap, or have Siphon Elements active.
|
|
|
|

2. Build's PROS & CONS
| PROS |
|
| CONS |
|
3. Leveling tips
Start with Essence Drain & Contagion and switch to Fire Spells after allocating the Blackflame Covenant Keystone, around level 50 or so. Once you allocate Sunder the Flesh, you can start specializing in Critical Hit Damage on your passive skill tree. Sire of Shards should be your weapon until you find a good Wand and Focus. From there, you can start assembling the build as pictured here.
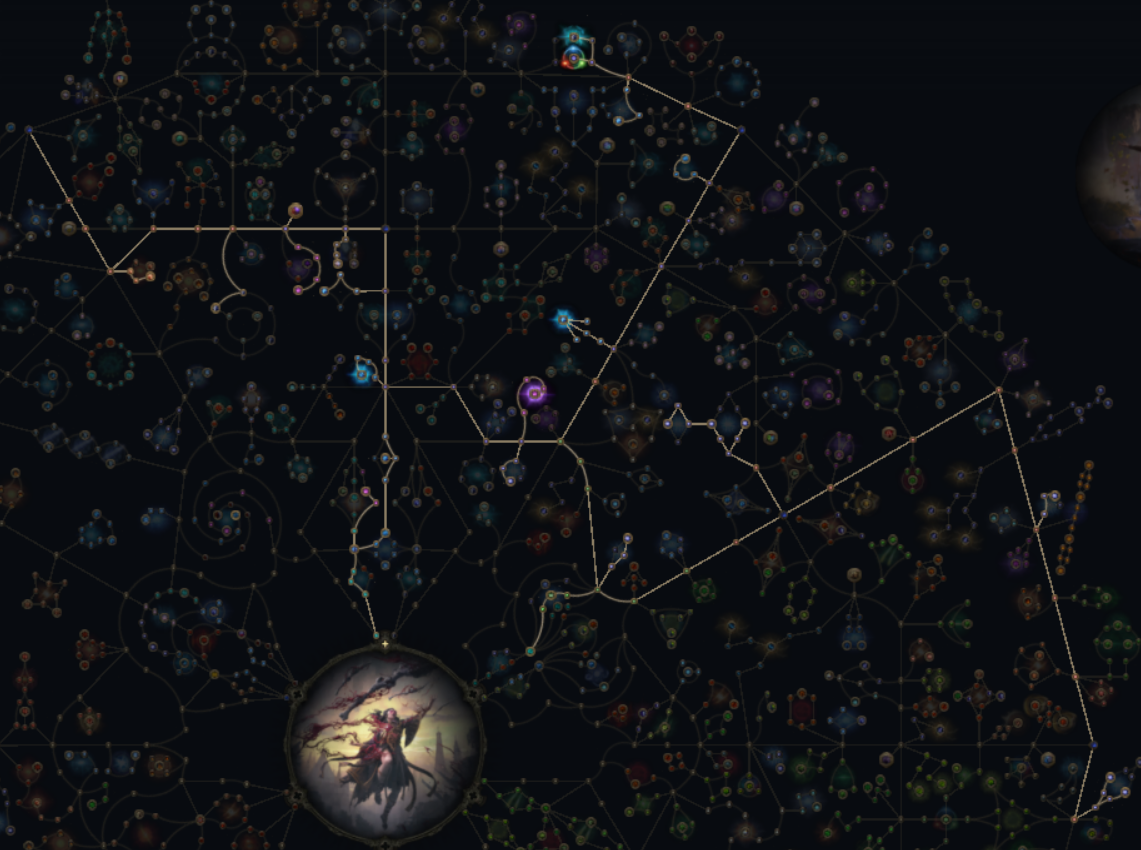
4. Final Skill Tree, Ascendancy Points, and Pantheon
Final Skill Tree:
 |
|
Click on the image to open the Passive Tree preview in a new window Or import the build into PoB: |
Ascendancy points:
Preferably in this order:
- Sanguimancy
- Grasping Wounds
- Sunder the Flesh
- Crimson Power
- Gore Spike or Vitality Siphon
5. Final Gems links
| [DPS] Fireball setup | |
 |
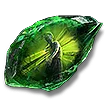
Fireball - Fireball is the main damaging ability against tough enemies. It will deal Chaos Damage. Try to have it Infused with Fire and Sealed up. |
 |
Unleash - Accumulate Seals over time, they will cause the Spell to reoccur when consumed, meaning you will use it less often for a more powerful effect. |
 |
Considered Casting - Less Cast Speed, but much more Spell Damage. |
 |
Wildshards - Chance to fire 8 additional Projectiles in a circle. |
 |
Fork - Projectiles Fork and deal less damage after Forking. You can replace this one with Sione's Temper or Atalui's Bloodletting if your clear speed is good already. |
 |
Nova Projectiles - 4 additional Projectiles for the Spell, all fired in a Circle. It does less damage. |
| [DPS] Ember Fusillade setup | |
 |
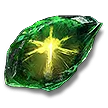
Ember Fusillade - The primary ability to use when mapping. It has a short delay before launching Embers at enemies. Deals Chaos Damage too. |
|
Considered Casting |
 |
Compressed Duration - Embers are ready to launch at enemies sooner. |
|
Wildshards - This can be replaced with Blindside or Extraction if you are unable to use it due to Sione's Temper. |
 |
Fire Mastery - An extra Gem level to Ember Fusillade. |
 |
Sione's Temper - 20% chance to fire 8 additional Projectiles in a circle per Wildshard, which you gain upon casting Ember Fusillade. |
| [UTILITY] Temporal Chains setup | |
 |
Blasphemy - Linked Curse is constantly affecting enemies around you and costs Spirit. Focused Curse can be used here if you have no Spirit for that. |
 |
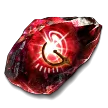
Despair - Since you deal Chaos Damage with Blackflame Covenant allocated, use a Curse that lowers Chaos Resistance. |
 |
Magnified Area - More Area of Effect for the Curse. |
 |
Heightened Curse - 25% increased Magnitudes for linked Curse. |
 |
Ritualistic Curse - 50% increased Area of Effect, but it erupts after 30% more delay (irrelevant with Blasphemy). |
| [UTILITY] Life Remnants setup | |
 |
Life Remnants - A Remnant that you can generate on kill or on-hit against tough enemies. Grants Life that can Overflow. |
 |
Harmonic Remnants - Lets you collect Remnants from further away. |
 |
Remnant Potency - Remnants take effect with a delay, but are more powerful. |
| [UTILITY] Withering Presence setup | |
 |
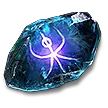
Withering Presence - Applies the stackable Withered debuff on enemies around you; it causes them to take increased Chaos Damage. |
 |
Prolonged Duration - Increased Duration of the Withered debuff. |
 |
Chaos Mastery - An extra Gem Level for Withering Presence. |
| [UTILITY] Spellslinger setup | |
 |
Spellslinger - A Meta Skill that, once activated, casts the linked Spell multiple times. It can be found on Dueling Wands and is optional. |
 |
Living Bomb - It attaches to the enemy and creates Fire Infusion after exploding. It can be replaced with Snap to serve the same purpose. |
 |
Flame Wall - Projectiles passing through Flame Wall have added Fire Damage to them. |
 |
Boundless Energy - Gain increased Energy. |
 |
Overabundance - +1 to Limit of Living Bombs. It reduces the Duration of it, but you should be able to trigger the bomb very fast anyway. |
 |
Energy Retention - 35% chance to refund half of the Energy cost. |
| [UTILITY] Siphon Elements setup | |
 |
Siphon Elements - Costs Spirit and creates Infusion Remnants; Fire Remnants upon Igniting a non-Ignited enemy. |
|
Remnant Potency |
|
Harmonic Remnants |
| [UTILITY] Frost Wall setup | |
 |
Frost Wall - Fireballs can explode when colliding with a Frost Wall, damaging tough enemies that are nearby. |
|
Magnified Area |
|
|
6. Gear Setup
The build can be assembled from Rare items only. Defensively, you're relying on Maximum Life and many sources of its Recovery, be it Leech, Recoup, or Regeneration. It's very important. You will get a bit of ES from your ES items, but don't prioritize it over Life, at least not early in the game (you have no reliable way to Recover ES). You have no Block Chance, no Armour, no Evasion, and no Deflection, so remember to cap your Resistances and try to avoid hits. For more Damage, try to get more Crit Chance and Crit Damage Bonus. Combine it with modifiers that increase the Gem Level of all your Fire Spells, and the plain Spell and Chaos Damage with Cast Speed. Maximum Life will also increase your Damage via the Gore Spike ascendancy passive if you have it. That's pretty much all there is to it.
|
Stat priorities on items:
|
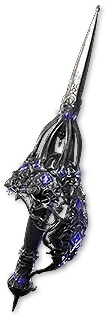 (Weapon) Rare Wand - On a Wand, look for regular damage modifiers like the one listed here. Be careful, Fire Damage mods will grant you no damage at all, since it's all Converted to Chaos, but level of Fire Spells will. (Weapon) Rare Wand - On a Wand, look for regular damage modifiers like the one listed here. Be careful, Fire Damage mods will grant you no damage at all, since it's all Converted to Chaos, but level of Fire Spells will. |
|
| Min. requirements: increased Spell Damage increased Cast Speed Level of all Fire Spell Skills Optional affixes: increased Critical Hit Chance for Spells increased Critical Spell Damage Bonus increased Chaos Damage Gain #% of Damage as Extra Damage of some other type |
|
 (Off-hand) Rare Focus - On your Focus, focus on offensive stats, similar to those on your Wand. (Off-hand) Rare Focus - On your Focus, focus on offensive stats, similar to those on your Wand. |
|
| Min. requirements: increased Spell or Chaos Damage Level of all Spell Skills Optional affixes: increased Cast Speed increased Critical Hit Chance for Spells increased Critical Spell Damage Bonus |
|
 (Off-hand) Rathpith Globe - Extremely suitable once your Maximum Life is high, but it requires a significant investment in Life Recovery. (Off-hand) Rathpith Globe - Extremely suitable once your Maximum Life is high, but it requires a significant investment in Life Recovery. |
|
| (60–100)% increased Energy Shield +(60–100) to maximum Life Non-Channelling Spells cost an additional 6% of your maximum Life Non-Channelling Spells have 5% increased Critical Hit Chance per 100 maximum Life Non-Channelling Spells deal 10% increased Damage per 100 maximum Life |
|
 (Helmet) Rare Helmet - Not many interesting mods to seek out on a Helmet, just the most basic Defences in huge quantities. (Helmet) Rare Helmet - Not many interesting mods to seek out on a Helmet, just the most basic Defences in huge quantities. |
|
| Min. requirements: Maximum Life Chaos or Elemental Resistance Optional affixes: Life Regeneration Attributes |
|
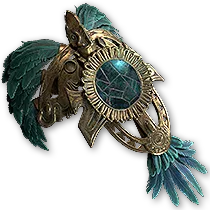
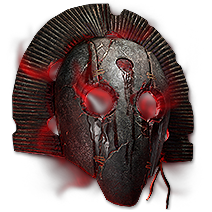 (Helmet) Mask of the Sanguimancer - Blood Magic may be a good addition if you struggle with Mana Sustain, but you have to be careful with it; it requires good Life Recovery. (Helmet) Mask of the Sanguimancer - Blood Magic may be a good addition if you struggle with Mana Sustain, but you have to be careful with it; it requires good Life Recovery. |
|
| +(20-25) to Evasion Rating +(10-15) to maximum Energy Shield (20-40)% increased Critical Hit Chance for Spells +(10-20) to Strength +(10-20) to Intelligence Blood Magic |
|
 (Gloves) Rare Gloves - Gloves are also not that interesting. It's Maximum Life, Resistances, Crit Damage, and Dexterity if you need it. (Gloves) Rare Gloves - Gloves are also not that interesting. It's Maximum Life, Resistances, Crit Damage, and Dexterity if you need it. |
|
| Min. requirements: Maximum Life increased Critical Damage Bonus Chaos or Elemental Resistance Optional affixes: Attributes Gain # Life per Enemy Killed |
|
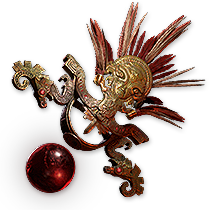
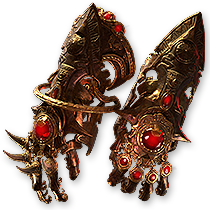 (Gloves) Atziri's Acuity - These Gloves will increase your Crit Chance and cause Life Leech from Critical Hits to recover your Life instantly, making you more durable. (Gloves) Atziri's Acuity - These Gloves will increase your Crit Chance and cause Life Leech from Critical Hits to recover your Life instantly, making you more durable. |
|
| (80–100)% increased Armour (30–50)% increased Critical Hit Chance +(20–30) to Intelligence Leech from Critical Hits is instant |
|
 (Boots) Rare Boots - On your Boots, you will only need Maximum Life, Movement Speed, and Resistances of all types. You may also find the reduction of Elemental Ailments' Duration on you quite useful. (Boots) Rare Boots - On your Boots, you will only need Maximum Life, Movement Speed, and Resistances of all types. You may also find the reduction of Elemental Ailments' Duration on you quite useful. |
|
| Min. requirements: Maximum Life Chaos or Elemental Resistance increased Movement Speed Optional affixes: Attributes # Life Regeneration per second #% reduced Shock/Freeze/Chill duration on you |
|
 (Amulet) Rare Amulet - We recommend a "+3" Amulet with lots of Spirit. These are premium stats. Then, seek the usual Life and Resistances. (Amulet) Rare Amulet - We recommend a "+3" Amulet with lots of Spirit. These are premium stats. Then, seek the usual Life and Resistances. |
|
| Min. requirements: Maximum Life +# to Level of all Spell Skills Optional affixes: Attributes increased Critical Damage Bonus Spirit Chaos or Elemental Resistance |
|
 (Amulet) Defiance of Destiny - A defensive option that you definitely should consider at a point where your DPS is not as big of a problem as your survivability. (Amulet) Defiance of Destiny - A defensive option that you definitely should consider at a point where your DPS is not as big of a problem as your survivability. |
|
| +(10–15) to Dexterity (6–10)% increased maximum Life +(10–20) to Strength (25–40)% increased Mana Regeneration Rate Recover (10–20)% of Missing Life before being Hit by an Enemy |
|
 (Ring) Rare Ring - On Rings, you will find Cast Speed, Maximum Life, Attributes, and Resistances. (Ring) Rare Ring - On Rings, you will find Cast Speed, Maximum Life, Attributes, and Resistances. |
|
| Min. requirements: Maximum Life Chaos or Elemental Resistance Optional affixes: Attributes increased Cast Speed Life per Enemy Killed |
|
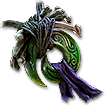
 (Ring) Snakepit - Snakepit can be great if you wish to improve your clear Speed. Put it in your Left Ring Slot and alter your Gem setups accordingly. (Ring) Snakepit - Snakepit can be great if you wish to improve your clear Speed. Put it in your Left Ring Slot and alter your Gem setups accordingly. |
|
| (7-10)% increased Cast Speed (20-30)% increased Spell Damage (10-15)% increased Cast Speed Left ring slot: Projectiles from Spells cannot Chain Left ring slot: Projectiles from Spells Fork Right ring slot: Projectiles from Spells Chain +1 times Right ring slot: Projectiles from Spells cannot Fork Projectiles from Spells cannot Pierce |
|
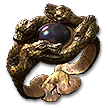
 (Ring) Seed of Cataclysm - Big Critical Hit chance and Damage with some Chaos Resistance. It has a manageable downside of increased Mana Cost of Skills. (Ring) Seed of Cataclysm - Big Critical Hit chance and Damage with some Chaos Resistance. It has a manageable downside of increased Mana Cost of Skills. |
|
| +(20–30) to maximum Mana (30–50)% increased Critical Hit Chance for Spells (30–50)% increased Critical Spell Damage Bonus +(13–17)% to Chaos Resistance 10% increased Mana Cost of Skills |
|
 (Belt) Rare Belt - A regular Belt is an opportunity to get more Maximum Life, Resistances, and Strength. Charm and Flask modifiers are not very important. (Belt) Rare Belt - A regular Belt is an opportunity to get more Maximum Life, Resistances, and Strength. Charm and Flask modifiers are not very important. |
|
| Min. requirements: Maximum Life Chaos or Elemental Resistance Optional affixes: Strength |
|
 (Body Armour) Rare Body Armour - Body Armour can get you a lot of Energy Shield with Maximum Life. ES is crucial to extract the bonus from Crimson Power. Spirit can be found here as well. (Body Armour) Rare Body Armour - Body Armour can get you a lot of Energy Shield with Maximum Life. ES is crucial to extract the bonus from Crimson Power. Spirit can be found here as well. |
|
| Min. requirements: Maximum Life high Maximum Energy Shield (good with Crimson Power) Optional affixes: Spirit Chaos or Elemental Resistance |
|
 (Body Armour) Kaom's Heart - Grants tons of Life, but disables Spirit, which forces you to adjust Skill setups. (Body Armour) Kaom's Heart - Grants tons of Life, but disables Spirit, which forces you to adjust Skill setups. |
|
| (30-40)% increased Stun Threshold +1500 to maximum Life You have no Spirit |
|
 (Jewel) Rare Jewels - Critical Damage Bonus is the most potent mod if your Crit Chance is high. Add to that Cast Speed and Spell Damage. (Jewel) Rare Jewels - Critical Damage Bonus is the most potent mod if your Crit Chance is high. Add to that Cast Speed and Spell Damage. |
|
| Optional affixes: increased Critical Hit Chance for Spells increased Critical Damage Bonus increased Cast Speed increased Spell Damage |
|
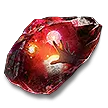
 (Jewel) Grand Spectrum (Ruby) - Ruby Grand Spectrum increases your Maximum Life, the most valuable resource here. You have to have all three or none at all. (Jewel) Grand Spectrum (Ruby) - Ruby Grand Spectrum increases your Maximum Life, the most valuable resource here. You have to have all three or none at all. |
|
| 2% increased Maximum Life per socketed Grand Spectrum |
|
|
If you have any other build requests please leave that in the comments below. We are always open to suggestions and constructive feedback.
Pictures used in this article are the intellectual property of Grinding Gear Games.