Buy/Sell
 Log in


Barya of Kelari Disciple of Varashta POE2 Build
A peculiar minion build for the Disciple of Varashta that commands Barya of Kelari to deal Physical and Chaos Damage.Djinn Barya of Kelari
Disciple of Varashta Build
Updated for Path of Exile 2 Early Access
The Best Crafty Guides by Odealo
| Guide notes |
| August 29, 2026 - Updated for Patch 0.5.5, including a new Archon that massively improves the build's performance. |
| Build Overview | |||
| Tags: [MINION] [PHYSICAL] [CASTER] [ENERGY SHIELD] | |||
|
Budget: Defenses: |
|
Boss DPS: AoE: |
|



The Disciple of Varashta is a Spellcaster Ascendancy disguised as a Minion user. It has access to unique Djinn Minions, or Baryas as they're called. These Minions do nothing passively, but have very powerful Command Skills that you have to activate manually. It plays like a Caster, but your Items are focused on Minion modifiers, especially Gem Level to Minion Skills, their Critical Hits, and Cooldown Recovery Rate for these Command Skills.
You can choose between three Baryas, but this build focuses heavily on the Kelari. The main damage-dealing ability is the Kelari's Deception, which creates a small explosion in a targeted location. Consecutive uses will deal significantly more Damage, so it is a good idea to store all 3 charges during Boss fights. In the meantime, you can use Kelari's Brutality to create falling daggers, or charge up Kelari's Judgment. Thanks to the new Archon of Undeath, your Cooldowns are very low, so the Skill rotation is very smooth. It's further enhanced by Puppet Master stacks, which remove the Movement Penalty while using all Command Skills. To activate the Archon, you simply have to use Command Skills. It will be active at all times during Mapping, but for Boss fights you should activate it with the basic Ruzhan's Brand, which has no Cooldown whatsoever. By default, Archon can't recover its Cooldown during its duration, but you can change it with the special Dominion Notable available only via Destilled Emotions.
All of the Kelari's Skills have a very high Crit Chance of 15%, making it an obvious choice for scaling Damage. Most of their Skills will also apply Critical Weakness, but it is not very reliable. To ensure high uptime on this powerful Debuff, which adds up to 10% Base Critical Hit Chance, we recommend wearing Effigy of Cruelty in your second Weapon Set and using Entangle, which is the fastest-hitting spell in the game. Keep in mind, you can't bind your Djinns to specific Weapon Sets, so you will have to use a different Spell to go back to your primary Weapon Set, such as Curse or Pain Offering. It can be quite annoying to manage, but it doubles your burst against Bosses, so it's quite worth the effort. You will also raise an army of permanent Minions, just to maximise the bonuses gained from Muster Gem. Their damage is not very impressive, but at least they can inflict useful Debuffs, such as Blind, Maim, or Daze.
It is worth mentioning Navira's Fracturing Spell, which can be used to explode any Chilled surfaces. It is a great tool for clearing, but the full Combo is quite lengthy and not really worth the payoff in the end. To create Chilled Ground, you have to infuse Frost Nova. You can get Infusion by waiting for the Frost Bomb to disappear, or use Powered by Verisium, ideally linked with Cast on Minion Death Meta Skill. It also costs 2 Ascendancy Points to unlock after all, so you will lose plenty of survivability by not picking the Sacred Rituals.
You can also check our other Path of Exile 2 builds right over here Odealo's Crafty Guides - Full List
1. Gameplay
The build uses two Kelari Command Skills, and most enemies will die with just one use of any of them. If you need more damage, cast Entangle, Curse, or Pain Offering. Remember to wait for all Kelari's Deception charges to recharge before Commanding for maximum damage output. All Skeletons and Sceptre Skills are working in the background, passively.
|
|
|
|


2. Build's PROS & CONS
| PROS |
|
| CONS |
|
3. Leveling tips
You will need to complete the first Ascendancy Trial to acquire Djinns. To get there, you can use the well-established Chaos DoT Setup, but Elemental Spells such as Spark or Physical Plants are also good. After your first ascension, allocate Kelari's Deception and use the skills provided as shown in this guide.
4. Final Skill Tree, Ascendancy Points, and Pantheon
Final Skill Tree:
 |
|
Click on the image to open the Passive Tree preview in a new window Or import the build into PoB: |
Ascendancy points:
Preferably in this order:
- Barya of Kelari with Kelari's Deception
- Barya of Ruzhan
- The Fourth Teaching
- Sacred Rituals
5. Final Gems links
| [DPS] Barya of Kelari setup Weapon Set 1 |
|
 |
Barya of Kelari - It includes Kelari's Deception. These two are your main damaging abilities and come directly from the Ascendancy Tree. Additional Sockets are gained as you level up, with the final one acquired at level 90. |
 |
Muster - this Gem grants 7% More Damage for each different permanent Minion you have summoned. If you have sockets and Spirit to spare, you should slot in as many Minions as possible. |
 |
Bidding II |
 |
Magnified Area II |
 |
Blindside |
 |
Kurgal's Leash |
 |
Hulking Minions - if you can't allocate Gigantic Following due to Spirit restraints, you can use this Gem instead. It's rarely efficient, but might be worth it in certain cases. |
 |
Vorana's Siege - an endgame upgrade over the Magnified Area. |
 |
Uul's Netol Embrace - another expensive upgrade; it also grants Armour Break. |
| [DPS] Barya of Ruzhan setup Weapon Set 1 |
|
 |
Barya of Ruzhan - Ruzhan's Brand ability deals a moderate amount of Damage, which is good enough to clear out stragglers. It's mostly used to stack up Puppet Master Buff. |
|
Bidding II |
|
Muster |
 |
Short Fuse I |
 |
Fire Penetration II |
|
Blindside |
| [UTILITY] Entangle setup Weapon Set 2 |
|
 |
Entangle - rapidly hits enemies, making it a great tool to inflict the Critical Weakness Debuff. It is only useful against Bosses. With better gear, you can skip this setup. |
 |
Excise |
 |
Pinpoint Critical |
 |
Branching Fissures II |
 |
Prolonged Duration II |
 |
Concussive Spells |
| [UTILITY] Pain Offering setup Weapon Set 1 |
|
 |
Pain Offering - Pain Offering increases Minions' Damage. Try to keep it alive for as long as possible. |
|
Sacrificial Offering |
|
Danse Macabre |
 |
Meat Shield - it can be replaced with Brutus' Brain. |
|
Prolonged Duration |
|
Magnified Area |
| [UTILITY] Curse setup Weapon Set 1 |
|
 |
Temporal Chains - slows down Enemies, and prolongs the Debuff duration on them. Use it to swap back to Weapon Set 1. |
 |
Slow Potency |
 |
Ritualistic Curse |
 |
Efficiency II |
 |
Cursed Ground |
|
Magnified Area II |
| [UTILITY] Wolf Pack setup | |
 |
Wolf Pack - a Companion Skill that summons many wolves. Their primary role is to increase your survivability and apply debuffs. |
 |
Amanamu's Tithe |
 |
Loyalty |
 |
Blind |
 |
Catha's Brilliance |
 |
Withering Touch |
| [UTILITY] Skeletal Minions setup | |
 |
Skeletal Warrior - All Skeletons' primary Role is to add 7% more damage each via Muster for Kelari. They can also inflict useful Debuffs. The Warriors should be granted by your Sceptre to save Gem Sockets, which is the main limitation here. |
 |
Skeletal Cleric - The Cleric is useful for keeping your Minions alive, but it is not that great at their job. |
 |
Skeletal Reaver - It has the lowest Spirit Cost among remaining Skeletal Minions. |
 |
Skeletal Sniper - Another cheap Minion. |
 |
Skeletal Frost Mage - A higher-tier Minion; it reserves 39 Spirit. Its contribution to total DPS is still very low, but it might inflict a weak Chill sometimes. |
 |
Skeletal Storm Mage - A similar case; the Damage is not great, but it can sometimes apply Shock. |
 |
Skeletal Arsonist - has no redeeming qualities, but it's still worth it to boost up the Muster Gem if you have Sockets and Spirit to spare. |
 |
Skeletal Brute - reserves 48 Spirit, the highest amount among Skeletal Minions. You might find a cheaper Raised Spectre instead. |
 |
Essence Harvest - recovers your Mana a bit when a minion dies. |
 |
Last Gasp |
|
Muster |
|
Blind |
|
Withering Touch |
|
|
6. Gear Setup
Your damage is sourced from the level of Minion Skills and Minion Damage, especially Critical Strike Chance and Multiplier. Special modifiers for Command Damage and Cooldown Recovery are also very potent. Every other gear piece shall boost your survivability, which comes down to Maximum Energy Shield and Resistances. With Chaos Inoculation, you won't need Chaos Resistance or worry about Bleed avoidance. Mana Regeneration Rate and better ES Recharge Rate are both great. Additional Spirit and Skill Sockets are useful to boost up Muster Gem, but they raise the Item's price drastically, so you shouldn't prioritize them early.
|
Stat priorities on items:
|
 (Helmet) Rare Helmet - Helmet must have the "+2" minion mod and as much ES as you can afford. You can use a Raven-Touched Shard to get an additional Anoint, or an Idol of Ralakesh to improve Reservation Efficiency. (Helmet) Rare Helmet - Helmet must have the "+2" minion mod and as much ES as you can afford. You can use a Raven-Touched Shard to get an additional Anoint, or an Idol of Ralakesh to improve Reservation Efficiency. |
|
| Min. requirements: 300 Energy Shield +2 to Level of all Minion Skills +40% total Elemental Resistance Optional affixes: +# to Intelligence #% increased Rarity of Items found 8% increased Reservation Efficiency of Minion Skills Raven-Touched |
|
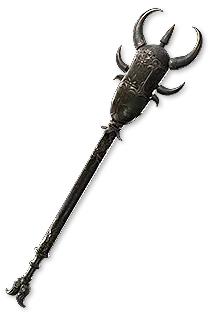 (Weapon) Rare Sceptre - Minion Skill Levels are the most important here, but increased Damage or Crits are also quite useful. Use a base that grants Malice Aura to improve the Crit Chance of your Minions passively, or additional Skeletal Minions to scale Muster. You might also need additional Spirit if you are not using any utility Skills. Try to socket the Soul Core of Dominion. (Weapon) Rare Sceptre - Minion Skill Levels are the most important here, but increased Damage or Crits are also quite useful. Use a base that grants Malice Aura to improve the Crit Chance of your Minions passively, or additional Skeletal Minions to scale Muster. You might also need additional Spirit if you are not using any utility Skills. Try to socket the Soul Core of Dominion. |
|
| Min. requirements: +4 to Level of all Minion Skills Optional affixes: Allies in your Presence have #% increased Critical Hit Chance Allies in your Presence deal #% increased Damage Allies in your Presence have #% increased Critical Damage Bonus #% increased Spirit |
|
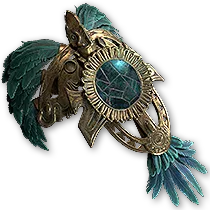 (Off-hand) Rare Focus - Level of all Minion Skills is an Abyssal Suffix, and it must be present. Then, search for usual defense. You can socket Soul Core of Retreat for better Stun Threshold, Owl Idol for Cooldown, or simply an Iron rune for higher ES. (Off-hand) Rare Focus - Level of all Minion Skills is an Abyssal Suffix, and it must be present. Then, search for usual defense. You can socket Soul Core of Retreat for better Stun Threshold, Owl Idol for Cooldown, or simply an Iron rune for higher ES. |
|
| Min. requirements: 200 Energy Shield +2 to Level of all Minion Skills (Desecrated Suffix) +30% total Elemental Resistance Optional affixes: #% increased Energy Shield Recharge Rate #% increased Mana Regeneration Rate |
|
 (Weapon) Rare Wand - the second Weapon Set is useful only against Bosses. You only need high Crit Chance for your Spells here. Remember to swap back to your main Weapon Set afterwards. (Weapon) Rare Wand - the second Weapon Set is useful only against Bosses. You only need high Crit Chance for your Spells here. Remember to swap back to your main Weapon Set afterwards. |
|
| Min. requirements: 60% increased Critical Hit Chance for Spells Optional affixes: #% increased Cast Speed |
|
 (Off-hand) Effigy of Cruelty - you can quickly apply all 20 stacks of Critical Weakness via Entangle to massively improve your burst against Bosses. (Off-hand) Effigy of Cruelty - you can quickly apply all 20 stacks of Critical Weakness via Entangle to massively improve your burst against Bosses. |
|
| +(20—30) to maximum Energy Shield (40—50)% increased Spell Damage +10 to Intelligence +(7—13)% to Chaos Resistance Critical Hits with Spells apply (1—3) Stacks of Critical Weakness |
|
 (Gloves) Rare Gloves - your Gloves are purely defensive, but you can get plenty of Damage if you sacrifice the Augment Sockets with the Cadigan's Epiphany to get an extra Jewel Socket. (Gloves) Rare Gloves - your Gloves are purely defensive, but you can get plenty of Damage if you sacrifice the Augment Sockets with the Cadigan's Epiphany to get an extra Jewel Socket. |
|
| Min. requirements: 150 Energy Shield +80% total Elemental Resistance Optional affixes: #% increased Energy Shield Recharge Rate +# to Intelligence #% increased Rarity of Items found Destroys all Augment Sockets on the item to create a Jewel Socket |
|
 (Boots) Rare Boots - the Boots are all about Speed. You can get plenty of Movement Speed, but also reduce the Slow Potency on you. For this reason, the Energy Shield will be rather low here. (Boots) Rare Boots - the Boots are all about Speed. You can get plenty of Movement Speed, but also reduce the Slow Potency on you. For this reason, the Energy Shield will be rather low here. |
|
| Min. requirements: 100 Energy Shield +40% total Elemental Resistance 30% increased Movement Speed Optional affixes: #% increased Energy Shield Recharge Rate +# to Intelligence #% increased Rarity of Items found #% reduced Slowing Potency of Debuffs on You |
|
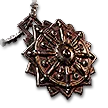 (Amulet) Rare Amulet - On the Amulet, look for +3 to Level of Minion Skills. It already makes the amulet quite pricey, so the other listed mods are of lesser importance. The Dominion Notable is mandatory to keep your Archon Buff at all times. At first, you can use Splintering Force to break Armour easily. You can use Portent Amulet to get Wolf Pack Skill for free. (Amulet) Rare Amulet - On the Amulet, look for +3 to Level of Minion Skills. It already makes the amulet quite pricey, so the other listed mods are of lesser importance. The Dominion Notable is mandatory to keep your Archon Buff at all times. At first, you can use Splintering Force to break Armour easily. You can use Portent Amulet to get Wolf Pack Skill for free. |
|
| Min. requirements: +3 to Level of all Minion Skills Optional affixes: #% increased maximum Energy Shield/Global Defences +# to Spirit +#% total Elemental Resistance +# to Intelligence #% increased Rarity of Items found Anointment: Dominion Splintering Force |
|
 (Ring) Rare Ring - at first, simply look for Resistances, Attributes, and Rarity, which makes acquiring high ES easier. Later on, you will want Breach-crafted Rings that improve your Minions. You can use an Unset Ring to gain additional Skill Slots. (Ring) Rare Ring - at first, simply look for Resistances, Attributes, and Rarity, which makes acquiring high ES easier. Later on, you will want Breach-crafted Rings that improve your Minions. You can use an Unset Ring to gain additional Skill Slots. |
|
| Optional affixes: +#% total Elemental Resistance +# to Intelligence #% increased Rarity of Items found Grants 1 additional Skill Slot Minions deal #% increased Damage Minions have #% increased Critical Hit Chance Minions have #% increased Critical Damage Bonus Minions have #% increased Cooldown Recovery Rate |
|
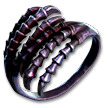 (Ring) Evergrasping Ring - Evergrasping Ring adds lots of extra Chaos Damage, which is further boosted with the Withered Debuff. Good with high Chaos Resistance or Chaos Inoculation. (Ring) Evergrasping Ring - Evergrasping Ring adds lots of extra Chaos Damage, which is further boosted with the Withered Debuff. Good with high Chaos Resistance or Chaos Inoculation. |
|
| (7-10)% increased Cast Speed +(60-100) to maximum Mana Allies in your Presence Gain (15-25)% of Damage as Extra Chaos Damage Enemies in your Presence Gain (6-12)% of Damage as Extra Chaos Damage |
|
 (Ring) Kalandra's Touch - this Ring copies all modifiers on your second Ring. A good Rare Ring for Minions is usually very expensive, so use it to cut costs. (Ring) Kalandra's Touch - this Ring copies all modifiers on your second Ring. A good Rare Ring for Minions is usually very expensive, so use it to cut costs. |
|
| Reflects opposite Ring | |
 (Ring) Ingenuity - this Belt can be used to further copy your expensive Ring powers, but to a lesser extent. (Ring) Ingenuity - this Belt can be used to further copy your expensive Ring powers, but to a lesser extent. |
|
| Has (1—3) Charm Slots 20% of Flask Recovery applied Instantly (-20—20)% reduced Charm Charges gained (-10—10)% reduced Charm Charges used (20—30)% increased bonuses gained from left Equipped Ring (20—30)% increased bonuses gained from right Equipped Ring |
|
 (Belt) Rare Belt - basic Belt should provide Resistances and Attributes. The special Breach modifiers are even stronger here, but also harder to acquire. Keep in mind you only need 2 Charm Slots, since the third one is unlocked in the Campaign. (Belt) Rare Belt - basic Belt should provide Resistances and Attributes. The special Breach modifiers are even stronger here, but also harder to acquire. Keep in mind you only need 2 Charm Slots, since the third one is unlocked in the Campaign. |
|
| Optional affixes: +#% total Elemental Resistance +# to Strength +2 Charm slots +# to Level of all Minion Skills Minions have #% increased Area of Effect Minions deal #% increased Damage with Command Skills |
|
 (Body Armour) Rare Body Armour - your Body Armour is the biggest source of Energy Shield, but you can also get plenty of Recharge Rate. You might want Spirit or Reservation Efficiency here as well, but it increases the costs significantly. (Body Armour) Rare Body Armour - your Body Armour is the biggest source of Energy Shield, but you can also get plenty of Recharge Rate. You might want Spirit or Reservation Efficiency here as well, but it increases the costs significantly. |
|
| Min. requirements: 600 Energy Shield +40% total Elemental Resistance Optional affixes: +# to Spirit #% increased Spirit Reservation Efficiency #% increased Energy Shield Recharge Rate #% reduced Ignite Duration on you |
|
 (Body Armour) Silks of Veneration - this Armour has most of the important modifiers you seek after, making it a very good budget option. It also provides extra defense against Elemental Damage. (Body Armour) Silks of Veneration - this Armour has most of the important modifiers you seek after, making it a very good budget option. It also provides extra defense against Elemental Damage. |
|
| (40-50)% increased Mana Regeneration Rate (150-200)% increased Energy Shield +(30-50) to Spirit +(20-30) to Intelligence (30-50)% increased Energy Shield Recharge Rate Current Energy Shield also grants Elemental Damage reduction |
|
 (Jewel) Rare Jewels - Look for at least two Minion modifiers. You can boost their effect with the Liquid Ferocity, but it tends to be quite expensive. At first, simply settle for additional Energy Shield gained through Liquid Ire. (Jewel) Rare Jewels - Look for at least two Minion modifiers. You can boost their effect with the Liquid Ferocity, but it tends to be quite expensive. At first, simply settle for additional Energy Shield gained through Liquid Ire. |
|
| Optional affixes: #% increased Maximum Energy Shield (40-60)% increased Effect of Suffixes Minions deal #% increased Damage Minions have #% increased Critical Damage Bonus Minions have #% increased Critical Hit Chance |
|
 (Jewel) From Nothing - this Jewel allows you to very efficiently reach Notables around certain Keystones. It combos with the Time-Lost Jewels extremely well, which also affects their price. (Jewel) From Nothing - this Jewel allows you to very efficiently reach Notables around certain Keystones. It combos with the Time-Lost Jewels extremely well, which also affects their price. |
|
| Passives in Radius of <Random Keystone> can be Allocated without being connected to your tree |
|
 (Jewel) Time-Lost Jewels - the Time-Lost Jewels with Large Radius are extremely effective in two configurations. The popular version sits near the Conduit Keystone. The other requires the Baryanic Leylines Ascendancy Notable, allowing you to cover 16 Notables near the Ritual Cadence Keystone. (Jewel) Time-Lost Jewels - the Time-Lost Jewels with Large Radius are extremely effective in two configurations. The popular version sits near the Conduit Keystone. The other requires the Baryanic Leylines Ascendancy Notable, allowing you to cover 16 Notables near the Ritual Cadence Keystone. |
|
| Optional affixes: Upgrades Radius to (Very) Large Small Passive Skills in Radius also grant #% increased maximum Energy Shield Small Passive Skills in Radius also grant Minions deal #% increased Damage Notable Passive Skills in Radius also grant Minions have #% increased Critical Hit Chance Notable Passive Skills in Radius also grant Minions have #% increased Critical Damage Bonus Notable Passive Skills in Radius also grant #% faster start of Energy Shield Recharge |
|
 (Jewel) Voices - a very expensive upgrade that simply adds extra Jewel sockets. (Jewel) Voices - a very expensive upgrade that simply adds extra Jewel sockets. |
|
| Allocates (2-4) Sinister Jewel sockets | |
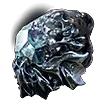 (Jewel) Megalomaniac - another luxurious addition with very versatile bonuses. You can use it to improve your energy shield, speed, or allocate extra notables in the range of your powerful time-lost jewels. (Jewel) Megalomaniac - another luxurious addition with very versatile bonuses. You can use it to improve your energy shield, speed, or allocate extra notables in the range of your powerful time-lost jewels. |
|
| Allocates <Random Passive Skill> | |
 (Flask) Lavianga's Spirits - the best Flask for comfort; it passively recovers a small amount of Mana. However, a regular Magic Flask will be better during Boss fights. (Flask) Lavianga's Spirits - the best Flask for comfort; it passively recovers a small amount of Mana. However, a regular Magic Flask will be better during Boss fights. |
|
| This Flask cannot be Used but applies its Effect constantly (70—80)% reduced Amount Recovered |
|
|
If you have any other build requests please leave that in the comments below. We are always open to suggestions and constructive feedback.
Pictures used in this article are the intellectual property of Grinding Gear Games.