Last Epoch Dungeon Guide
To The Lightless Arbor and The Vault of Uncertain Fate
Introduction
The Lightless Arbor is one of the three currently available Last Epoch Dungeons. It features unique mechanics, offers a difficult challenge, and gives you the chance to waste invest some of your gold to possibly get handsome rewards. If you're brave and wealthy enough, you might find much more than glory in its depths... This guide will go over everything that is to know about this dark place.
The Lightless Arbor Dungeon
| Lightless Arbor is an ancient forest full of dangerous creatures, warped wildlife, and overgrown vegetation. The most powerful of the beings that reside there is a titan made of stone and plant - The Mountain Beneath. You will find this forgotten place underneath the Last Refuge, but to enter it, you will need a special key... and something that will light up the path that lies before you. |
|
Farming Lightless Arbor Keys
- Arena Champions are known to have modifiers that improve the chance of obtaining Lightless Arbor Keys from them. This means that farming The Arena is one of the most consistent ways of farming Keys, especially if you don't want to build up a lot of Corruption.
- The modifiers you're looking for, to increase Key drop chance, appear after wave 20. Just keep in mind that there's no guarantee that you'll get the key you actually need (you might also get a Temporal Sanctum or Arena Keys, for example).
- After Wave 30, you can choose a modifier that will guarantee an Arena Key.
- The most efficient way of farming Lightless Arbor Keys in the Arena is to do 30 wave runs repeatedly. This way you can potentially get infinite Arena Keys. If you have spare keys, you can do 20 Wave runs instead.
- Running Monoliths is another good way of farming the Keys. This will, however, require high Corruption to be efficient.
- Bosses have a high chance to drop Keys. The higher the Corruption, the higher the chances! At high Corruption levels, you can even get multiple keys from a single Boss.
- On high Corruption Levels, Shades also have a solid chance to drop Keys.
- Your Build matters! Builds designed for Speed-Running through content will yield much more Keys/hour than slow and steady ones! It's all about the speed at which you can clear.
If you have some Lightless Armor Keys already, your best option for farming Keys is to simply... Run Lightless Arbor:
- The Vault of Uncertain Fate might give you a choice of choosing the Lightless Arbor key as a reward. If you combine this with modifiers that duplicate the rewards, you might get multiple Keys from a single run!
- This means that you can potentially do infinite Lightless Arbor runs... if you're lucky and wealthy enough.
|
|
The Darkness and the Pyre Amber Mechanics
As the name suggests, Lightless Arbor is a dark place. A very dark place... in fact, there are no natural light sources at all and the entire dungeon seems to be made out of the darkness that's home to powerful and dangerous monsters.
- Monsters encountered in Lightless Arbor receive high Damage and Resistance bonuses while they remain in the dark.
- A shining crystal, called pyre Amber, will accompany you on your journey and illuminate the immediate surroundings for you.
- The crystal can be controlled with the dungeon ability called "Illumination". By using Illumination, you can send forth and recall the crystal to scout the road ahead.
- When you take damage the power of the Crystal drains, reducing its light radius. You can recharge it by collecting Amber from slain Amber Elementals you'll encounter on your way (this adds a soft minimum gear requirement to the dungeon as you can run out of light if you're not powerful enough).
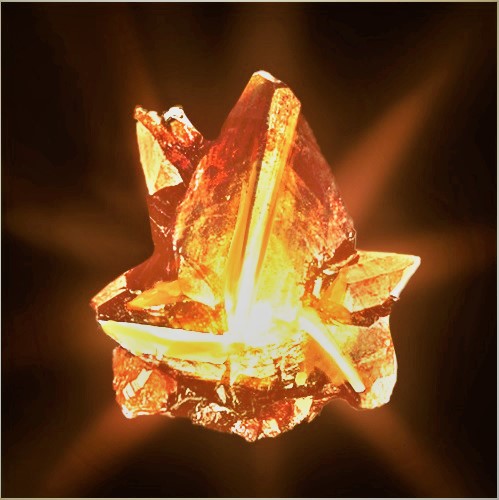
Pyre Amber will light your way, don't let it go out!
|
|
The Mountain Beneath Strategy
Mountain Beneath, the guardian of the Vault of Uncertain Fate is one of the Titans of Eterra. While we do not know much about its origin, we know that it's very dangerous, it's affected by the surrounding Corruption, and it doesn't like light. This towering Titan is over 100ft tall, so fighting him directly is not really possible...
The fight itself takes place on a rectangular (more or less) Platform and consists of two separate phases:
In Phase One you will have to light up two kindlings located on the top corners of the platform. This is done by using the Dungeon Ability "Burning Amber" near them. You'll have to destroy roots that protect the kinglings first. After you light up the first Kindling, three stationary Adds will spawn - deal with them and go to the second Kindling.
- To make the task more difficult, the Boss will frequently cause Boulders to rain down on the platform. They are Telegraphed by small white circles that appear on the ground. These won't kill you but they will often overlap with more dangerous mechanics.
- Sometimes, the Boss will throw an Add at you. This is telegraphed by a larger white circle. Unlike Boulders, these have to be avoided at all costs as they deal much more damage.
- The Boss will sometimes slam the platform with his enormous Hands. This is Telegraphed by expanding Circles that appear on the Left and the Right - Avoid these at all costs and keep to the middle of the platform so that you're not caught off-guard by this.
- Try to be as fast as possible with lighting the kindlings to minimize risks.
- There are also safe zones right beneath the Kindlings, but it's very narrow and you won't be able to dodge other mechanics if you choose to stay there.
- The Boss can also create a Shockwave that will travel from one side of the platform to another. To dodge Dodge it, run to the opposite edge.
Once both Kindlings are lit, you can enter the Mountain and start The Second Phase. Inside the Mountain, you will find the Stone Titan's Heart in the middle of a circular room. You have to destroy it to defeat the Boss.
- During this phase, multiple small mines will spawn. If you let them live long enough, they'll start doing Telegraphed attacks against You. AoE helps against these.
- Boss will frequently summon Adds. They are not too dangerous but they might get in your way, so you should deal with them quickly.
- Armor-shredding Projectiles will be shot at you from time to time. You can side-step these quite easily.
- Boss will sometimes use a 45-degree Cone Attack that will afflict you with Poison Stacks. try to avoid it by stepping out.
- Poison can also be cleansed if you have a belt with the "Cleanse Ailments on Potion Use" Affix.
- Stone Titan's Heart will fire a Green Beam in a random direction. The beam will then split in two and travel in two opposite directions (clockwise and counter-clockwise). To avoid it, run to the opposite side of the Heart.
- Keep your distance from the Heart during this mechanic to make sure you don't touch the beams.
- When you run too far away from the Boss, He will use an AoE attack that will expand from the corners of the room and force you to run to the middle. This is indicated by fog gathering on the edge of the room. Just run to the middle of the room when this happens.
- The Heart will also summon Boulders that will do circles around it. Try not to get hit by these too much.
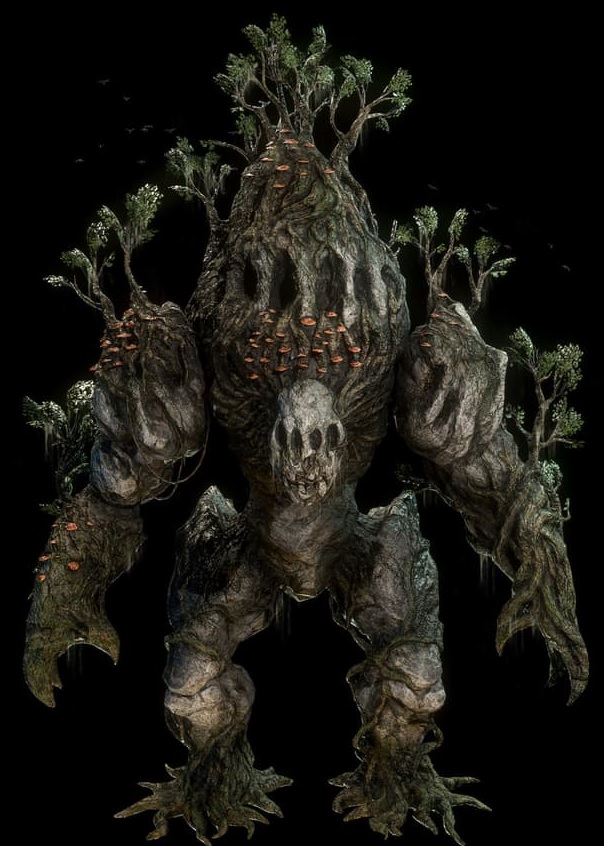
To get to the Vault, you'll need to take care of this guy first
|
After you defeat the Mountain Below, you can approach the Vault of Uncertain Fate and sink Invest some of your gold to possibly get powerful rewards! |
The Vault of Uncertain Fate
|
After defeating The Mountain Beneath, you will gain access to an ancient structure called The Vault of Uncertain Fate. It is of a similar origin as the Eternity Cache and the Monolith. A legend has it that it possesses a portion of the power of a mighty being from the Ancient Era called Derium.
The Vault of Uncertain Fate will give you a choice: Do you want to risk a portion of your wealth for a chance of receiving powerful rewards? Before you decide, remember that there are no guarantees.
After this lore-friendly introduction, it's time to take a closer look at the mechanics involved.
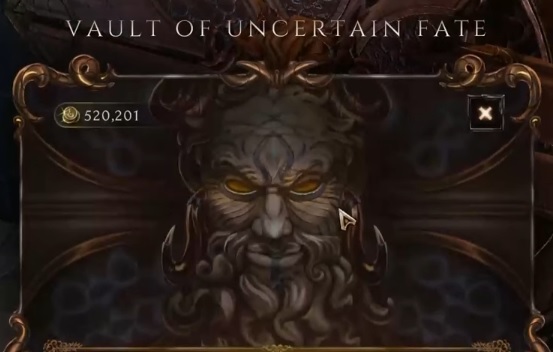
Derium would not trick you into risking all of your gold for an uncertain reward, would He?
|
|
The Offering
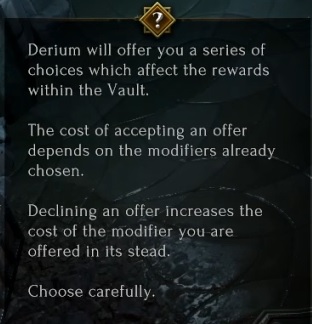
When you interact with the Vault, it will present you with a series of modifier offers that will affect your reward from The Lightless Arbor. You can either Accept or Decline them. Each offer has its price, so Accept only the ones that present real value to you.
- If you Decline an offer, the price of the next offer presented will increase. This means that re-rolling is associated with increasingly high prices.
- The price of an offer is also affected by the modifiers which you've chosen already; getting a set of perfect modifiers might get rather expensive.
- The more Gold you sacrifice, the more powerful reward you might receive. Might is the keyword here as there are no guarantees! All you can do is optimize your risk versus reward ratio by being strategic with your choices.
- Once you are satisfied with your modifiers (or simply don't have more Gold), simply press the "Enter Vault" key and approach the reward chests.
- The maximum number of modifiers is 12.
The more you risk, the more you can gain... or lose
|
|
Possible Modifiers
Here's a list of modifiers we've seen. Knowing what modifiers are possible to get will let you be more strategic (and economical) with your choices.
- Adds a Chest that drops several exalted items.
- Adds a Chest that drops a Rare Weapon, an Exalted Weapon, and a Unique Weapon.
- Adds a Chest that drops a Rare Item, an Exalted Item, a Unique Item, and a Set Item.
- Adds a Chest that drops an Exalted Helmet, Exalted Body Armor, Exalted Gloves, and Exalted Boots.
- Adds a Chest that drops several Exalted Helmets.
- Adds a Unique Item to a random Chest.
- Adds an additional Set item to All Chests.
- Adds a Set Item to a random Chest.
- Adds an additional Glyph of Chaos to All Chests.
- Adds an additional Glyph of Despair to All Chests.
- Adds additional Exalted Relic to All Chests.
- Adds an additional Rune of Ascendance to All Chests.
- Adds an additional Glyph of Chaos to All Chests.
- Duplication of all Unique Items from Every Chest. This effect is additive with other item multiplication effects.
- Additive means that Triplicating and Duplicating will give you 5 items, not 6, etc.
- All Items from every Chest have an X% chance to be Duplicated (X can be equal to 20%, 30%, 40%, and 50%). This effect is additive with other item multiplication effects.
- Getting over 100% chance may result in getting even more copies of an item.
- Duplication of every Chest. This effect occurs after modifiers that apply to a random chest have already been applied.
- Triplication of every Chest. This effect occurs after modifiers that apply to a random chest have already been applied.
- This one is an auto-pick in our book, especially if you get it early or your previous choices were satisfactory.
- All Chests drop X% more Items (possible percentages are 15%, 20%, 30%, 40%, and 50%). This effect is multiplicative with other modifiers.
- All Chests drop X% more Exalted Items (possible percentages are 15%, 20%, 30%, 40%, and 50%). This effect is multiplicative with other modifiers.
|
|
END NOTE
Congratulations! You have defeated The Mountain Beneath and gained access to the Vault of Uncertain Fate! How much of your Gold are you willing to risk for an uncertain reward? Please let us know! If we have missed a piece of information that is especially important to you, please let us know and we will make sure to add the missing information.
Please note that this is an early version of our guide, and we will be happy to receive constructive criticism, that will help us improve it, so leave your suggestions in the comments section below. We also plan on expanding this guide with further sections, so stay tuned.
|
Pictures used in this article are the intellectual property of Eleventh Hour Games