Games Marketplace - Odealo
0.00 25 (Click on the icon to view details)

Articles

Double Throw Barbarian PD2 Build

Double Throw Barbarian PD2 Build

God Tier Barbarian build with massive DPS and insane clear speed

Double Throw
Barbarian Build

Updated for Season 4
 

Build notes:

April 9, 2021
-Build created

January 12, 2022
-Build updated for Season 4 


Build Overview

Double Throw (and thrown weapons in general) was one of the Skills that got a lot of love from Project Diablo 2 developers. Double Throw is a ranged attack that allows you to throw both of your Weapons and deal massive damage. The skill also has a built-in chain, which allows you to hit plenty of enemies with each Attack. This build is truly Godly, and allows you to faceroll Maps and pretty much most of the content. You are tanky, with massive Life Leech, tons of damage, increased mobility, and your Axes fly all over the screen obliterating enemies. Needless to say, a relatively low-budget version of this build allows you to solo farm Baal below level 80 without having to consume Potions. After you get all the equipment, get some fancy corruptions and extra sockets, you may not even need many adjustments to take on DClone - but yeah, that's something you need to be experienced with anyway. Furthermore, for some reason, the build doesn't seem to be that popular and the BiS weapons go for less than 1 Ist Rune each. 

Having played this build for quite some time, I couldn't really find any downsides of that character. Maybe mobility could have been better, but if you build Enigma this is kind of mitigated. You can also max out the Increased Speed Passive and run nearly as fast as an Amazon. That's not exactly the most recommended option, but if you want to be at fast as possible, that's an option. According to our PD2 Tier List for Season 2, it's the Top Barbarian build currently.

Season 4 Note: After the rework received in season 1, Double Throw has turned out to be a bit too good... and thus it was nerfed in seasons 3 and 4. Despite this, it still remains solid and is currently the best Combat Skill for Mapping with a Barbarian. 

You can also check our other Best Project Diablo 2 Builds


 Pros  Cons
 Insane DPS with massive area coverage  Let's put mobility here so that it doesn't seem too one-sided
 Faceroll Maps and most of the content   
 Tanky with massive Life Leech   
 Can be played as a Starter and budget-friendly build  


Skills

ATTRIBUTES

  1. Strength - just enough to equip all the gear. In our case, it was 118 Strength for Arreat's Face (which also happens to grant up to 20 Strength)
  2. Dexterity - all remaining Points should be allocated in Dexterity to maximize your Attack Rating and Defense Rating
  3. Vitality - you are looking to get around 1,200 to 1,800 Life depending on what you want to do and how comfortable you feel farming your current content. Around 220-260 Vitality in total should suffice
  4. Energy - do not allocate any Points to Energy

WARCRIES

You want all the "buff" type Warcries allocated with at least 1 point in each. We also recommend spending all additional Points on specific Warcries and abilities from this Tree after you get all the core Combat Skills and Throwing Mastery. Whether you decide to go Find Items, Battle Orders, Battle Cry, or Battle Command is up to your personal preference. If you are socketing your Items with Ists and picking up MF gear, obviously Find Item is mandatory. Make sure to hotkey all the Warcries and use them all once every 5 minutes 

Skills:

  1. Howl [1/20] - prerequisite only
  2. War Cry [1/20] - prerequisite only
  3. Taunt [1/20] - prerequisite only
  4. Shout [1/20] - your first Warcry that you are going to use to buff yourself and your allies. Shout increases the defense rating of you and your party
  5. Battle Orders [1/20] - this Warcry increases your Life and Mana, and in most cases, that's the Warcry we recommend maxing out if you are not interested in using Find Item
  6. Battle Command [20/20] - increases the level of all your Skills. It also grants a 3% damage bonus per level, so it's not a bad idea to spend some extra Points here
  7. Battle Cry [1/20] - a Warcry that reduces the defense and increases damage taken by affected enemies. It has to be recast when facing new enemies, where in most cases that's just used against Bosses. Stat-wise that's the best ability from this Tree that should be maxed out, but the bonuses granted are very inconsistent, as you will use mainly against Bosses
  8. Grim Ward [1/20] - when used on a corpse, it will create a Totem that greatly boosts your DPS

Optional skills:

  1. Find Potion [1/20] - a prerequisite for Find Item
  2. Find Item [1/20] - allows you to search corpses for extra Items, if you are playing an MF barb or just want to try out your luck, you can even max out Find Item Skill in this build

COMBAT MASTERIES

You will find only Passives in this Tree and you are going to take them all except for the ones related to the types of Weapons that are you not going to use as a Double Throw Barbarian. It's recommended to just allocate 1 Point in each Passive (except for Throwing Mastery), which will be then increased by all the + to Skills bonuses that you have

Skills:

  1. Throwing Mastery [20/20] - a mandatory Skill that increases the damage you deal with Thrown Weapons
  2. Combat Reflexes [1/20] - increases your Stamina, Stamina regen, and Maximum Life
  3. Increased Speed [1/20] - increases your Movement Speed
  4. Iron Skin [X/20] - grants physical damage reduction and Defense rating. You can spend the rest of your points here for some additional defenses or improve your Find Item, for example.  
  5. Natural Resistance [1/20] - increases your Elemental Resistances and Poison Resistance

COMBAT SKILLS

You will find Double Throw in this Skill Tree which is the build-defining Skill in this build. You are going to take only three Skills here, and max out just Double Thrown and Double Swing for the synergy bonus. Frenzy is just a prerequisite and you shouldn't take more than 1 Point here

Skills:

  1. Frenzy [1/20] - prerequisite only. Though it's the skill you are going to use for the first couple of levels before you get Double Swing and Double Throw eventually
  2. Double Swing [20/20] - not a skill that you are going to use, but you need 20 Points here to increase the damage of your Double Throw through those Skills synergy
  3. Double Throw [20/20] - the main Attack used in this build so obviously you want to prioritize it and get it to 20/20 as soon as possible


Items

As always, you want to increase the level of All Skills/Barbarian Skills to the highest level possible. For Barbarians this is an even more important stat because of all the Warcries and Passives that benefit from it, so basically all other stats must have a lower priority. You also want Attack Speed and Faster Hit Recovery - as long as you attack enemies will melt, if you get hit (stunned/knocked back in the result) too much, you won't Leech and you may end up dying

HELMETS

[BIS] Arreat's Face (Slayer Guard) - Arreat's Face can give you +2 to All Skills and up to +2 to Combat Skills as well, making it the best all-round option for this build. It also offers All Resistances, Attributes, FHR, and Life Leech

Arreat's Face

  • Defense: 302-363
  • Required Level: 42
  • Required Strength: 118
  • Durability: 55
  • (Barbarian Only)
    • +150-200% Enhanced Defense 
    • 30% Faster Hit Recovery 
    • 20% Bonus To Attack Rating 
    • +2 To Barbarian Skill Levels 
    • 3-6% Life Stolen Per Hit 
    • All Resistances +30 
    • +[10-20] to Strength (varies) 
    • +[10-20] to Dexterity (varies) 
    • +(1-2) To Combat Skills (Barbarian Only) 

Andariel's Visage (Demonhead) - another great helmet option that offers a very high Attack Speed bonus. If you are struggling to get to the next IAS Breakpoint, picking up Andariel's Visage is a great option

Andariel's Visage

  • Defense: 310-387
  • Required Level: 83
  • Required Strength: 102
  • Durability: 20  
    • +100-150% Enhanced Defense 
    • +2 To All Skills 
    • 20% Increased Attack Speed 
    • 8-10% Life Stolen Per Hit 
    • +25-30 To Strength 
    • +10% To Maximum Poison Resist 
    • Fire Resist -30% 
    • Poison Resist +70% 
    • 15% Chance To Cast Level 15 Poison Nova When Struck 
    • Level 3 Venom (20 charges) 

Crown of Ages (Corona) - A very solid defensive choice that gives us a high damage reduction, some nice resistances, a lot of Defense, and up to three sockets which make it much more versatile than some other worthwhile helmets. 

Crown of Ages

  • Defense: 349 to 399 
  • Required Level: 82
  • Required Strength: 192
  • Durability: Indestructible 
    • 50% Enhanced Defense 
    • +100-150 Defense (varies) 
    • 75% Reduced Curse Duration 
    • Damage Reduced By 10-15% (varies) 
    • All Resistances +20-30 (varies) 
    • +30% Faster Hit Recovery 
    • Socketed (1-3) (varies) 
    • Indestructible 

WEAPONS

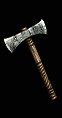
[BIS] Lacerator (Winged Axe) - Lacerator is your go-to weapon for this Barb. It deals massive Physical Damage with a chance to apply Amplify Damage to enemies on hit, which basically doubles your DPS. It also has a high chance to open wounds and prevents Monster heal. It's also cheap, so it shouldn't be hard to get nearly perfect rolls with decent corruption for just a few high runes

Lacerator

  • Throw Damage: 21 to 216
  • Required Strength: 96
  • Required Dexterity: 122
  • Required Level: 68
  • Base Weapon Speed: -10
    • 33% Chance to Cast Level 16 Amplify Damage on Striking 
    • +30% Increased Attack Speed 
    • +[200-260]% Enhanced Damage (varies) 
    • 33% Chance of Open Wounds 
    • Prevent Monster Heal 
    • +20 to Minimum Damage 

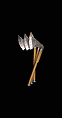
Gimmershred (Flying Axe) - another extremely powerful Weapon that deals massive Elemental Damage of all three types. Personally, I have used two of these on Weapon Swap, but to be honest, I have rarely needed to swap at all

Gimmershred

  • Throw Damage: (44-51) to (191-224)
  • One-Hand Damage: (49-58) to (189-221)
  • Required Strength: 88
  • Required Dexterity: 108
  • Required Level: 70
  • Base Weapon Speed: 10
    • +190-240% Enhanced Damage (varies)
    • Adds 258-523 Fire Damage
    • Adds 29-581 Lightning Damage
    • Adds 216-437 Cold Damage, 4 sec. Duration
    • +30% Increased Attack Speed

Demon's Arch (Balrog Spear) - another interesting option, though it only deals two types of damage making it a less versatile weapon than Gimmershred. It gives you Life Steal though, allowing you to choose from a wider variety of items for other slots

Demon's Arch

  • Throw Damage: (156-164) To (192-254)
  • One-Hand Damage: (102-135) To (195-258)
  • Required Strength: 127
  • Required Dexterity: 95
  • Required Level: 68
  • Base Weapon Speed: 10
    • +210-310% Enhanced Damage (varies)
    • Adds 232-323 Fire Damage
    • Adds 1-666 Lightning Damage
    • +30% Increased Attack Speed
    • 6-12% Life Stolen Per Hit (varies)
    • 10-20% Fire Pierce (varies)
    • 10-20% Lightning Pierce (varies)

AMULETS

Mara's Kaleidoscope - one of the best Amulets in Project Diablo 2. The Resistances are negligible in this build, but still, the +2 Skill is invaluable for a Double Throw Barb

Mara

  • Required Level: 67
    • +2 To All Skills
    • All Resistances +20-30 (varies)
    • +5 To All Attributes

Seraph's Hymn - another powerful +2 Amulet which instead of Attributes/Resistances grants you extra damage against Undead and Demons

Amulet

  • Required Level: 65
    • +2 to All Skills
    • +1-2 to Defensive Auras (Paladin Only) (varies)
    • 50-80% Damage vs. Demons (varies)
    • +150-250 to Attack Rating Against Demons (varies)
    • 50-80% Damage vs. Undead (varies)
    • +150-250 to Attack Rating Against Undead (varies)
    • +2 to Light Radius

Highlord's Wrath - a great option if you need extra IAS to reach the next Breakpoint. Also grants bonus Lightning Damage and a high chance for Crushing Blows but "just" +1 to Skills

Highlords

  • Required Level: 65
    • +1 to All Skills
    • 20% Increased Attack Speed
    • + 0-25% Deadly Strike (+0.25 per Character Level)
    • Lightning Resist +25-35% (varies)
    • Adds 1-300 Lightning Damage
    • Attacker Takes Lightning Damage of 400-650 (varies)

ARMORS

Templar's Might (Sacred Armor) - one of the best choices as it grants +1 to Skills and Might Aura which boosts your DPS. The Armor can be however equipped on a Mercenary, so then you should definitely pick one of the other options for yourself

Templar's Might

  • Defense: 1622 to 1923
  • Required Strength: 232
  • Durability: 60
  • Required Level: 74
    • +170-220% Enhanced Defense (varies)
    • +250-300 Defense vs. Missile (varies)
    • +20-30 to Strength (varies)
    • +20-30 to Vitality (varies)
    • 20% Faster Hit Recovery
    • +40-50 to Maximum Stamina (varies)
    • +1 to All Skills
    • Level 4-8 Might Aura When Equipped (varies)

Enigma (Runeword) - the best all-around Armor for this build. It grants +2 to All Skills, Teleport skill which fixes all your needs for additional mobility, tons of Life Strength and Magic Find. Consists of Jah • Ith and Ber runes, making it quite an expensive option

Enigma

  • Defense: Depends on base Armor 
  • Required Level: 65 
  • Required Strength: Depends on base Armor 
  • Durability: Depends on base Armor 
  • Jah + Ith + Ber  
    • +2 To All Skills 
    • +25% Faster Run/Walk 
    • Level 1 Blink* (5/5 Charges)
      Replenish 1 Charge in 3 Seconds
    • +500-775 Defense (varies) 
    • +[0-74] to Strength (+[0.5-0.75] per Character Level) (varies)
    • Increase Maximum Life 5%
    • Damage Reduced By 4%
    • 15% Damage Taken Goes To Mana
    • [0-74]% Better Chance of Getting Magic Items ([0.5-0.75]% per Character Level) (varies)

Chains of Honor (Runeword) - another great option for this build with offers tons of damage and Resistances. It requires Dol • Um • Ber • Ist to complete it, and the Ber rune required for the Rune Word makes it quite a pricy option as well. It should be socketed in a chest with the highest defense rating you can afford

Chains of Honor

  • Defense: Depends on base Armor 
  • Required Level: 65 
  • Required Strength: Depends on base Armor 
  • Durability: Depends on base Armor 
  • Dol + Um + Ber + Ist 
    • +2 To All Skills 
    • +200% Damage to Demons 
    • +100% Damage to Undead 
    • 8% Life stolen per hit 
    • +70% Enhanced Defense 
    • +20 Strength 
    • Replenish Life +10 
    • All Resistances +50-60 (varies) 
    • Physical Damage reduced by 4% 
    • 25% Better Chance of Getting Magic Items 

RINGS

[BIS] Wisp Projector - the BiS Ring for raw damage, and also the Lightning Absorb is a great addition to your defenses 

Wisp Projector

  • Required Level: 76
    • Lightning Absorb 4-6% (varies)
    • 8-15% Better Chance of Getting Magic Items (varies)
    • +1-3 to Spirit of Barbs (varies)
    • +1-3 to Heart of the Wolverine (varies)
    • +1 To All Skills

[BIS] Raven Frost - Freeze immunity is a must-have for pretty much every build. Raven Frost is the easiest way to get it

Raven Frost

  • Required Level: 76
    • +150-250 Attack Rating (varies)
    • 15-45 Cold Damage
    • +15-20 Dexterity (varies)
    • +40 Mana
    • Cold Absorb 5-10% (varies)
    • Cannot be Frozen

Bul-Kathos Wedding Band - another great option that adds +1 to Skills and extra Life. Should be used instead of Raven Frost if you get the Freeze immunity corrupted modifier one some other piece of equipment

Wisp Projector

  • Required Level: 58
    • +1 To All Skills
    • + (0.5 Per Character Level) 0-49 To Life)
    • 3-5% Life Stolen Per Hit (varies)
    • +50 Maximum Stamina

GLOVES

[BIS] Soul Drainer (Vambraces) - I found this pair to be mandatory as Mana Steal was necessary to play this build comfortably. If you have another way to replenish your Mana and feel comfortable enough using Potions, there are definitely better DPS-wise options for this slot

Soul Drainer

  • Defense: 129 - 149
  • Required Strength: 50
  • Durability: 16
  • Required Level: 74
    • +90-120% Enhanced Defense (varies)
    • 4-7% Mana Stolen Per Hit (varies)
    • 4-7% Life Stolen Per Hit (varies)
    • -(50-100) to Monster Defense per Hit (varies)
    • Attacker Takes Damage of 600-860 (varies)
    • 20% Chance to Pierce
    • -(5-10)% to Enemy Physical Resistances (varies)
    • Drain Life -30

Steelrend (Ogre Gauntlets) - this pair offers the highest possible DPS bonus with a high chance of Crushing Blow and up to 80% (!!) Enhanced Damage

Steelrend

  • Defense: 232 - 281
  • Required Strength: 185
  • Durability: 24
  • Required Level: 70
    • +170-210 Defense (varies)
    • 40-80% Enhanced Damage (varies)
    • 10-15% Chance of Crushing Blow (varies)
    • +15-20 to Strength (varies)
    • Melee Attack Deal Splash Damage

Dracul's Grasp (Vampirebone Gloves) - another very popular option for this slot that grants a high IAS bonus and Life Steal

Dracul's Grasp

  • Defense: 125 - 145
  • Required Strength: 50
  • Durability: 14
  • Required Level: 76
    • +90-120% Enhanced Defense (varies)
    • +10-15 to Strength (varies)
    • +5-10 Life After Each Kill (varies)
    • 25% Chance of Open Wounds
    • 7-10% Life Stolen Per Hit (varies)
    • 20% Increased Attack Speed

BOOTS

War Traveler's (Battle Boots) - the best all-around pair for this build. It grants high MF bonus and the extra Added Damage scales greatly with various sources of Enhanced Damage bonuses

War Traveler's

  • Defense: 120 to 139
  • Kick Damage: 37 to 64
  • Required Strength: 95
  • Durability: 48
  • Required Level: 42
    • +150-190% Enhanced Defense (varies)
    • 25% Faster Run/Walk
    • +10 to Vitality
    • +10 to Strength
    • Adds 15-25 Damage
    • +40% Slower Stamina Drain
    • Attacker Takes Damage Of 5-10 (varies)
    • 30-50% Better Chance of Getting Magic Items (varies)

Gore Rider (War Boots) - this pair offers the highest possible DPS bonuses for your character. 

Gore Rider

  • Defense: 140 to 162
  • Kick Damage: 39 to 80
  • Required Strength: 94
  • Durability: 34
  • Required Level: 47
    • +160-200% Enhanced Defense (varies)
    • 30% Faster Run/Walk
    • 10% Chance Of Open Wounds
    • 15% Chance Of Crushing Blow
    • 15% Deadly Strike
    • Requirements -25%
    • Attacker Takes Damage Of 5-10 (varies)
    • +20 Maximum Stamina

BELTS

[BIS] Verdungo's Hearty Cord (Mithril Coil) - the best option in terms of defenses, but also the very high FHR bonus allows you to deal damage more consistently without having to avoid getting hit that much

Verdungo Hearty Cord

  • Defense: 125-158
  • Required Level: 63
  • Required Strength: 106
  • Durability: 16
  • 16 Potion Boxes
    • +90-140% Enhanced Defense
    • 10% Faster Hit Recovery
    • +30-40 To Vitality
    • Replenish Life +10-13
    • +100-120 Maximum Stamina
    • Damage Reduced By 10-15%

Thundergod's Vigor (War Belt) - adds a ton of extra Lightning Damage so if you pair it with Highlord's Amulet, you may not even need to swap Weapons against Physical Immune enemies. It also grants a ton of defenses against Lightning Damage 

Thundergod's Vigor

  • Defense: 137 to 159
  • Potion Slots: 16
  • Required Strength: 110
  • Durability: 24
  • Required Level: 47
    • +160-200% Enhanced Defense (varies)
    • 1-(150-250) Lightning Damage (varies)
    • 5% Chance to Cast Level 17 Fist of the Heavens When Struck
    • +5-10 Lightning Absorb (varies)
    • 5% to Maximum Lightning Resist
    • +10-15 to Strength (varies)
    • +10-15 to Vitality (varies)
    • +2 to Lightning Fury (Amazon Only)
    • +2 to Lightning Strike (Amazon Only)
    • +1 to Lightning Skills

Nosferatu's Coil (Vampirefang Belt) - this is the recommended belt if you need extra Attack Speed. It also offers additional Life Steal and increases your chance to deal Deadly Strike

Nosferatu's Coil

  • Defense: 56 to 63
  • Potion Slots: 16
  • Required Strength: 50
  • Durability: 14
  • Required Level: 51
    • Slows Target By 10%
    • +2 To Mana After Each Kill
    • 3-6% Life Stolen Per Hit (varies)
    • +10-15 Strength (varies)
    • 20% Increased Attack Speed
    • 10% Deadly Strike

Goldwrap (Heavy Belt) - An interesting choice for this build; it grants quite a lot of Attack Speed, some defense, and high Magic Find which is great for farming. 

Goldwrap

  • Defense: 34-36 
  • Potion Slots: 12 
  • Required Level: 27
  • Required Strength: 45
  • Durability: 18
    • +40-60% Enhanced Defense (varies) 
    • +25 Defense 
    • 20% Increased Attack Speed 
    • 20-40% Better Chance Of Getting Magic Items (varies) 
    • 50-80% Extra Gold From Monsters (varies) 
    • +2 To Light Radius  

CHARMS

  1. Gheed's Fortune - if you want to increase your MF and loot in general, equipping Gheed's Fortune is the easiest and most popular way
  2. Hellfire Torch - again, the BiS Unique Large Charm which increases your Vitality +1 to All Skills and more
  3. Annihilus - same as above, you want to have this Unique Small Charm on all your characters eventually
  4. Grand Charms - if you are going for Skiller Grand Charms, you may want to pick Warcry ones as they will offer the highest overall bonuses. Ones with Life and FHR are the BiS options. You can also get Grand Charms with high bonus Maximum Damage and Attack Rating
  5. Small Charms - preferably Max Damage and Attack Rating here. You can also get extra Life or Magic Find, depending on your personal preferences

MERCENARY

We recommend picking up Act 1 Vigor Mercenary for an extra Movement Speed bonus. Also, the Rogue merc can give you up to two powerful Auras from Faith Rune Word and Templar's Might (if she end up having enough Strength to equip it)

  1. Faith Rune Word in high DPS Bow, preferably Hydra Bow. Faith offers Fanaticism Aura which increases your Damage, Attack Rating, and Attack Speed
  2. Templar's Might with Might Aura is the best option (assuming you don't have it equipped on your own character) though it has a very high Strength requirement. You can also use a budget-friendly Gloom Rune word which offers high defensive bonuses to your Merc
  3. Dracul's Grasp Gloves - for high IAS and Life Steal
  4. Vampire's Gaze - this is arguably one of the best Merc Helmet as it grants high Life Steal and damage reduction so that you don't have to resurrect your Mercenary constantly
  5. String of Ears - very high damage reduction again
  6. Sandstorm Trek Boots - an inexpensive pair of very solid boots which offer extra FHR and stats for your Mercenary


END NOTE

We have just started making guides for Project Diablo 2 so we will appreciate any feedback (or criticism as well). We would like to provide the highest quality content on our website, so if you would like us to add some other type of information, like Leveling Tips & Gear, more alternative equipment options, recommended farming areas, and such, please let us know in the comments below! 

Pictures used in this article are the intellectual property of Blizzard Entertainment.