
Arc Raiders Best Solo Farming Locations Guide
Best solo farming spots in Arc Raiders—safe locations, smart looting tips, and top areas for players who run solo and avoid PvPBest Solo Farming Locations in Arc Raiders – Complete Guide
Last update: December 30, 2025
Introduction
Farming solo in Arc Raiders can be one of the safest and most consistent ways to build up resources—especially for players who prefer avoiding PvP, want to practice the basics, or simply need steady loot income without risking expensive gear. This guide focuses on low-pressure, beginner-friendly solo farming locations, along with the most important principles of solo play.
Before diving into specific farming spots, it’s important to understand that solo looting success depends more on your playstyle than the location itself. The truth is that even the “best” farming spots don’t stay the best forever; as soon as they become widely recognized (including through guides like this one), traffic increases, and risk rises. That’s why understanding how to play solo is just as important as knowing where to go.
Below are the core recommendations for successful solo farming:
Core Solo Farming Tips
- Avoid popular routes and peak-traffic areas – Go slightly off-meta paths; the quieter the area, the safer your run.
- Stay mobile and don’t overstay – Solo players thrive on hit-and-run looting; lingering too long increases chances of PvP encounters.
- Listen more than you engage – Sound is your biggest advantage in solo play; disengage early rather than fighting uncertain opponents.
- Always plan your extraction before you start looting – A safe exit route is worth more than one extra loot container.
- Travel light, extract often – The goal is consistency, not one huge risky payday.
- Use budget gear – Losing cheap, effective items hurts less and allows for repeated farming attempts with minimal setbacks.
- Expect that “best spots” will evolve – As locations become popular through community guides, more players show up. Rotate your farming routes frequently.
This article incorporates those principles while listing three strong, lower-risk farming spots on each map, chosen specifically for solo runners who want reliable loot without diving into high-traffic red zones or PvP hotspots.
The Dam – Best Solo Farming Spots
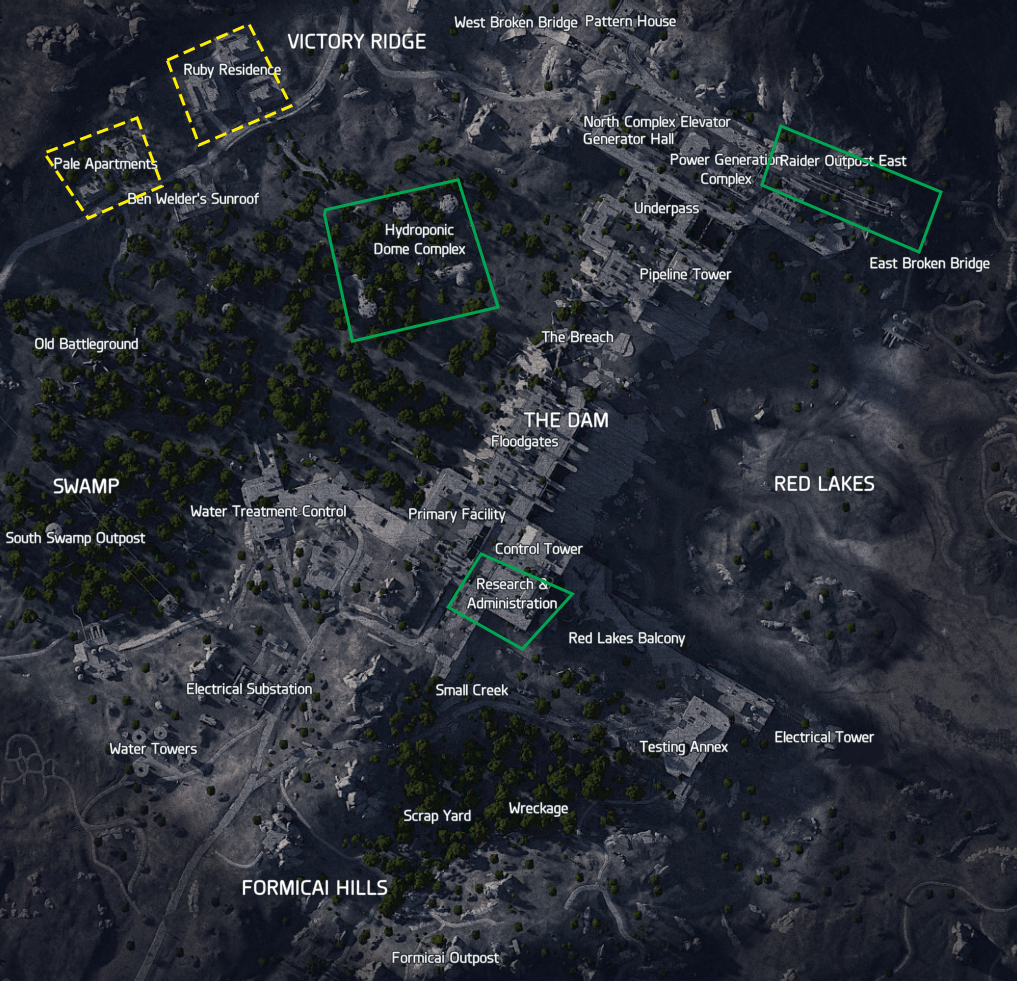
• Research & Administration Building – Reliable mid-tier loot, multiple rooms to search, and fewer choke points than central Dam locations.
• Raised Highway Loot Gap – Scattered containers, low foot traffic, and great for quick hit-and-run looting before extracting.
• (questionable) Ruby Residence & Pale Apartments – these residential areas are known for decent Keycard and container spawns and are positioned near the map edges, which normally benefits solo players. However, both locations are surprisingly popular due to their loot potential, making PvP encounters more likely than in other edge zones. Approach with caution if you're running a low-risk farming route.
Buried City – Best Solo Farming Spots
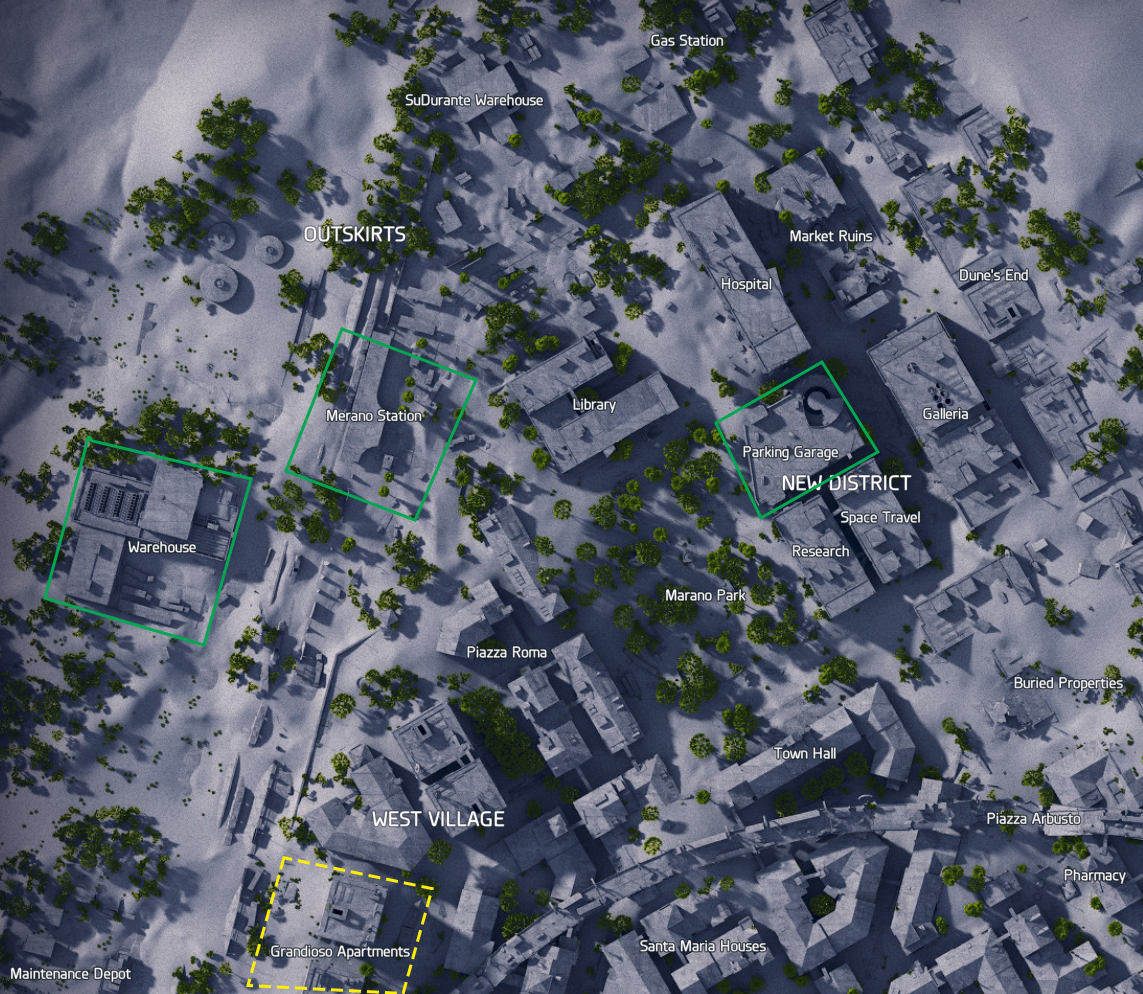
• Northwest Warehouse – Multiple generators, containers, and craftables in a compact, easy-to-clear layout.
• New District Parking Garage – Consistent loot on multiple levels and tucked away from major combat zones.
• (questionable) Grandioso Apartments – same rules apply as with the residential zones mentioned earlier. The location is perfect, and the loot potential is high, but the popularity of such areas may make such endeavors riskier
Blue Gate – Best Solo Farming Spots

• Outer Pilgrim’s Peak – Good material drops and wide open lines of sight for safe solo looting.
• Underground Secret Loot Spots – Reliable loot without pushing into the highest-traffic engagements. This area can be accessed by riding the zipline near the Reinforced Reception zone. Several secret locations are scattered throughout this underground section, but the most notable one requires finding three Power Banks to unlock a door that often contains some of the best end-game loot
Spaceport – Best Solo Farming Spots
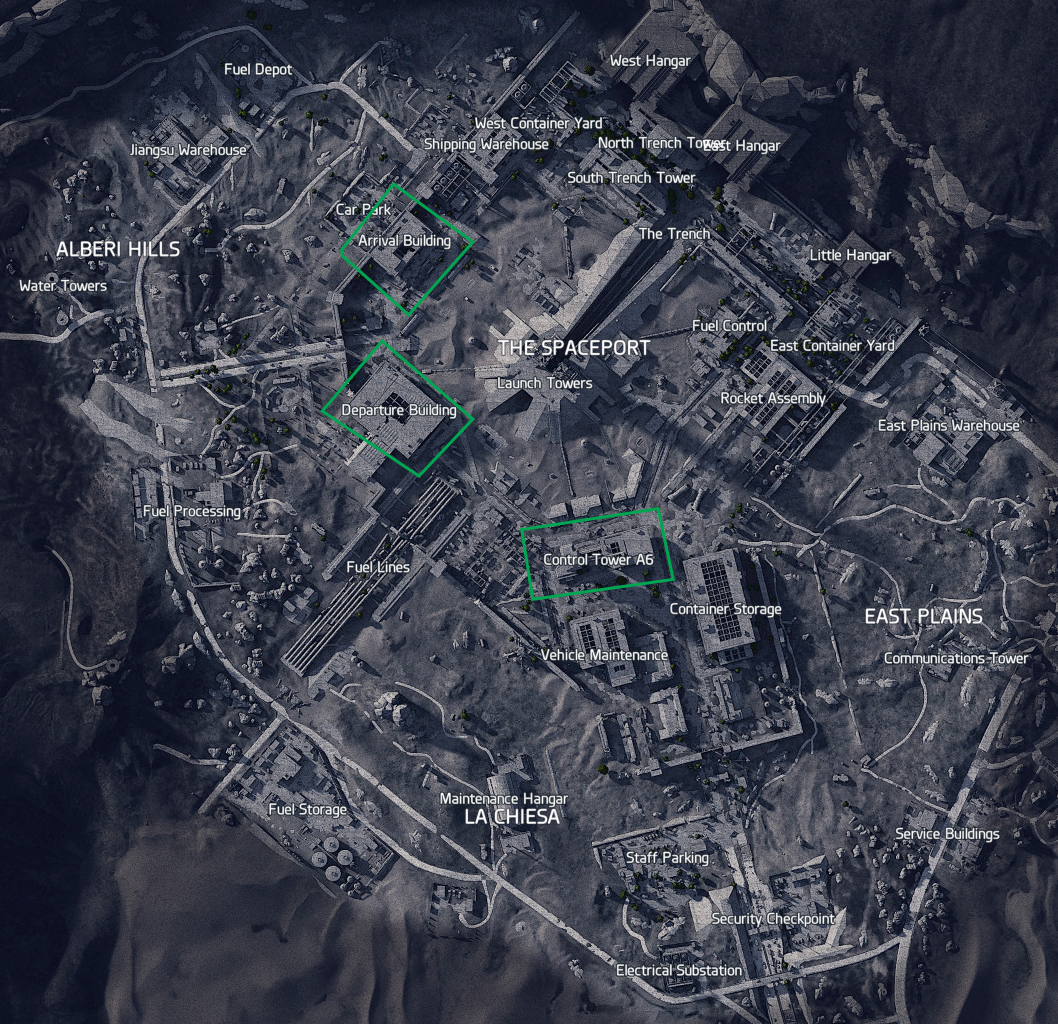
• Departure Building – Consistent medbags, weapon crates, and escape-friendly layout for solo players.
• Control Tower A6 – Solid mid-tier loot with manageable AI density and cleaner loot routes compared to central runways.
Stella Montis – Best Solo Farming Spots
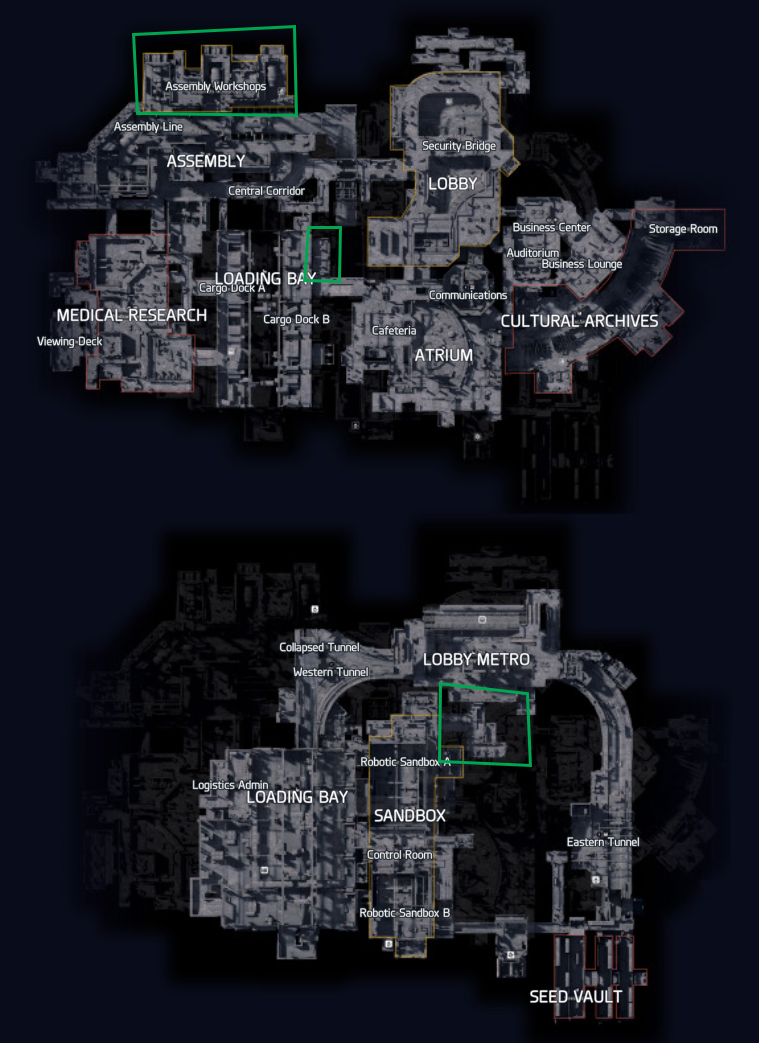
• Loading Bay Area – Loading Bay is a solid solo-looting zone thanks to its outer-edge position and relatively low player traffic. It offers a reliable mix of containers and materials while allowing quick rotations and safe disengagement if threats appear
• Area outside Lobby Metro – Just south of the Lobby Metro, there is an unassuming little room that many players overlook. Despite its modest appearance, it can contain surprisingly valuable loot, making it a perfect solo farming spot
Final Words
Loot tables and spawn rates in Arc Raiders may change with future balance updates, so we will continue to revise this guide as new patches arrive. If additional maps or farming areas are introduced, we’ll expand the list to keep solo players well-informed and prepared. Check back regularly to stay updated with the most reliable solo routes and loot strategies.
Pictures used in this article are the intellectual property of Embark Studios or their corresponding owners.