Ball Lightning of Static Poet's Pen
Saboteur Build
Created for Patch 3.24
The Best Crafty Guides by Odealo
| Guide notes |
May 5, 2024
-Build created |
| Build overview |
| Tags: [CRIT] [LIFE] [ELEMENTAL] [TRIGGER] |
|
Budget:
Defenses:
|


|
Boss DPS:
AoE:
|

|
The Ball Lightning of Static creates a stationary Orb that deals Lightning Damage in a large area around it. It has a fixed Duration of 2 seconds, which can't be modified. It is limited by a Cooldown of 1,5 seconds but can store up to 3 Charges. On top of that it cannot interact with popular Support Gems such as Spell Totem, Spell Echo, or Archmage. In return, it deals very good Damage and doesn't require any investments in Cast Speed.
When combined with the Sabouteur's Triggerbot you will Trigger 2 Ball Lightnings at once, while consuming only one Charge. You can also greatly benefit from the Cooldown Recovery Rate and various bonuses against Enemies affected by Elemental Ailments. The usual CoC setup is not very feasible here, as the Cooldown is still too long, but you can use the Poet's Pen and Squire to Trigger Ball Lightning with your Attacks. Since you will deal Lightning Damage, the Inpulsa Body Armour is an excellent choice to greatly improve your Clear Speed, although it is not required.
Your main defense comes from powerful Blind Aura, high Evasion and Spell Suppression chance, and the Petrified Blood that delays the Damage you take from Hits, which makes your Life Leech much more powerful. Your fast Movement Speed and convenient playstyle of static Ball Lightning are also very safe.
You can also check our other Path of Exile builds right over here Odealo's Crafty Guides - Full List
1. Gameplay
Use Frenzy to Trigger your Ball Lightning of Static. You will automatically apply Assassin's Mark with your Attacks, but you can also cast the Conductivity against stronger Enemies. You should also use the Divine Blessing with an Aura for a temporary boost. For Movement, you will have a very fast Shield Charge and instant Frostblink at your disposal.
|
 
Odealo is a secure trading platform for MMO gamers. Here you can buy, sell, and trade PoE Currency for real cash.
|
2. Build's PROS & CONS
| PROS |
- Great Clear Speed
- Good Single-target Damage
- Effortless gameplay
- Easy to setup
|
| CONS |
- Unique Items are expensive at the start of the League
- Map modifiers can be annoying
|
3. Leveling tips
You can start using this setup at the level 28 onwards. To complete the first steps of the campaign we recommend using any Lightning Spell combination to your liking. You can check out our Templar Leveling Guide for PoE using Lightning Spells which shares a lot of similarities with the Shadow leveling.
Bandits:
Killing all Bandits for 2 bonus Skill Points is the best option, although you can help Alira to get Resistance, Mana Regeneration, and Critical Strike Multiplier boost in the early game.
Leveling Skill Trees:
35 Points Passive Tree
Pick up nearby Life, Critical Strike, and Elemental Spell Damage Notables. One Mana Notable will also greatly help with your sustain.
78 Points Passive Tree
Aim towards the Crit and Lightning Damage Notables. Pick Pain Attunement once you acquire the Petrified Blood Aura.
4. Final Skill Tree, Ascendancy Points, and Pantheon
Final Skill Tree:
119 Points Final Skill Tree (doesn't include Unique or Cluster Jewels)
121 Points Path of Building(PoB) link
Ascendancy points:
Preferably in the order:
- Like Clockwork
- Born in the Shadows
- Perfect Crime
- Explosive Expert
Pantheon:
Major God: Soul of the Brine King: You cannot be Stunned if you've been Stunned or Blocked a Stunning Hit in the past 2 seconds; 100% chance to Avoid being Frozen
Minor God: Soul of Ralakesh: 25% reduced Physical Damage over Time taken while moving; Moving while Bleeding doesn't cause you to take extra Damage
5. Final Gems links
[DPS] Ball Lightning of Static setup
Socket in the Poet's Pen + The Squire |
 |
Ball Lightning of Static - creates a stationary Ball of Lightning that Hits 13 times over the duration of 2 seconds. Additional Quality lowers the Cooldown. |
 |
Added Lightning Damage Support - improves the Lightning Damage to your Spells. The Awakened version also improves the Gem Level of your Lightning Spells. |
 |
Lightning Penetration Support - causes linked Skills to Penetrate Lightning Resistance. The Awakened version grants you a chance to inflict Lightning Exposure on Hit. |
 |
Hypothermia Support - improves your Damage against Chilled Enemies. |
 |
Increased Critical Damage Support - greatly boosts your Critical Strike Multiplier. |
 |
Increased Critical Strikes Support - it greatly improves your chance to deal a Critical Strike. |
| [UTILITY] Frenzy setup |
 |
Frenzy - a Wand Attack that generates a Frenzy Charge on Hit. It is used to Trigger your Ball Lightning of Static socketed in the Poet's Pen. |
 |
Shield Charge - it is your Movement Skill. It Attacks with the Shield, so it doesn't Trigger the Poet's Pen. |
 |
Faster Attacks Support - improves your Attack Speed with Frenzy and Shield Charge. |
 |
Culling Strike Support - Hitting enemies under 10% of their maximum Life will instantly kill them. |
| [UTILITY] Auras setup |
 |
Petrified Blood - delays a big portion of the incoming Damage to be taken over 4 seconds, and locks your Recovery up to a threshold. It also enables the Pain Attunement Keystone. |
 |
Grace - your main defensive Aura, it grants you a lot of Evasion Rating and helps scale it further. |
 |
Zealotry - it greatly improves your Spell Damage and Critical Strike Chance. You can also use the Purity of Elements for an easier gearing process. |
 |
Enlighten Support - you will need this Support to use all Auras listed here. |
 |
Precision - it slightly improves your Critical Stike Chance and enables the Watcher's Eye modifiers. Keep it at a low level to lower the Mana Reservation Cost. |
| [UTILITY] Mark setup |
 |
Assassin's Mark - a Curse that increases your Critical Strike Chance and Damage against Marked Enemies. |
 |
Mark on Hit Support - with this Support you will automatically apply linked Mark with any of your Attacks. |
| [UTILITY] Blessing setup |
 |
Wrath - an offensive Aura that improves your Lightning Damage with Spells. |
 |
Divine Blessing Support - converts your permanent Aura into a temporary Blessing which you can Cast using your Energy Shield. |
 |
Inspiration Support - lowers the Mana Cost of your Blessing. |
| [UTILITY] Various Utility Skills |
 |
Frostblink - an instant Blink Skill that can be used without interrupting your other actions to quickly dodge incoming thread or move around faster. |
 |
Steelskin - creates a protective Buff that absorbs part of the incoming Damage and disables the Bleeding effect. You can link it with the Cast When Damage Taken Support or Automation. |
 |
Conductivity - your second Curse that lowers the Lightning Resistance of affected Enemies. |
|
On Odealo dozens of sellers compete for your attention. Buying PoE Currency here guarantees the best prices, prompt delivery, and the best quality of service.
|
5. Gear Setup
The Build uses Poet's Pen to Trigger your main Skill. The Squire is not needed for functionality, but it is a massive Damage bonus as it allows you to use 3 more Support Gems. The Ashes of the Stars is also very powerful, as it lowers your main Cooldown quite substantially, but again, it is not required right from the start. On your Rare Items, you will need a lot of maximum Life, Elemental Resistance, and Strength for the Gem Requirements. You will also need Spell Suppression, Mana Reservation Efficiency, and a bit of Energy Shield. To scale your Damage you should aim for Critical Strike Multiplier, Lightning Spell Damage, and Cooldown Recovery Rate. As opposed to CoC setups, you don't need Accuracy or optimal Attack Speed.
|
Stat priorities on items:
- Maximum Life
- Elemental Resistances
- Critical Strike Multiplier
- Cooldown Recovery Rate
- Spell Suppression Chance
- Mana Reservation Efficiency
- Energy Shield
|
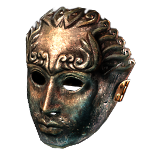 (Helmet) Rare Helmet - aim for a Helmet with high maximum Life, Spell Suppression, Mana Reservation Efficiency, and possibly an empty Prefix to craft the Physical Damage mitigation via Crafting Bench. You can also get those modifiers via Eldritch Implicits. (Helmet) Rare Helmet - aim for a Helmet with high maximum Life, Spell Suppression, Mana Reservation Efficiency, and possibly an empty Prefix to craft the Physical Damage mitigation via Crafting Bench. You can also get those modifiers via Eldritch Implicits. |
Min. requirements:
+10% chance to Suppress Spell Damage
+70 to maximum Life
10% increased Mana Reservation Efficiency of Skills
6% of Physical Damage from Hits taken as Elemental Damage
Optional affixes:
Elemental Resistance
Attribute |
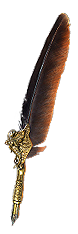 (Weapon) Poet's Pen - with this Wand, you will Trigger socketed Spell every time you perform an Attack. Thanks to the Perfect Crime Notable you will Trigger two Ball Lightnings instead of one. (Weapon) Poet's Pen - with this Wand, you will Trigger socketed Spell every time you perform an Attack. Thanks to the Perfect Crime Notable you will Trigger two Ball Lightnings instead of one. |
(11-15)% increased Spell Damage
+1 to Level of Socketed Skill Gems per 25 Player Levels
Trigger a Socketed Spell when you Attack with this Weapon, with a 0.25 second Cooldown
Adds 3 to 5 Physical Damage to Attacks with this Weapon per 3 Player Levels
(8-12)% increased Attack Speed |
 (Weapon) The Squire - the Support Gems socketed here will apply to your Main Setup socketed in the Poet's Pen. It is very useful, but not necessary for Build functionality right from the start. (Weapon) The Squire - the Support Gems socketed here will apply to your Main Setup socketed in the Poet's Pen. It is very useful, but not necessary for Build functionality right from the start. |
Has 3 Sockets
All Sockets are White
+(5-8)% to Quality of Socketed Support Gems
Socketed Support Gems can also Support Skills from your Main Hand
(100-150)% increased Armour and Evasion
+(3-5)% Chance to Block |
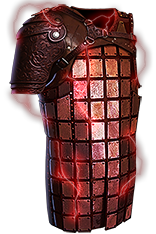 (Body Armour) Inpulsa's Broken Heart - it greatly improves your Clear Speed by exploding all Shocked Enemies, but the explosion itself cannot Shock. It also grants you plenty of Life, Damage, and immunity to Shock. (Body Armour) Inpulsa's Broken Heart - it greatly improves your Clear Speed by exploding all Shocked Enemies, but the explosion itself cannot Shock. It also grants you plenty of Life, Damage, and immunity to Shock. |
+(60-80) to maximum Life
(20-50)% increased Damage if you have Shocked an Enemy Recently
(15-25)% increased Effect of Shock
Shocked Enemies you Kill Explode, dealing 5% of
their Life as Lightning Damage which cannot Shock
Unaffected by Shock |
 (Amulet) Ashes of the Stars - it is the best Amulet to choose as it greatly improves your Cooldown Recovery Rate, and increases all Gem Levels by 1. It can be quite expensive at first. (Amulet) Ashes of the Stars - it is the best Amulet to choose as it greatly improves your Cooldown Recovery Rate, and increases all Gem Levels by 1. It can be quite expensive at first. |
(+(10-16) to all Attributes
(5-10)% increased Experience Gain of Gems
+1 to Level of all Skill Gems
+(20-30)% to Quality of all Skill Gems |
 (Amulet) Replica Dragonfang's Flight - alternatively you can use this Amulet to boost the Gem Level of your Ball Lightning by 3. It also improves your Reservation Efficiency and grants plenty of Attributes. (Amulet) Replica Dragonfang's Flight - alternatively you can use this Amulet to boost the Gem Level of your Ball Lightning by 3. It also improves your Reservation Efficiency and grants plenty of Attributes. |
+(10-16) to all Attributes
+3 to Level of all <Random Skill> Gems
+(5-10)% to all Elemental Resistances
(5-10)% increased Reservation Efficiency of Skills
Items and Gems have (10-5)% reduced Attribute Requirements |
 (Boots) Rare Boots - on your Rare Boots you should aim for defensive bonuses, but it can also boost your offense indirectly. Look for high maximum Life, Spell Suppression, and Movement Speed. To boost your Damage try to get a Cooldown Recovery Rate and increase the Effect of non-damaging Ailments. (Boots) Rare Boots - on your Rare Boots you should aim for defensive bonuses, but it can also boost your offense indirectly. Look for high maximum Life, Spell Suppression, and Movement Speed. To boost your Damage try to get a Cooldown Recovery Rate and increase the Effect of non-damaging Ailments. |
Min. requirements:
20% Movement Speed
+70 to maximum Life
+50% total Resistance
5% increased Cooldown Recovery Rate (Eater of Worlds)
Optional affixes:
% chance to gain Onslaught for 4 seconds on Kill
Attributes
% increased Effect of non-damaging Ailments
% increased Cooldown Recovery Rate (Shaper/Crusader) |
 (Gloves) Rare Gloves - here try to get the usual Life, Suppression, and Elemental Resistances. At a higher budget, you can also include bonuses to your Damage. Use Eldritch Influence to apply Unnerve and get Life Leech. (Gloves) Rare Gloves - here try to get the usual Life, Suppression, and Elemental Resistances. At a higher budget, you can also include bonuses to your Damage. Use Eldritch Influence to apply Unnerve and get Life Leech. |
Min. requirements:
+70 to maximum Life
60% total Elemental Resistance
Optional affixes:
% increased Damage against Chilled Enemies
% chance to Unnerve Enemies on Hit
% of Lightning Damage Leeched as Life
% increased Damage while Leeching |
 (Belt) Rare Belt - use Stygian Vise to get additional Abyss Jewel. On the Belt itself, you should aim for maximum Life, Strength, Flask modifiers, and lacking Resistances. You can add a lot of Cooldown Recovery Rate via Crafting Bench. (Belt) Rare Belt - use Stygian Vise to get additional Abyss Jewel. On the Belt itself, you should aim for maximum Life, Strength, Flask modifiers, and lacking Resistances. You can add a lot of Cooldown Recovery Rate via Crafting Bench. |
Min. requirements:
+70 to maximum Life
60% total Resistance
10% increased Cooldown Recovery Rate
Optional affixes:
% increased Flask Charges gained
% reduced Flask Charged used
% increased Damage against Chilled Enemies
% increased Life |
 (Ring) Mark of the Shaper - this Ring will greatly improve your Spell Damage, but your other Ring has to have relevant Influence. You can boost it further with Imbued Catalysts. (Ring) Mark of the Shaper - this Ring will greatly improve your Spell Damage, but your other Ring has to have relevant Influence. You can boost it further with Imbued Catalysts. |
(15-25)% increased Elemental Damage
20% chance to Trigger Level 20 Summon Volatile Anomaly on Kill
Adds (13-18) to (50-56) Lightning Damage to Spells
(6-10)% increased maximum Energy Shield
(6-10)% increased maximum Life
(60-80)% increased Spell Damage if your other Ring is an Elder Item
Cannot be Stunned by Spells if your other Ring is a Shaper Item |
 (Ring) Call of the Void - it is a great defensive choice, you will greatly slow and reduce the Damage of all Enemies you Hit. It also has the Shaper and Elder Influence types, so you will get both bonuses from the Mark of the Shaper. (Ring) Call of the Void - it is a great defensive choice, you will greatly slow and reduce the Damage of all Enemies you Hit. It also has the Shaper and Elder Influence types, so you will get both bonuses from the Mark of the Shaper. |
+(20-30)% to Cold Resistance
+(20-30)% to Cold Resistance
All Damage with Hits can Chill
All Damage Taken from Hits can Chill you
Enemies Chilled by your Hits can be Shattered as though Frozen
Enemies Chilled by your Hits lessen their Damage dealt by half of Chill Effect |
 (Ring) Rare Ring - you can also use a Rare Ring with Elder Influence. You should look for bonuses to your Life, Resistances, Attributes, and Critical Strike Multiplier or Lightning Damage, which you can get via Essences. (Ring) Rare Ring - you can also use a Rare Ring with Elder Influence. You should look for bonuses to your Life, Resistances, Attributes, and Critical Strike Multiplier or Lightning Damage, which you can get via Essences. |
Min. requirements:
+50 to Maximum Life
70% total Resistance
Has Elder Influence
Optional affixes:
Attributes
% increased Lightning Damage
Critical Strike Multiplier |
 (Jewel) Brutal Restraint - this Jewel adds extra bonuses to nearby Notables you will pick anyway. You should look for one that grants bonuses to Critical Strikes, Elemental Damage, and Flask Sustain. The Keystone it provides is irrelevant here. (Jewel) Brutal Restraint - this Jewel adds extra bonuses to nearby Notables you will pick anyway. You should look for one that grants bonuses to Critical Strikes, Elemental Damage, and Flask Sustain. The Keystone it provides is irrelevant here. |
Denoted service of (500-8000) dekhara in the akhara of (Asenath-Balbala-Nasima)
Passives in radius are Conquered by the Maraketh
Historic |
 (Jewel) Abyss Jewel - use the Abyss Jewel to add flat Cold and Fire Damage to your Spells, so you can easily benefit from the Explosive Expert Notable. It should also improve your maximum Life, or cover lacking Resistances and Attributes. (Jewel) Abyss Jewel - use the Abyss Jewel to add flat Cold and Fire Damage to your Spells, so you can easily benefit from the Explosive Expert Notable. It should also improve your maximum Life, or cover lacking Resistances and Attributes. |
Min. requirements:
+30 to maximum Life
Optional affixes:
% chance to gain Phasing for 4 seconds on Kill
Global Critical Strike Multiplier
Cooldown Recovery Rate
Adds Cold/Fire Damage to Spells
Elemental and Chaos Resistance
Attributes |
 (Jewel) Rare Jewels - on the regular Rare Jewels you should focus on the Critical Strike Multiplier, maximum Life, or get lacking Resistances and Attributes. (Jewel) Rare Jewels - on the regular Rare Jewels you should focus on the Critical Strike Multiplier, maximum Life, or get lacking Resistances and Attributes. |
Recommended affixes:
Global Critical Strike Multiplier
Critical Strike Multiplier with Spells
Critical Strike Multiplier with Lightning/Elemental Skills
% increased maximum Life
Elemental Resistances
Attributes |
 (Jewel) Watcher's Eye - There are a lot of modifiers you could make use of in this setup. To boost your Damage you should look for bonuses for your Wrath and Zealotry. (Jewel) Watcher's Eye - There are a lot of modifiers you could make use of in this setup. To boost your Damage you should look for bonuses for your Wrath and Zealotry. |
(4-6)% increased maximum Energy Shield
(4-6)% increased maximum Life
(4-6)% increased maximum Mana
<Two or Three random aura modifiers>
Recommended modifiers:
Critical Strikes Penetrate (8-10)% of Enemy Elemental Resistances while affected by Zealotry
+(30-50)% to Chaos Resistance while affected by Purity of Elements
+(12-15)% chance to Suppress Spell Damage while affected by Grace
Gain a Flask Charge when you deal a Critical Strike while affected by Precision |
 (Flask) Bottled Faith - a very good offensive Flask that creates a Consecrated Ground upon use, and greatly improves your Damage and Critical Strike Chance against Enemies standing on it. (Flask) Bottled Faith - a very good offensive Flask that creates a Consecrated Ground upon use, and greatly improves your Damage and Critical Strike Chance against Enemies standing on it. |
(30-15)% reduced Duration
Consecrated Ground created by this Flask has Tripled Radius
Consecrated Ground created during Effect applies (7-10)% increased Damage taken to Enemies
(100-150)% increased Critical Strike Chance against Enemies on Consecrated Ground during Effect |
 (Flask) Taste of Hate - you can improve your Cold and Physical Damage mitigation with this Flask. You should have good Flask sustain, but using it to cap Cold Resistances might be still risky. (Flask) Taste of Hate - you can improve your Cold and Physical Damage mitigation with this Flask. You should have good Flask sustain, but using it to cap Cold Resistances might be still risky. |
(10-15)% of Physical Damage from Hits taken as Cold Damage during Effect
Gain (10-15)% of Physical Damage as Extra Cold Damage during effect
30% chance to Avoid being Chilled during Effect
30% chance to Avoid being Frozen during Effect |
|
Other suggested Flasks:
- Life Flask with Bleeding Removal
- Quicksilver Flask with Critical Strike Chance bonus
- Jade Flask with Evasion Rating bonus
|
   |
|
Odealo is one of the biggest Path of Exile marketplaces. It allows regular players to buy, sell, and trade PoE Currency with the use of real cash.
|
If you have any other build requests please leave that in the comments below. We are always open to suggestions and constructive feedback.
Pictures used in this article are the intellectual property of Grinding Gear Games.